


Hat Patch University
Color Gradients on Patches: A Hat-Maker's Production Guide

UV printing and sublimation are the only methods that reliably reproduce photographic color gradients on patches. For hat-makers and merch teams, that verdict is the starting point for every design and ordering decision. Thread-blended embroidery can approximate a stylized fade across large areas, but it cannot match the continuous color transitions that UV printing or sublimation deliver. Photo-over (sublimated transfer) sits between the two in cost and feel, while screen printing with halftone techniques produces a graphical dot look rather than a true gradient.
Quick method picks:
- UV printing: Best for photographic gradients, full CMYK color, no tooling, fast turnaround. Minimum practical patch size: roughly 1 inch on the shortest dimension.
- Sublimation: Superb smoothness on polyester substrates. Avoid on cotton or dark base colors.
- Photo-over / heat transfer: Preserves photographic detail at lower cost; durability is the trade-off.
- Thread-blended embroidery: Stylized fades only. Avoid gradient areas smaller than 1 inch.
- Screen printing with halftone: Graphical, dot-pattern look. Practical color cap around 10 separations.
Skip gradients entirely on patches smaller than 1 inch across, and avoid extreme black-to-white transitions without a bridge color in the middle.
Key Takeaways
UV printing and sublimation are the only patch methods that reproduce photographic color gradients reliably; embroidery approximates stylized fades but cannot match continuous color transitions.
| Point | Details |
|---|---|
| Best method for photographic gradients | UV printing delivers full CMYK color transitions with no tooling and fast turnaround. |
| Embroidery gradient limit | Avoid blend zones smaller than 1 inch; use 60-weight thread and bridge colors for larger fades. |
| File prep essentials | Submit CMYK files at 300 DPI minimum; flatten all transparencies and add solid base layers. |
| Screen printing trade-off | Halftone techniques simulate gradients but cap at roughly 10 color separations and produce a stylized dot look. |
| Hatpatchsupply UV printing | Full-color UV printed hat patches with no minimums, adhesive backing, and photographic gradient fidelity. |
Table of Contents
- Which patch method handles color gradients best?
- How each method actually creates a color gradient
- How to prep your artwork files for gradient patches
- Design rules that keep gradients sharp at patch scale
- Cost, lead time, durability, and backing choices
- Which method should you choose for your specific use case?
- How Hatpatchsupply handles gradient patches
- The gradient advice most designers get wrong
- Hatpatchsupply UV printing: photographic gradients with no minimums
- Sources
Which patch method handles color gradients best?
| Method | Best for | Color vibrancy / fidelity | Detail & fine gradients | Durability / wash resistance | Typical cost & lead time | Min. size / detail limit |
|---|---|---|---|---|---|---|
| UV printing | Photographic detail | Excellent, full CMYK | Excellent | Strong with polymer coat | Moderate cost, fast (no tooling) | ~1 inch shortest side |
| Sublimation | Photographic on polyester | Excellent on white/light base | Excellent | Good on synthetic fabric | Low-moderate, fast setup | ~1 inch; polyester only |
| Photo-over / heat transfer | Photographic, lower budget | Very good | Very good | Moderate; edges can lift | Low cost, fast | ~1 inch |
| Thread-blended embroidery | Stylized, large fades | Limited; thread palette only | Poor for fine gradients | Excellent; thread is durable | Higher per-unit; longer setup | 1 inch minimum per blend zone |
| Screen printing + halftone | Graphical / stylized | Good for solid colors; stylized gradient | Moderate; dot pattern visible | Good with proper inks | Low at volume; slow setup | approximately a couple inches for halftone clarity |
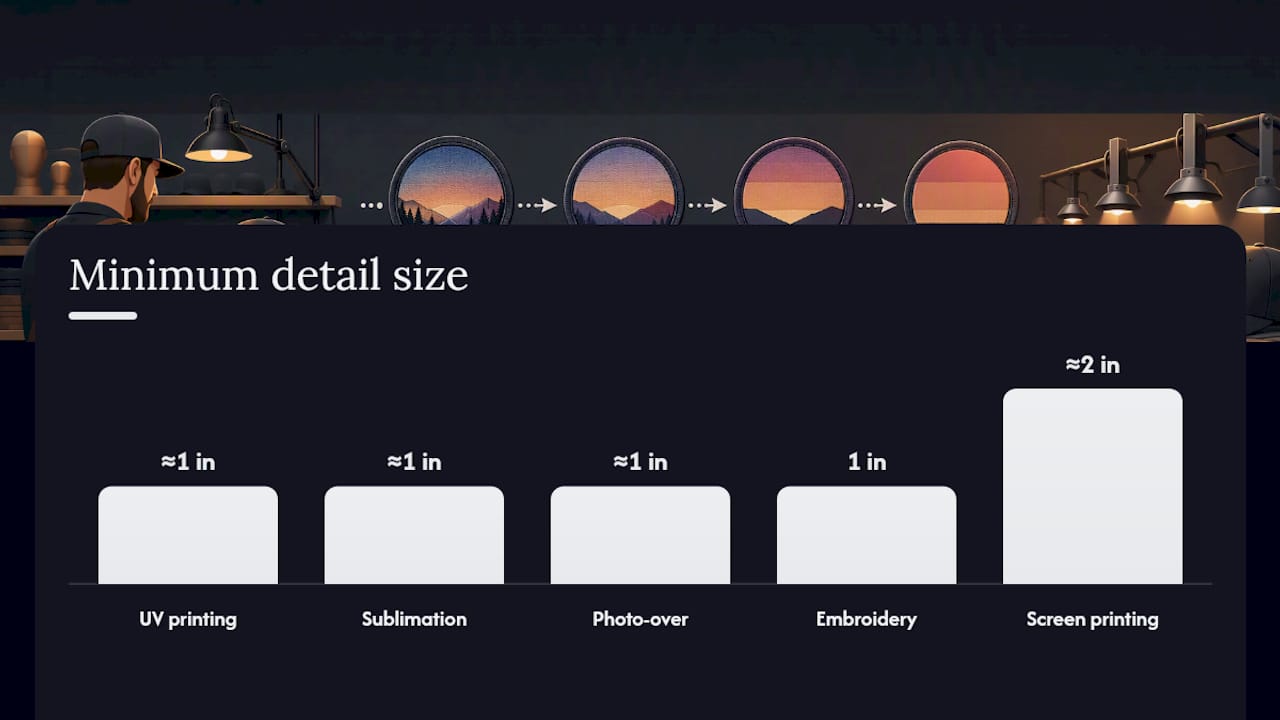
Printed methods (UV, sublimation, photo-over) win on gradient fidelity because they reproduce thousands of colors in a single pass. Raised UV patches support full CMYK photographic detail with no tooling and quick turnarounds, making them the practical default for hat patches with complex color transitions.
Embroidery wins on durability and tactile feel, but the gradient is always an approximation. Screen printing caps practical color separations around 10 ink colors, so halftone dot patterns become the only way to simulate a gradient, producing a stylized rather than photographic result.
How each method actually creates a color gradient
UV printing and direct UV print
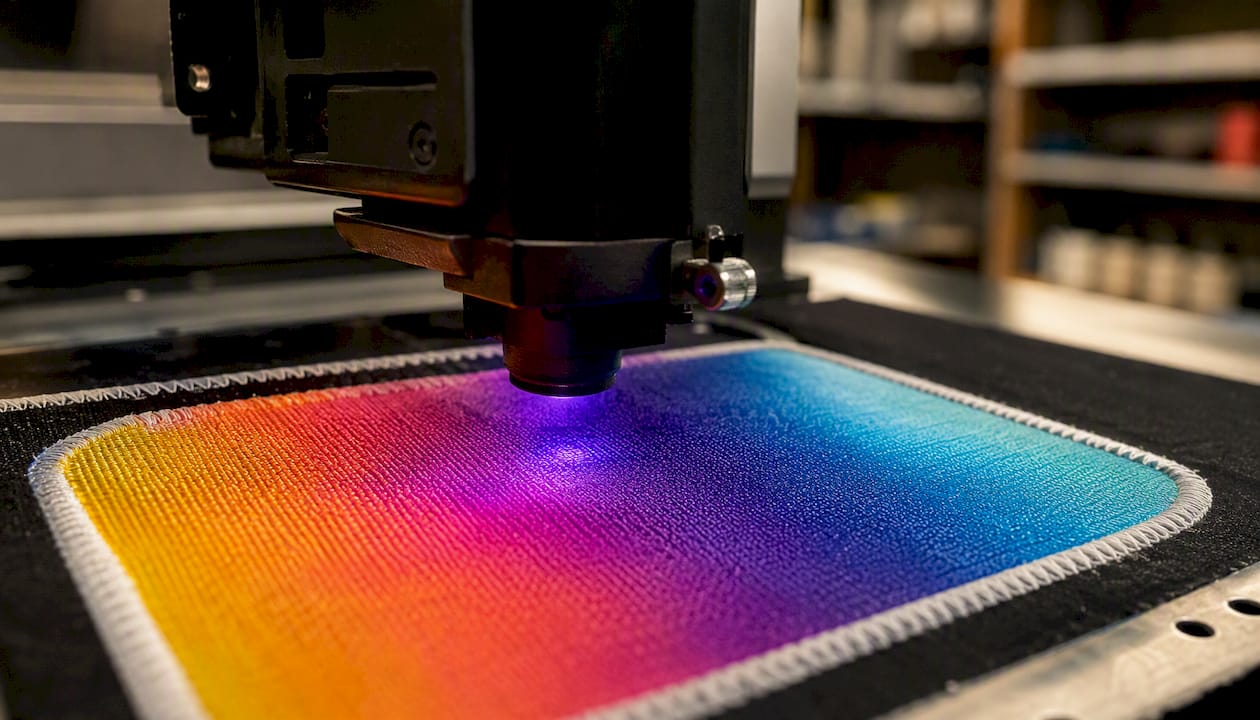
UV printing lays down full CMYK ink directly onto the patch substrate, then cures it instantly with ultraviolet light. Because the process is digital, it handles photographic gradients the same way a high-resolution inkjet printer does: millions of tiny ink dots blend optically at 300 DPI or higher, producing smooth, continuous color transitions. The polymer UV coat applied after printing adds both gloss and abrasion resistance. There is no screen setup, no color separation limit, and no tooling cost, which is why UV printing is the fastest path from artwork to finished patch when gradients are involved. See the evolution of hat patches for context on how this method displaced older techniques for color-critical work.
Sublimation
Dye-sublimation converts solid dye into gas under heat and pressure, bonding it directly into the fibers of a polyester substrate. The result is a gradient with no surface layer to crack or peel. The catch is that sublimation only works on white or very light synthetic bases. A dark or cotton substrate blocks the dye, producing muddy, washed-out color. Edge transparency in artwork should be flattened to a solid base color before output, because soft alpha edges on a polyester base produce a blurry, undefined silhouette rather than a clean fade.
Photo-over and heat transfer
Photo-over patches use a sublimated or digitally printed transfer film pressed onto the patch face. The photographic detail is preserved well, and the cost per unit is typically lower than direct UV printing. The durability trade-off is real: the transfer layer can lift at the edges with repeated washing if the adhesion is not sealed properly. For indoor or low-wash applications, photo-over is a cost-effective way to get near-photographic gradients.
Thread-blended embroidery
Embroidery cannot produce a true continuous gradient. What it can do is create an optical illusion of one through accordion spacing, dithering, and bridge colors. Accordion spacing interleaves stitches from two adjacent thread colors so the eye blends them at a distance. Bridge colors (a midpoint hue between two extremes, such as orange between red and yellow) reduce the visual jump between transitions. Thinner thread, specifically 60-weight rather than standard 40-weight, allows tighter stitch spacing and a finer blend. The hard constraint: avoid gradient blend zones smaller than 1 inch. Below that threshold, the stitches are too dense to space properly, causing puckering and a muddy, indistinct result. For planning thread quantities and material needs on embroidery projects, the Flossom embroidery project planner is a practical reference.
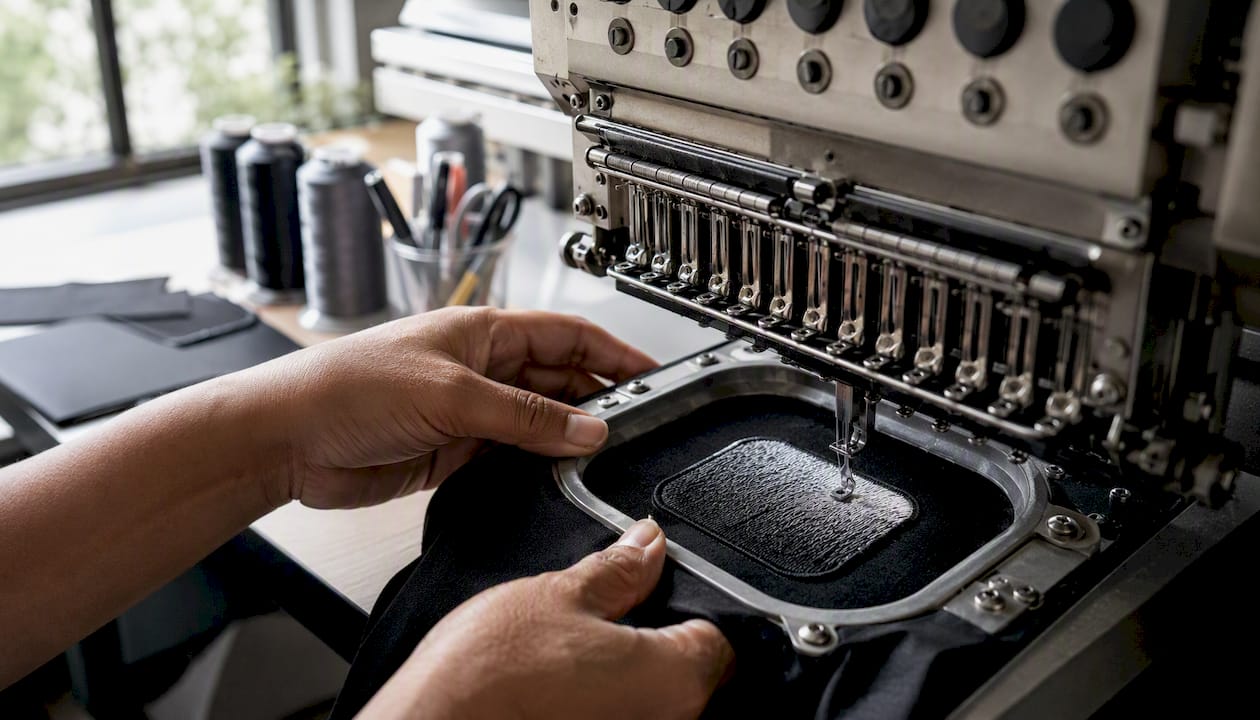
Pro Tip: Dithering on fabric surfaces can improve perceived gradient smoothness, but it introduces repeating artifacts if the threshold distribution is not varied carefully. Request a physical sample before approving a dithered embroidery gradient for production.
Screen printing with halftone
Screen printing builds color from discrete ink layers. Halftone dot patterns simulate smoother gradients, but the result is inherently graphical: viewed up close, the dot structure is visible. Halftone angles and dot sizes must be chosen carefully to avoid moiré patterns, which appear when two halftone screens are misregistered. For patches, screen printing with halftone works best when a stylized, graphic look is intentional rather than a compromise.
Pro Tip: Preview screen-printed halftone proofs at full scale and at arm’s length. Moiré and banding that look minor on a monitor become obvious on a 2-inch patch.
How to prep your artwork files for gradient patches
Getting the file right before you send it to production prevents the most common gradient failures: banding, muddy edges, and color shift between screen and print.
File prep checklist:
- File format: Submit layered PDF, AI (Adobe Illustrator), or PSD at 300 DPI minimum for raster areas. Vector files with embedded raster gradient layers are preferred.
- Color mode: Work in CMYK for UV printing and sublimation. RGB files are accepted by most vendors but will be converted, sometimes with a noticeable color shift in saturated hues.
- Resolution: 300 DPI at final output size is the floor. For patches smaller than 2 inches, 600 DPI reduces visible banding in gradient transitions.
- Alpha channels and transparency: Flatten all transparencies before export. Soft alpha edges on a printed patch produce a blurry, undefined border. Replace transparent edges with a solid base color or a hard clipping mask.
- Bleed and safe area: Add 1/16-inch bleed around die-cut patches. Keep critical gradient elements at least 1/8 inch inside the cut line.
- Screen printing files: Convert gradient layers to halftone-ready separations. Flatten transparencies and add a solid base layer under any gradient area.
- Banding prevention: Export raster gradients as 16-bit files when possible, or apply a subtle noise/dither layer (2–4%) to break up banding before flattening to 8-bit for output.
Pro Tip: Never rely solely on your monitor’s RGB preview for color approval. Request a Pantone Solid Coated reference or a physical thread swatch for color-critical work. Keeping embroidery designs to about 6 colors or fewer in tight areas reduces stitch bulk and puckering, and Pantone matching keeps thread color consistent across production runs.
Color mode matters more than most designers expect. A gradient built in RGB with wide-gamut blues or neon greens will compress noticeably when converted to CMYK, because the CMYK gamut is smaller. Build gradient color designs in CMYK from the start, and check the output values at both ends of the gradient range before sending files.
Design rules that keep gradients sharp at patch scale
Scale is the variable most designers underestimate. A gradient that looks smooth at 8 inches on screen can band visibly at 2 inches on a hat patch.
Do’s and don’ts:
- Do use bridge colors for transitions spanning more than two hue families. Red to yellow works. Red directly to blue produces a muddy brown midpoint without an intermediate orange or purple.
- Do add a thin outline (0.5 pt minimum) around the patch silhouette to preserve the edge against background fabric.
- Don’t use feathered or transparent edges on printed patches. They produce a soft, undefined border that looks unfinished on fabric.
- Don’t attempt photographic gradients on patches smaller than 1 inch. Switch to a solid midpoint color or a two-color hard fade instead.
- Do keep stroke widths at 0.5 mm or wider on patches under 2 inches. Thinner strokes disappear in production.
- Don’t blend extreme contrasts (black to white) without at least one bridge color. The transition zone will look abrupt or gray-muddy depending on the method.
For embroidery specifically, the 1-inch minimum rule for blend zones is not a suggestion. Professional digitizers recommend avoiding gradients in areas smaller than about 1 inch and simplifying to a solid midpoint color when the area is too tight to hold a believable blend.
Pro Tip: Order a physical proof before committing to a full production run on any gradient design. Screen proofs and physical patches can differ significantly in perceived brightness and edge sharpness, especially on dark or textured hat fabrics.
Backing and edging also affect how a gradient reads. A merrowed (overlock-stitched) border in a contrasting color frames the patch and makes the gradient inside appear more saturated by contrast. An iron-on or adhesive backing does not affect the printed surface, but a thick felt backing can slightly diffuse the perceived edge sharpness when the patch is viewed at an angle.
Cost, lead time, durability, and backing choices
Production decisions shape gradient outcomes as much as design decisions do.
Cost drivers by method:
- UV printing: moderate per-unit cost, no tooling or screen fees, scales well from single units to bulk orders.
- Sublimation: low per-unit cost at volume, but substrate constraints (polyester only) limit material options.
- Photo-over / heat transfer: lowest per-unit cost for photographic detail, but durability is the trade-off.
- Embroidery: higher per-unit cost for complex gradient designs due to stitch count and tie-off bulk from multiple thread colors.
- Screen printing: lowest cost at high volume, but setup fees for each color separation add cost on short runs.
No-minimum UV printing shortens time-to-market significantly for small hat brands and merch teams. There is no screen setup, no minimum order quantity, and no tooling charge, so a single prototype patch with a full photographic gradient costs the same per-unit as a run of ten. UV printed patches with polymer finishes hold up well to laundering when the UV coat is applied correctly, making them competitive with embroidery on durability for most hat applications.
Backing and finishing choices:
- Sew-on: Most durable long-term; no adhesive to degrade.
- Iron-on (heat-activated): Convenient for hat makers applying patches to structured hats; bond strength depends on fabric type and heat application.
- Adhesive-backed: Fastest application; best for smooth, firm surfaces like leather or structured hat panels.
- Merrowed or laser-cut edge: Merrowed edges add a tactile frame; laser-cut edges give a cleaner silhouette for photographic designs.
For embroidery finishing options and backing methods, the Flossom embroidery finishing guide covers the practical trade-offs between sew-on, iron-on, and adhesive approaches in useful detail.
Which method should you choose for your specific use case?
- Small embroidered hat logo (under 2 inches, simple design): Use standard embroidery with solid colors. Skip the gradient entirely or use a two-color hard fade with a bridge color. Gradients at this scale produce puckering and muddy blends.
- Photographic patch for merch (portraits, landscapes, detailed artwork): UV printing is the clear choice. Full CMYK, no tooling, fast turnaround, and photographic gradient fidelity that embroidery cannot match.
- Outdoor or workwear durability patch: UV printing with a polymer top coat or thread embroidery for maximum wash resistance. Avoid photo-over for gear that sees heavy laundering.
- Low-budget bulk run (500+ units, simple gradient): Screen printing with halftone at volume, or sublimation on polyester blanks. Both offer low per-unit costs at scale.
- Last-minute small order (1–10 patches, full color): UV printing with no minimum order. No screens, no setup fees, ships fast.
Questions to ask your vendor before ordering gradient patches:
- What is the maximum print resolution, and do you output at 300 DPI or higher for raster gradients?
- Do you accept CMYK files, or will you convert from RGB? Can I see a color proof before production?
- What substrate options are available for sublimation, and what base colors are supported?
- What backing and edging options are available, and do they affect the print area?
- Do you offer physical proofs or press checks for color-critical gradient designs?
How Hatpatchsupply handles gradient patches
Hatpatchsupply’s UV-printed patches are built specifically for hat makers and merch brands that need photographic gradient fidelity without the overhead of screen setup or minimum order requirements. The process uses full CMYK UV printing directly onto the patch substrate, producing color transitions that hold up to the detail and vibrancy that gradient color designs demand.
Ordering notes for best gradient results:
- Submit files in CMYK at 300 DPI minimum (600 DPI preferred for patches under 2 inches).
- Flatten all transparencies and replace soft alpha edges with solid base colors or hard clipping masks.
- Include 1/16-inch bleed on die-cut patches and keep gradient elements 1/8 inch inside the cut line.
- Adhesive-backed options are available for direct application to structured hat panels.
- No minimum order: order one patch or one hundred at the same per-unit price.
The Troutscape UV Printed Patch is a strong example of what full-color UV printing delivers on a hat patch: photographic detail, saturated color, and clean edge definition that embroidery cannot replicate at that scale. For a comparison of UV printing against embroidery and laser engraving across different use cases, the UV printed vs. laser engraved vs. embroidered hat patches guide covers the production trade-offs in detail.
Pro Tip: Use the Hatpatchsupply Adobe Illustrator mockup tool to preview your gradient design on an actual hat before uploading for production. It catches scale and color issues before they become production problems.
The gradient advice most designers get wrong
Most guides on color gradients on patches treat the method choice as a design preference. It is not. It is a production constraint, and getting it wrong costs you a reorder.
The conventional advice says to “use embroidery for durability and printing for color.” That framing is too simple. Embroidery is durable, but a gradient embroidery design on a 1.5-inch hat patch will look muddy and overworked in production, regardless of how clean it looks in the digitizing software. The thread physics do not change because the artwork is good.
What actually matters first is patch size. If your design is under 2 inches on the shortest side and includes a gradient, UV printing is not just the better option; it is the only option that will look intentional. Sublimation is a close second if your substrate is polyester and your base color is light. Everything else is a compromise.
The second thing most designers get wrong is file prep. Sending an RGB file with soft alpha edges to a UV printer and expecting the output to match your screen is optimistic. Convert to CMYK, flatten every transparency, and request a physical proof on the actual hat fabric before approving production. The substrate color and texture affect perceived gradient brightness more than most people expect.
The third mistake is skipping bridge colors in embroidery gradients. A direct red-to-blue transition in thread produces a brown muddy band in the middle. Adding an intermediate purple thread color takes thirty seconds in the digitizing software and produces a result that actually reads as a gradient.
Hatpatchsupply UV printing: photographic gradients with no minimums
Getting photographic gradient fidelity on a hat patch used to mean committing to a large screen-printing run or accepting the limitations of embroidery. Hatpatchsupply changes that equation directly. Full-color UV printed hat patches are available with no minimum order, adhesive backing for clean application to structured hat panels, and production times that work for small brands and last-minute merch runs alike.
The Troutscape UV Printed Patch and the Brotherhood custom UV printed patch both demonstrate what full CMYK UV printing delivers at hat-patch scale: saturated color, photographic detail, and gradient transitions that hold up to real-world use. For hat makers and merch teams ready to order, the custom full-color UV printed hat patches page is the place to upload your artwork and configure your order.
Sources
- Screen Printing Gradients Made a Reality | Printsome Blog
- Embroidery Gradients & Color Blending: The Ultimate Guide
- How to master multi-colored gradient effects in screen printing
Recommended
- Hat Patch Making Made Simple: 7 Powerful Tips to Create Custom Hats That Stand Out - Hat Patch Supply by Hat Foundry
- Troutscape UV Printed Patch - Durable and Stylish Design – Hat Patch Supply
- Bitches Are People Too Colorful UV Printed Patch - Fun Decor – Hat Patch Supply
- If It Flies Hat Patch - Stylish Acrylic Design in 3 Colors – Hat Patch Supply
Ready to press your own?
Custom UV patches with no minimum, shipped in 72 hours — or grab a free-shipping sample pack first.