


Hat Patch University
Double-Sided Vinyl Banners for Businesses: Visibility That Lasts

For two-way visibility, choose a true double-sided vinyl banner built from 18 oz duplex vinyl with a blockout liner. That construction keeps both sides crisp and readable whether your banner hangs from a street pole, spans a trade-show aisle, or faces foot traffic from two directions at once. A single-reverse print won’t cut it when text legibility on the back matters.
Here’s how to order correctly the first time:
- Choose true double-sided construction (two printed panels + blockout liner), not single-reverse, for any text-heavy or two-way-viewing application.
- Select 18 oz duplex vinyl for outdoor or high-traffic installs; consider 15 oz for lighter-duty or budget-sensitive projects.
- Specify your finishes upfront: grommets, pole pockets, reinforced hems, or wind flaps depending on your mounting method.
- Request a free production proof before approving the order so you can confirm color, layout, and bleed on both sides.
- Place your order at Hatpatchsupply to get custom vinyl banners with fast turnaround and a proof-first workflow.
Key Takeaways
True double-sided vinyl banners with 18 oz duplex construction and a blockout liner deliver the opacity, durability, and two-way legibility that outdoor and pole-mounted installs demand.
| Point | Details |
|---|---|
| Choose true double-sided | Two panels plus a blockout liner are required for text-heavy or two-way-viewing applications. |
| 18 oz duplex for outdoors | 18 oz duplex scrim is the standard weight for pole banners and building signage requiring opacity and tear resistance. |
| Mesh over wind slits | In high-wind locations, mesh banners outperform solid vinyl with wind slits, which increase fabric stress and vibration. |
| Confirm finishes before ordering | Specify grommets, pole pockets, or hemmed edges to match your mounting hardware before checkout. |
| Hatpatchsupply for custom orders | Hatpatchsupply offers custom vinyl banners with 18 oz duplex options, free production proofs, and fast turnaround. |
Table of Contents
- What is a double-sided vinyl banner and where should you use one?
- How material weight and construction affect print quality and durability
- What finishing options do you need for your mounting method?
- Single-reverse vs. true double-sided: which construction do you actually need?
- How to prepare your artwork files for both sides
- What drives the price and how long will production take?
- How long will your outdoor banner last, and how do you manage wind?
- Why Hatpatchsupply delivers on custom vinyl banners
- What we’ve learned producing durable signage
- How to place your order with Hatpatchsupply
- Sources
What is a double-sided vinyl banner and where should you use one?
A true double-sided vinyl banner consists of two separately printed panels sewn or laminated back-to-back with a blockout layer between them. That blockout layer is the critical detail: it prevents each side’s image from bleeding through to the other, so both faces display with full opacity and color accuracy. Without it, you get a washed-out ghost image on whichever side faces the light source.
Double-sided banners are purpose-built for high-traffic, multi-directional viewing areas, including street poles, storefronts, and open-space events where audiences approach from both directions. The most common installations include:
- Street pole banners mounted on light poles along a main corridor
- Hanging banners suspended from ceilings at trade shows or indoor arenas
- Free-standing frame displays at outdoor festivals or retail entrances
- Storefront banners visible from both sidewalk directions
- Trade-show aisle signage where attendees walk past from either end
Single-sided prints remain perfectly acceptable for wall-mounted displays, backdrops, or any installation where the back faces a wall or structure. If your design is logo-only with no text, a single-reverse print can also work at a lower cost. The installation environment should drive the decision: hanging or pole-mounted banners almost always benefit from true double-sided construction, while wall-mounted displays typically do not need it.
Hatpatchsupply offers custom vinyl banners you can configure for double-sided applications, with options to specify material, size, and finishing before checkout.
How material weight and construction affect print quality and durability
The two most common material weights for outdoor double-sided vinyl banners are 18 oz and 15 oz, and the difference matters more than the number suggests.
| Spec | 18 oz Duplex Scrim | 15 oz Double-Sided Smooth |
|---|---|---|
| Weight | 18 oz/sq yd | 15 oz/sq yd |
| Caliper | ~18 mil | ~13 mil |
| Construction | Duplex scrim + blockout | Scrim + blockout |
| Flame rating | NFPA 701 (typical) | NFPA 701 |
| Best for | Pole banners, building signage, demanding outdoor | Lighter outdoor, trade shows, budget projects |
| Opacity | High (integrated blockout) | Moderate to high |
The 18 oz duplex scrim banner incorporates an integrated blockout layer and reinforced polyester scrim designed for demanding outdoor applications where strength, opacity, and print reliability are non-negotiable. The scrim is the woven polyester mesh embedded in the vinyl that resists tearing and dimensional changes when the banner flexes in wind or temperature shifts.
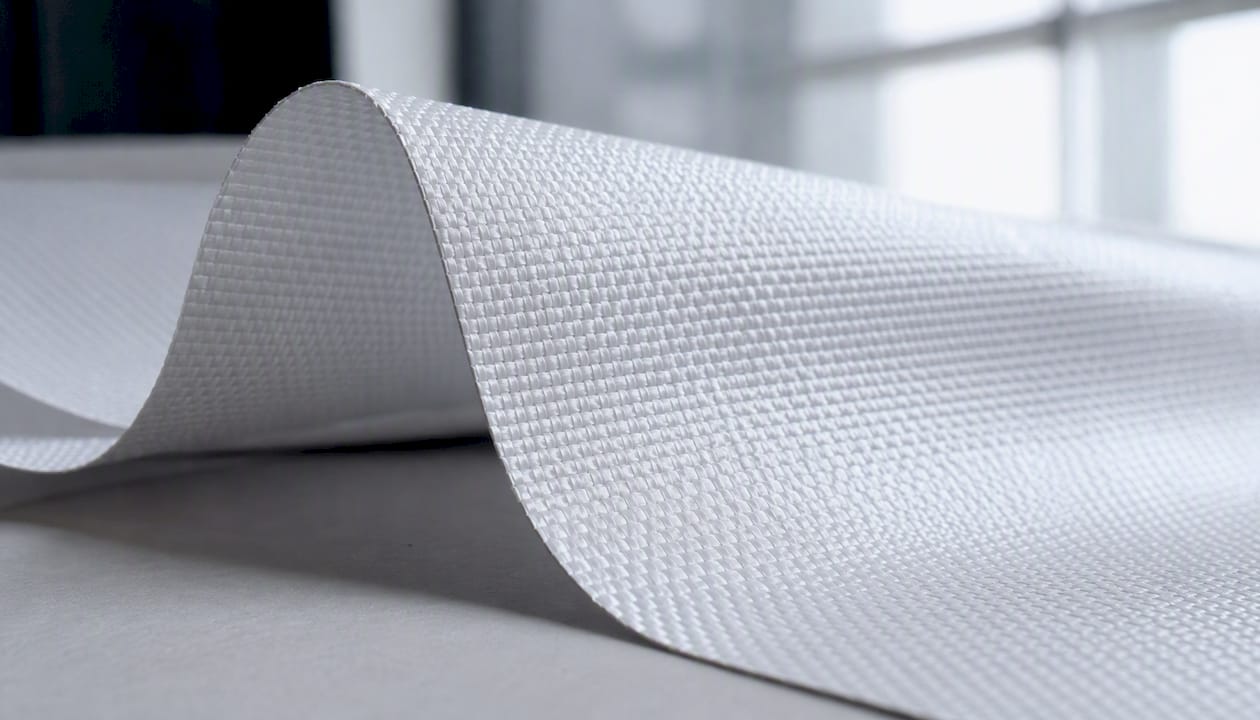
The 15 oz double-sided smooth banner from Duratex carries a 13 mil caliper and NFPA 701 flame resistance, making it a viable alternative for projects where slightly lower weight is acceptable and the installation is less exposed. It costs less per square foot and ships lighter, which matters when ordering large quantities.
When requesting specs from any vendor, ask for: material weight (oz/sq yd), caliper (mil), scrim denier, blockout construction type, and flame rating. A vendor who can’t provide a material data sheet is a red flag.
Statistic callout: 18 oz duplex scrim is the industry-standard weight for pole banners and building signage where both opacity and tear resistance are required outdoors.
What finishing options do you need for your mounting method?
The finish you specify determines how your banner installs and how long the hardware holds. Getting this wrong means a banner that tears at the grommets or won’t fit the pole system you rented.
Common finishing options and their applications:
- Hemmed edges: A folded and sewn border around the perimeter that distributes stress and prevents fraying. Standard on most quality banners.
- Grommets: Metal eyelets punched through reinforced corners and along edges. For larger banners, space grommets every 19"–36" to distribute load evenly and reduce stress concentration at any single point.
- Pole pockets: A sewn sleeve along the top and/or bottom edge that slides over a pole or rod. Common for street pole banners and retail hanging systems.
- Reinforced corners: Extra layers of material at corners where tearing typically starts. Worth specifying for any outdoor install.
- Wind flaps: Panels that allow controlled movement in wind. Less common on true double-sided builds but available from some vendors.
Mounting hardware options include pole bracket systems (for street poles), banner arm assemblies (for building-mounted installs), ceiling suspension hardware (for trade shows), and free-standing retractable or rigid frames. Match the finish to the hardware before you order, not after.
Pro Tip: For heavy 18 oz double-sided banners, use a pole bracket system with a bungee or spring-loaded bottom arm rather than a fixed rod. The slight give in the bottom arm reduces flutter stress on grommets and extends the banner’s usable life significantly.
Single-reverse vs. true double-sided: which construction do you actually need?
This is the most common ordering mistake we see, and it costs buyers real money when they get it wrong.
Single-reverse printing produces a mirror image on the back of a single-layer banner. It works acceptably for simple graphic or logo designs where the reversed image is still recognizable. Text, however, reads backward on the reverse side, making it unusable for any sign that carries a phone number, URL, or directional copy.
True double-sided construction uses two fully printed panels joined back-to-back with a blockout liner. Both sides carry independent, correctly oriented artwork. The blockout liner between them prevents light from washing one image through to the other.
| Feature | Single-Reverse | True Double-Sided |
|---|---|---|
| Construction | Single panel, mirrored back | Two panels + blockout liner |
| Text legibility (back) | Reversed / unreadable | Fully readable |
| Opacity | Lower (light bleed possible) | High (blockout prevents bleed) |
| Relative cost | Lower | Roughly double single-sided |
| Weight | Lighter | Heavier |
| Best use | Logo-only flags, budget installs | Text-heavy, two-way viewing |
Double-sided banners cost more and weigh more because they require roughly double the material and labor to print, assemble, and finish. That added mass also reduces flutter in wind, which is a practical durability benefit.
Pro Tip: Always ask your vendor to confirm “blockout liner included” in writing before approving your proof. Some vendors use the term “double-sided” loosely to describe single-reverse prints. If the spec sheet doesn’t mention a blockout layer, ask directly.
How to prepare your artwork files for both sides
File setup errors are the leading cause of reprints on double-sided orders. A few non-negotiable rules keep production clean.
- Submit separate files for each side. Label them clearly (Side A / Side B) and confirm with your vendor which side is which before approving the proof.
- Use CMYK color mode. RGB files convert unpredictably at the press, and the shift is often visible on large-format prints.
- Set resolution to 100–150 dpi at final print size. Large-format banners are viewed from a distance, so 150 dpi at size is more than sufficient. Higher resolution inflates file size without improving visible quality.
- Include bleed of 0.125"–0.5" depending on your vendor’s spec. Ask before you build the file, since bleed requirements vary by finishing method.
- Keep critical content (text, logos) at least 0.5" inside the safe area away from grommets, seams, and pole pocket folds.
- Use the same ICC color profile for both sides and request a test proof if color matching across both faces is critical to your brand.
When your two sides carry different messages, design them with the same visual weight and color palette so the banner reads as a unified piece from either direction. For hanging formats, confirm the orientation of Side B relative to Side A before finalizing files, since a banner that hangs from a pole needs Side B to be flipped vertically, not just horizontally.
What drives the price and how long will production take?
Price and turnaround on a custom outdoor double-sided banner depend on five primary variables: size, material weight, construction type, finishing options, and quantity.
- Size is the biggest cost driver. A 2’ x 4’ banner costs a fraction of a 4’ x 8’, and large-format orders scale roughly with square footage.
- Material weight affects both material cost and shipping weight. 18 oz duplex costs more per square foot than 15 oz.
- True double-sided construction typically runs roughly double the cost of a comparable single-sided print because of the added panel, blockout liner, and assembly labor.
- Finishing options add incremental cost: grommets, sewn hems, and pole pockets each carry a small per-unit fee.
- Quantity usually unlocks price breaks at defined thresholds, though some vendors (including Hatpatchsupply) offer no-minimum ordering.
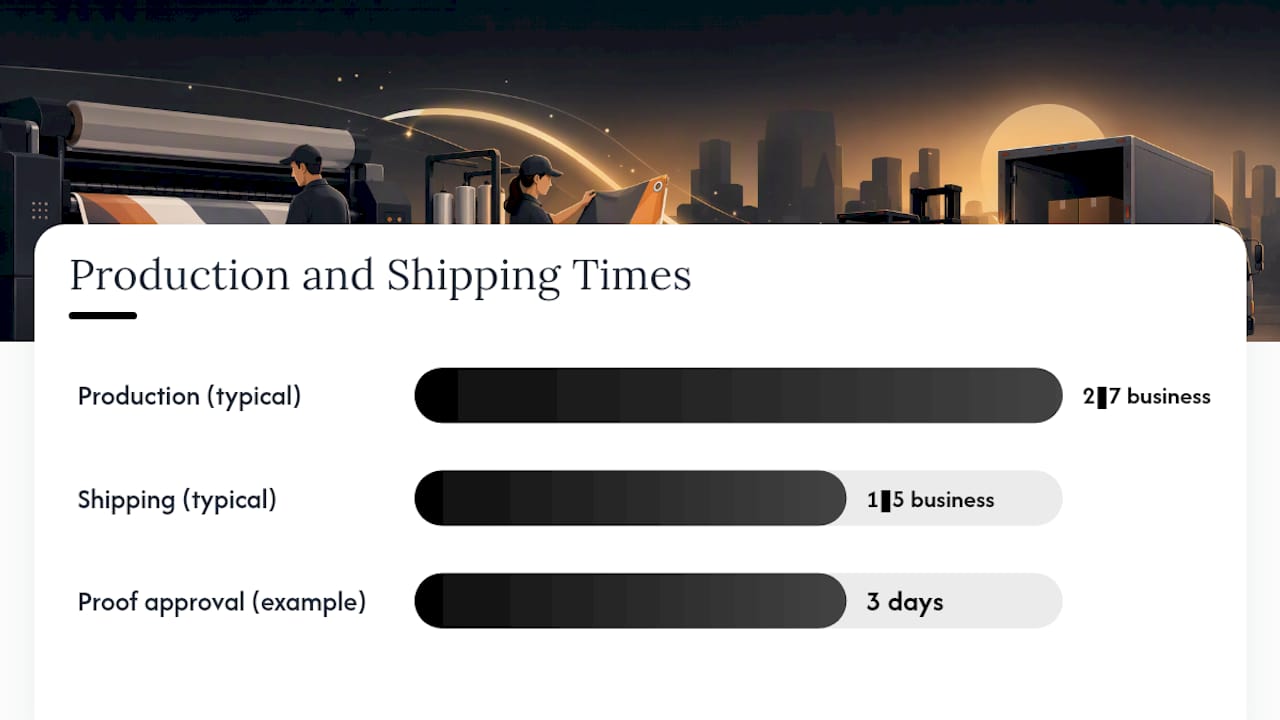
Typical production timelines run 2–7 business days for standard orders, with rush or expedited options available at a premium. Shipping adds 1–5 business days depending on carrier and destination. Proof approval is the most commonly overlooked timeline factor: if you take three days to approve a proof, that time comes out of your schedule, not the vendor’s production window.
Timeline example: Order placed (Day 1) → Proof delivered (Day 1–2) → Proof approved (Day 2–3) → Production (Day 3–7) → Ships (Day 7–8) → Delivered (Day 8–12).
When ordering, request material data sheets and confirm the vendor’s proof policy before placing a rush order. A vendor with a clear proof workflow and documented specs reduces the risk of reprints and missed deadlines.
How long will your outdoor banner last, and how do you manage wind?
An 18 oz duplex scrim banner in a typical outdoor environment, with moderate UV exposure and seasonal weather, can last 2–3 years with proper installation and basic maintenance. Lighter materials and more exposed locations shorten that range. Direct coastal or desert sun accelerates UV degradation faster than inland temperate climates.
Wind management is where most buyers make their worst decisions.
For high-wind or exposed locations, mesh banners are the preferred solution because their perforated construction lets air pass through and reduces the risk of tearing or structural damage. A solid 18 oz duplex banner in a sustained wind event without proper hardware will eventually fail at the grommets or seams.
Wind slits, the cuts some installers make in solid banners to reduce wind resistance, are a poor substitute for mesh. Wind-tunnel testing found that wind slits can increase vibration and fabric stress in some bracket systems, with slits sometimes increasing drag rather than reducing it. They also create tear initiation points that shorten banner life.
Best practices for wind-resistant installs:
- Use mesh material (typically 9 oz perforated vinyl) for any site with sustained winds above 15 mph.
- Specify professional bracket systems with spring-loaded or bungee bottom arms for pole banners.
- Inspect grommets and hardware monthly during high-wind seasons.
- Clean banners with mild detergent and water; avoid pressure washing, which degrades seams.
- Store banners rolled (not folded) in a dry location during off-season periods.
Pro Tip: If you need a solid double-sided banner in a moderately windy location, use a pole bracket system rated for your banner’s square footage rather than cutting slits. The hardware investment pays back in banner longevity.
Why Hatpatchsupply delivers on custom vinyl banners
Hatpatchsupply produces custom vinyl banners alongside its full line of UV-printed and laser-engraved hat patches, applying the same fast-production and proof-first workflow to large-format signage. Key product and service highlights:
- 18 oz double-sided construction available, with blockout liner for full opacity on both faces.
- Custom sizing to fit your specific installation, whether a standard street pole format or a trade-show hanging banner.
- Finishing options including grommets, hemmed edges, and pole pockets specified at checkout.
- Free production proof before final approval, so you confirm color, layout, and bleed on both sides before anything goes to press.
- Fast turnaround consistent with Hatpatchsupply’s production standards across all custom print products.
- No-minimum ordering where applicable, making it practical for single-event or small-run needs.
- Direct order flow with visible product specs and a support team available for pre-order file questions.
When you request a proof, ask the team to confirm the blockout liner spec and finishing details in writing. That single step eliminates the most common source of double-sided banner reprints.
What we’ve learned producing durable signage
We’ve worked through enough banner orders to know that the spec conversation before production matters more than anything that happens at the press. Buyers who arrive with clear file specs, confirmed construction type, and a defined installation environment almost never need reprints. The ones who skip the proof or assume “double-sided” means the same thing at every vendor are the ones who call us back frustrated.
Our team reviews files before production and flags issues with bleed, color mode, and safe-zone violations before they become problems on press. If you have an unusual installation, a non-standard size, or questions about which material weight fits your exposure conditions, reach out before you place the order. We’d rather answer three questions upfront than reprint a banner that didn’t need to fail.
How to place your order with Hatpatchsupply
Getting a custom double-sided vinyl banner from Hatpatchsupply takes three steps, and the whole process is designed to move fast without cutting corners on quality.
Step 1: Pick your size and material. Choose your banner dimensions and confirm 18 oz duplex (for outdoor/pole installs) or 15 oz (for lighter-duty applications). Specify your finishes: grommets, pole pockets, or hemmed edges.
Step 2: Upload your files or request a proof. Submit separate files for Side A and Side B in CMYK at 100–150 dpi with bleed. Not ready with final files? Request a free production proof first and work with the team to finalize artwork.
Step 3: Approve and ship. Once you confirm the proof, production begins. Standard turnaround runs 2–7 business days, with shipping added on top. Rush options are available for tight deadlines.
Visit Hatpatchsupply to start your order or request a free proof. The team is available for pre-order questions on file specs, material selection, and installation requirements before you commit.
Sources
- Double-sided banners
- The Difference Between Single-Reverse and Double-Sided Printing : Support
- Mesh Banners vs. Wind Slit Banners | eSigns
- Single vs. Double-Sided Banners: Which One Wins the Visibility Game? - BannerBuzz Blog
- Duratex 15oz Double-Sided Smooth Banner
- BigSol 762 18oz Duplex Scrim Banner
- BannerFlex banner bracket hardware and banners are tested in full size wind tunnel
- Double-Sided vs. Single-Sided Banners: What You Need to Know - AlphaGraphics
When ordering from any vendor, request the material data sheet for your chosen weight (15 oz or 18 oz) to verify caliper, scrim denier, blockout construction, and flame rating before approving production.
Recommended
Ready to press your own?
Custom UV patches with no minimum, shipped in 72 hours — or grab a free-shipping sample pack first.