


Hat Patch University
Hat Patch Placement: A Precise Guide for Hat Makers

For structured caps, center the patch on the front panel with the bottom edge sitting slightly above the bill seam. That single measurement is the reliable default for snapbacks, fitted caps, and most trucker hats because it positions the patch squarely in the viewer’s sightline without crowding the brim or the crown seam. The front panel is also the flattest zone on most structured caps, which means adhesive bonds hold more evenly and sew lines stay consistent across a production run.
For other hat styles, the rules shift slightly. On 5-panel and flat-front hats, the same vertical offset applies, but you’re working with a single uninterrupted panel, so centering is even more forgiving. Beanies work best with the patch placed 1"–2" above the fold line, centered left-to-right. Bucket hats typically carry patches on the side panel, centered within that panel’s width. Dad caps and soft-front hats follow the same front-center default, though a slight off-center shift (1/2" left or right) reads as intentional on smaller patches.
Before you mark anything, have these three tools ready:
- A flexible tape measure or rigid 6" ruler for vertical offset
- A fabric marking pen or tailor’s chalk for the centerline
- Adhesive dots or repositionable tape to tack the patch before final attachment
Key Takeaways
Precise, repeatable hat patch placement requires a consistent vertical offset measurement, the right tools for marking and testing, and a final QA check before permanent attachment.
| Point | Details |
|---|---|
| Default vertical offset | Place the patch bottom edge 1/2"–3/4" above the bill seam on structured caps and snapbacks. |
| Soft hat and beanie rule | Position patches 1"–2" above the fold line on beanies; keep width to 3" or under on dad caps. |
| Sizing by hat style | Structured caps carry 2.5"–3.5" wide patches; trucker hats handle up to 4" wide comfortably. |
| Top tool for consistency | A paper template cut to patch dimensions reproduces placement accurately across a full production run. |
| Hatpatchsupply resources | The size guide and Adobe Illustrator mockup tool confirm dimensions and placement before ordering. |
Table of Contents
- Where exactly should you place a patch on each hat style?
- What patch size works best for each hat style?
- Which tools make repeatable placement fast and accurate?
- How to mark, test, and attach a patch step by step
- What are the most common placement mistakes, and how do you fix them?
- How does Hat Patch Supply’s size guide help you place patches correctly?
- Why consistent placement matters more than makers realize
- Get the right patches and tools from Hatpatchsupply
- Sources
Where exactly should you place a patch on each hat style?
Placement rules vary by hat construction, and the differences matter more than most makers expect. A measurement that works perfectly on a structured snapback will look low and cramped on a trucker or visually lost on a beanie. Front-panel centering maximizes visibility on structured caps and reduces stress on adhesive edges, making it the most reliable default across hat types.
Snapbacks and fitted caps
Center the patch horizontally on the front panel. Measure up from the bill seam and mark the bottom edge of the patch at 1/2"–3/4". For taller crown panels, you can push that offset a bit higher, but going much higher risks the patch reading as floating rather than anchored. Avoid placing the patch so it overlaps the center eyelet at the crown, since that seam creates a ridge that lifts patch edges over time.
Trucker hats and 5-panel caps
Trucker hats have a foam or mesh front panel that is flatter and slightly more rigid than a fabric cap. The same 1/2"–3/4" vertical offset above the bill seam applies, but pay attention to the panel seams on either side. Keep the patch at least 1/4" clear of any vertical seam to prevent edge lifting. On 5-panel hats with a single flat front, centering is straightforward; use the center seam at the top as your vertical reference and drop down from there.
Dad caps and soft-front hats
Soft-front caps have more crown curve than structured caps, which means a large patch will fight the fabric. Keep patches on dad caps relatively narrow to fit well, and place them centered or up to 1/2" off-center. Off-center placement works well for smaller patches because it signals intentional design rather than a centering error. Avoid going too far toward the side panel seam.
Beanies and knit hats
Place the patch a short distance above the fold line, centered on the front face. Low placement (near the fold) gets hidden when the brim is turned up; high placement risks the patch sitting on the crown curve where it’s harder to see straight-on. A rectangular or oval patch sits more naturally on the flat face of a beanie than a rigid square.
Bucket hats
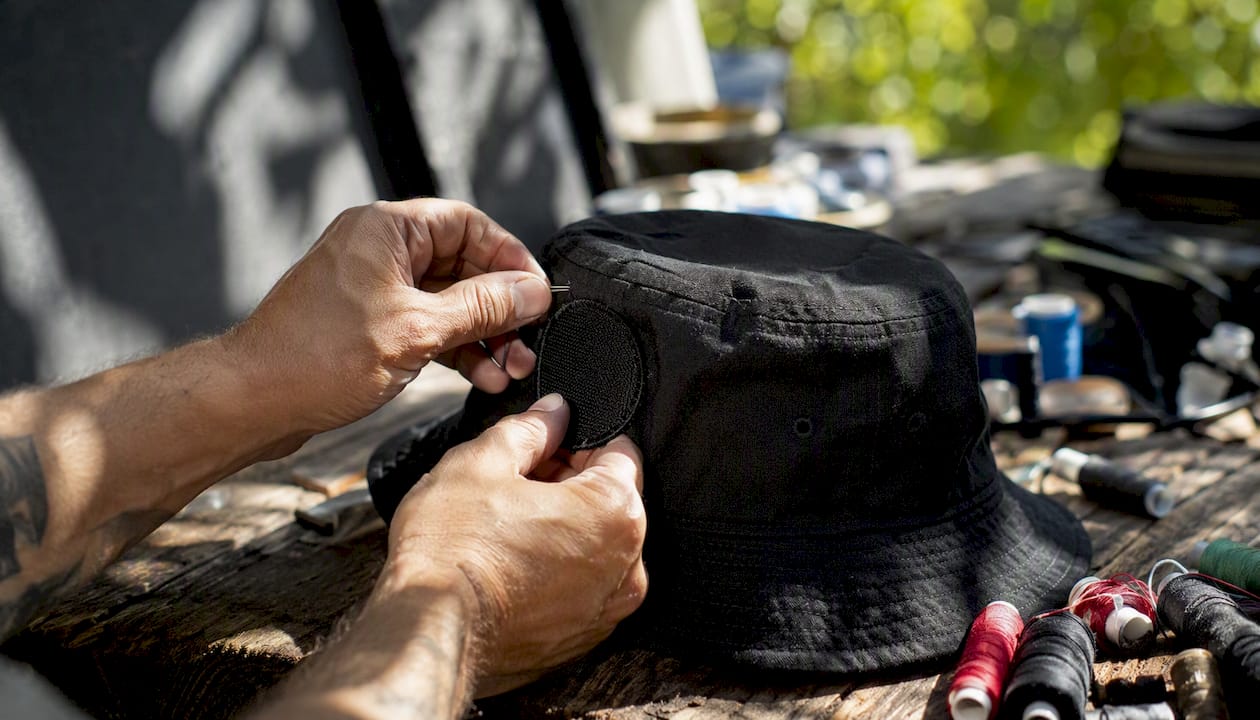
Side-panel placement is standard for bucket hats. Center the patch within the side panel, roughly midway between the crown seam and the brim. Curvature on bucket hat panels is more pronounced than on cap fronts, so adhesive-only attachment is less reliable here. Sewing or a combination of adhesive and sewing holds better on curved bucket hat panels.
| Hat Style | Placement Zone | Vertical Offset | Notes |
|---|---|---|---|
| Snapback / Fitted | Front panel center | slightly above bill seam | Avoid crown eyelet overlap |
| Trucker / 5-panel | Front panel center | slightly above bill seam | Clear vertical seams by 1/4" |
| Dad cap / Soft front | Front center or slight off-center | slightly above bill seam | Keep patch width 3" or under |
| Beanie | Front face center | a short distance above fold line | Oval or rectangular shapes preferred |
| Bucket hat | Side panel center | Midway between crown and brim | Sew or combine with adhesive |
What patch size works best for each hat style?
Getting the width right is as important as getting the position right. A patch that is too wide for the panel will overlap seams or curve around the sides; one that is too narrow gets lost on a large front panel. The Hat Patch Supply size guide provides specific size ranges for trucker and structured caps, and we use those as our baseline recommendations.
For most structured caps, a patch width of 2.5"–3.5" fills the front panel without crowding it. Trucker hats, with their wider foam panels, can carry patches up to 4" wide comfortably. Beanies and dad caps read best with patches in the 2"–3" range. Bucket hat side panels are narrower, so 1.5"–2.5" is the practical ceiling there.
Height proportions matter for legibility. A patch taller than it is wide tends to look awkward on a horizontal panel. For most hat patches, a width-to-height ratio of roughly 2:1 to 3:2 keeps logos readable and visually balanced. Round and oval shapes work well when the artwork is symmetrical; rectangular shapes suit text-heavy or landscape-format designs.
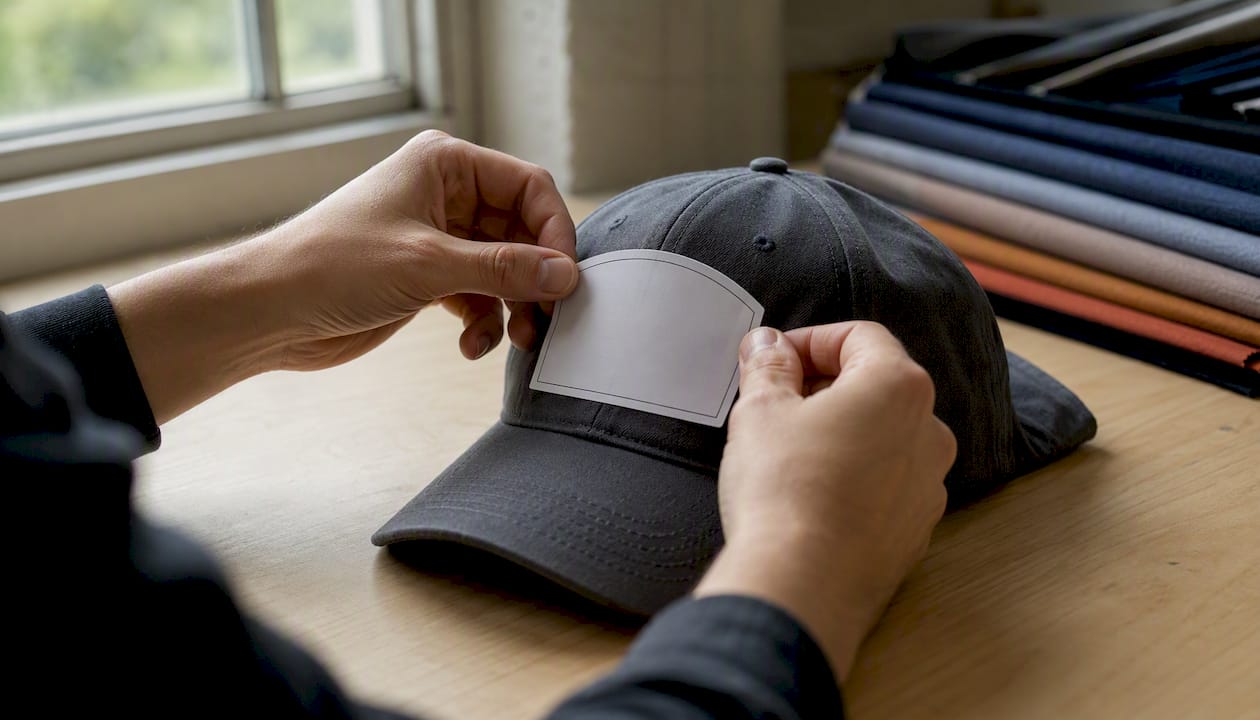
Pro Tip: Print your patch artwork at full scale on plain paper, cut it out, and tape it to the hat before ordering. Photograph it from 5–10 feet away to check legibility and proportion. This print-and-test step catches sizing problems before production and takes under five minutes.
Which tools make repeatable placement fast and accurate?
Consistency across a run of 50 or 500 hats comes down to having the right physical and digital tools, not eyeballing each one. Here is what we rely on:
Physical tools:
- Flexible tape measure: measures the curved bill seam accurately; use it to find the 1/2"–3/4" vertical offset on each hat.
- Centering ruler or T-square: finds the horizontal midpoint of the front panel quickly, especially on trucker hats where the panel width varies by brand.
- Fabric marking pen or tailor’s chalk: marks the patch position without damaging fabric; chalk brushes off cleanly after attachment.
- Adhesive dots or repositionable tape: tacks the patch in place for a visual check before permanent attachment.
- Heat pad or silicone pressing pad: supports the hat panel from inside during iron-on application, keeping the surface stable.
Printable templates and laser-cut guides:
A paper template cut to your patch’s exact dimensions is the fastest way to reproduce placement across a run. Hatpatchsupply offers free downloadable patch shape files that you can print and use as placement templates immediately.
Digital mockup tools:
Before committing to production, using a vector mockup or printable template prevents most sizing and alignment mistakes. The Hatpatchsupply Adobe Illustrator mockup tool lets you drop your artwork onto a hat shape, scale it to real dimensions, and see exactly how it reads on the panel. This step is especially useful when presenting designs to clients or when you’re scaling up from a single prototype to a production run.
Template workflow:
- Print the patch template at 100% scale.
- Cut and align it on the hat using your ruler and chalk mark.
- Tack with adhesive dots and photograph from the front and a 45-degree angle.
- Confirm position before moving to final attachment.
How to mark, test, and attach a patch step by step
Preparation
Clean the hat panel with a lint roller or a slightly damp cloth and let it dry fully. Choose your attachment method: sewing for maximum durability, heat-activated adhesive for speed, or permanent fabric adhesive for hats that can’t tolerate heat. Gather your ruler, chalk, adhesive dots, and the patch.
Marking
- Find the horizontal center of the front panel. On structured caps, the center eyelet is a reliable reference; on truckers, measure the panel width and divide by two.
- Mark a vertical chalk line at center.
- Measure up from the bill seam and mark the bottom edge of the patch at 1/2"–3/4".
- Align the patch to both marks and tack it with an adhesive dot at each corner.
Temporary testing
Place the hat on a mannequin head or hat block. Step back 5–10 feet and photograph it straight-on and from a slight angle. Check that the patch reads centered, sits at the right height, and doesn’t conflict with any existing logo or embroidery on the hat. If something looks off, peel the adhesive dots and reposition.
Attachment
Sewing: Use a backstitch or machine stitch around the patch perimeter, 1/8" from the edge. Keep tension consistent to avoid puckering the hat panel.
Heat/iron-on: Cover the patch with a thin pressing cloth before applying heat to protect the surface. Press firmly for 30–40 seconds without sliding the iron. Let the patch cool completely before handling.
Safety Tip: Never apply a heat press directly to PVC or UV-printed patches without confirming the material’s heat tolerance. Use a silicone pressing pad inside the hat to prevent scorching the panel lining.
Adhesive-backed patches: Peel the backing, align to your chalk marks, and press firmly from the center outward to push out air. On curved panels, add a perimeter stitch within 24 hours for long-term hold.
Verification
After attachment, check all four edges for lifting. Press any loose corners firmly. Flex the hat panel gently to confirm the patch moves with the fabric rather than pulling away. Wipe off any chalk marks with a damp cloth.
What are the most common placement mistakes, and how do you fix them?
Even experienced makers run into the same handful of problems. Knowing the fix before it happens saves time.
- Off-center placement: Usually caused by measuring from the wrong reference point. Always measure from the panel’s actual midpoint, not from a seam that may not be centered. Fix: use a centering ruler before marking.
- Too low (patch crowding the bill): The patch bottom edge is less than 1/2" above the bill seam. It reads as cramped and gets obscured when the hat is worn. Fix: re-mark at 3/4" and reapply.
- Too high (patch floating on the crown): The patch drifts toward the crown seam and loses its visual anchor. Fix: keep the bottom edge no higher than 1" above the bill seam on standard caps.
- Overlap with existing hat logo or embroidery: Always check the hat blank for existing branding before marking. Move the patch to a side panel or adjust the vertical offset to clear the conflict zone.
- Edge lifting on curved panels: Adhesive-only attachment on a curved surface often lifts at the corners within days. Fix: add a perimeter stitch or use a heat-activated adhesive designed for flexible substrates. Adding a thin backing or heat-activated adhesive designed for flex prevents edge pop on curved panels.
- Glue show-through on fabric: Excess adhesive squeezed past the patch edge. Fix: use adhesive dots sized to the patch rather than a full-coverage sheet, and press from center outward.
Pre-attachment QA checklist:
- Patch bottom edge 1/2"–3/4" above bill seam (or 1"–2" above fold on beanies)
- Horizontal center confirmed with ruler, not by eye
- No overlap with existing logos, eyelets, or seams
- Photographed on mannequin from 5–10 feet
- All four corners tacked and lying flat
How does Hat Patch Supply’s size guide help you place patches correctly?
Hatpatchsupply publishes a dedicated hat patch size guide with recommended dimensions and proportions for trucker hats and structured caps. It’s the fastest reference we know for confirming whether a patch design is sized correctly before production begins.
Beyond the size guide, the Adobe Illustrator mockup tool lets makers drop artwork onto a scaled hat template and verify placement digitally before ordering a single patch. This step alone eliminates most of the “it looked right on screen” problems that slow down production runs.
For reliable attachment across hat styles, we recommend these product types from Hatpatchsupply:
- Adhesive-backed UV printed patches: The pressure-sensitive backing makes temporary tacking and final placement straightforward. The Troutscape UV Printed Patch is a good example of the adhesive-backed format in action.
- Laser engraved leatherette patches: Slightly more rigid than UV patches, which actually helps them sit flat on structured panels without edge curl.
- Mockup files and downloadable templates: Use these before ordering to confirm scale and position on your specific hat blank.
Hatpatchsupply’s no-minimum ordering policy means you can order a single sample patch to test placement and adhesion on your hat before committing to a full run.
Why consistent placement matters more than makers realize
Placement inconsistency is one of those production problems that compounds quietly. A patch that sits 1/4" lower on hat number 47 than on hat number 1 doesn’t look like much in isolation, but side-by-side on a retail display or in a product photo, the variation reads as a quality control failure. Customers notice, even when they can’t articulate why.
The measurement-first approach described here isn’t about being rigid; it’s about making the right placement repeatable without having to think about it on every hat. A chalk mark and a ruler take 30 seconds. A paper template takes five minutes to make and then works for every hat in that run. The mockup step takes ten minutes and eliminates the most expensive kind of mistake: a full production run with the patch in the wrong position.
We’ve also seen makers skip the temporary-tack step because they’re confident in their eye. That confidence is usually well-placed on the first hat. By hat 20, fatigue shifts the mark slightly, and by hat 50, the drift is visible. The tack-and-photograph step is the check that keeps the whole run consistent, not just the first few.
Get the right patches and tools from Hatpatchsupply
Precise placement starts with patches that are sized and backed correctly for the job. Hatpatchsupply’s custom UV printed hat patches come with adhesive backing as standard, so you can tack, test, and reposition before final attachment without damaging the patch or the hat.

Order a single sample patch to test your placement workflow on your specific hat blank, then scale to a full run once the position is confirmed. No minimums means no wasted inventory on a placement you haven’t verified yet. Visit Hatpatchsupply to browse patches, download the size guide, and grab the Illustrator mockup tool before your next production run.
Sources
Start with the size guide if you need to confirm patch dimensions before ordering. Open the mockup tool next if you’re ready to test placement digitally.
- Patch Placement Guide: Where to Put Patches on Gear That Actually Works
- How to Choose the Right Hat Patch Size, Shape, and Placement? - Lightspot
- How to Iron a Patch on a Hat: Quick and Easy Steps – American Hat Makers
Recommended
- Hat Patch Making Made Simple: 7 Powerful Tips to Create Custom Hats That Stand Out - Hat Patch Supply by Hat Foundry
- Trouble Maker Hat Patch - Unique and Trendy Accessories – Hat Patch Supply
- Thin Red Line UV Printed Hat Patch - Quality and Durability – Hat Patch Supply
- Over Par Under The Influence Hat Patch - Stylish Accessory – Hat Patch Supply
Ready to press your own?
Custom UV patches with no minimum, shipped in 72 hours — or grab a free-shipping sample pack first.