


Hat Patch University
Iron-On Hat Patches: What Hobbyists Need to Know

Iron-on hat patches work well on most fabric hats — cotton, cotton-blend, canvas, and denim take heat-activated adhesive reliably. Wool, coated finishes, and high-performance synthetics are where things go sideways. Before you press anything, run through this short checklist:
- Check the hat’s fabric label for fiber content and any care warnings.
- Choose a patch with a heat-seal or thermally activated adhesive backing rated for hat fabrics.
- Test on a hidden interior spot if you’re unsure about the fabric’s heat tolerance.
- Have a pressing cloth and a stable curved support (cap block or rolled towel) ready before you start.
Per Owl Badges, a heat-activated adhesive layer bonds best with cotton and cotton-blend fabrics at the manufacturer’s specified temperature and time — and adding corner stitches after application meaningfully extends how long the bond holds.
Key Takeaways
Iron-on hat patches bond reliably on cotton, canvas, and cotton-blend hats when applied at the manufacturer’s specified temperature and dwell time — and corner stitches after application are the single most effective durability upgrade.
| Point | Details |
|---|---|
| Check fabric compatibility first | Cotton, canvas, and cotton-blend hats take iron-on adhesive well; avoid wool, mesh, and coated finishes. |
| Match temperature to backing type | Use the patch manufacturer’s specified temperature and dwell time; test on a scrap before pressing a finished hat. |
| Add corner stitches for heavy-wear hats | Stitching the four corners after ironing adds mechanical security that adhesive alone cannot provide. |
| Cold wash and air dry to extend patch life | High-heat washing and dryer cycles degrade heat-activated adhesive faster than any other factor. |
| Hatpatchsupply for hat-ready options | Hatpatchsupply offers UV-printed and heat-seal patches with no minimums and clearly listed application specs for hat fabrics. |
Table of Contents
- Which iron-on patch should you buy for a hat?
- Which hat fabrics take iron-on adhesives well?
- How do you apply an iron-on patch to a hat with a heat press?
- How do you apply an iron-on patch to a hat with a household iron?
- Alternatives: when should you sew, glue, or use adhesive-backed patches?
- Troubleshooting common problems and caring for patched hats
- What tools and supplies do you need to apply iron-on patches to hats?
- What we’ve learned from supplying hat-ready patches
- Hatpatchsupply has the hat-ready patches you need
- Sources
Which iron-on patch should you buy for a hat?
Not every patch sold as “iron-on” is built for hats. The backing type and adhesive chemistry matter more than the patch’s visual style. Here’s a quick breakdown of the main types you’ll encounter:
- Embroidered with heat-seal backing: The most common type. Works well on cotton and canvas hats. Look for listings that specify a heat-seal or thermally activated polymer layer, not just “iron-on.”
- Woven patches: Thinner and lighter than embroidered. Good for low-profile hats. Same backing rules apply.
- PVC/heat-seal patches: Durable and weather-resistant. Bond strength is good on cotton but can vary on polyester blends. Check the manufacturer’s recommended substrate list.
- UV-printed leatherette patches: Full-color, photo-quality printing on a leatherette base. Hat Patch Supply offers these with adhesive-backed or sew-on options, making them a strong choice for hat customization where detail and color accuracy matter.
- Adhesive-backed patches: Pre-applied pressure-sensitive adhesive. Fast to apply, but bond strength is lower than heat-activated types. Better for temporary placement or low-wear hats.
When reading product listings, confirm these four things before buying: the recommended backing temperature, compatible substrates (cotton, canvas, cotton-blend), the suggested application tool (iron vs. heat press), and any wash-tolerance notes. Retail listings vary widely in how much of this information they publish, so check the product page carefully — product specs vary significantly across styles and sellers.
Pro Tip: Order a single test patch before committing to a larger run. A $3–$5 sample press on a scrap piece of the same hat fabric tells you more about adhesion quality than any product description.
Which hat fabrics take iron-on adhesives well?
Fabric compatibility is the single most common reason iron-on patches fail on hats. The adhesive needs to penetrate and grip the fiber structure, and some materials simply don’t allow that at safe temperatures.
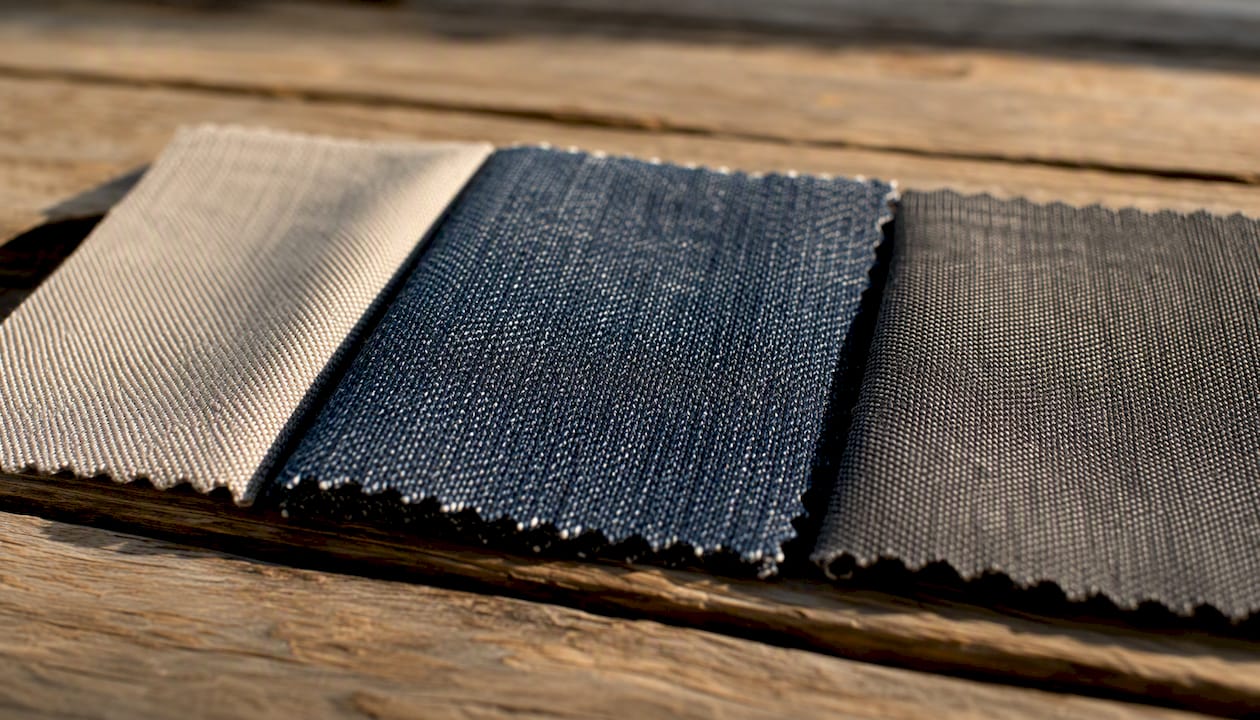
| Hat Fabric | Iron-On Compatibility | Notes |
|---|---|---|
| cotton | Works well | Best substrate for heat-activated adhesive |
| cotton-blend | Works well | Slight variation by blend ratio; test first |
| Canvas / denim | Works well | Dense weave holds adhesive firmly |
| Polyester (standard) | Use caution | Lower melt point; keep iron temp low |
| Nylon / mesh | Avoid | Melts or distorts at iron-on temperatures |
| Wool / felt | Avoid | Heat damages fiber; use sew-on instead |
| Leather / faux leather | Avoid | Heat scorches surface; use adhesive-backed or sew-on |
| Coated / water-repellent finish | Avoid | Coating blocks adhesive penetration |
Polyester deserves a specific note: standard polyester can tolerate moderate heat, but structured trucker hats often combine a polyester front panel with a mesh back, and the mesh portion will distort before the adhesive sets. Always apply to the front panel only and keep the iron away from any mesh sections.
Pro Tip: Before final application, press a clean iron at your intended temperature against the inside of the hat for five seconds. If the fabric discolors, stiffens, or smells synthetic, drop the temperature or switch to a sew-on method.
How do you apply an iron-on patch to a hat with a heat press?
A heat press is the right tool when you need repeatable results across multiple hats or when you’re working with thicker patch backings that require consistent platen pressure. Calibrated temperature and pressure are the top predictors of first-pass success — partial bonds usually mean insufficient dwell time or a surface that wasn’t fully clean before pressing.
Recommended temperature, time, and pressure ranges
| Patch Backing Type | Temperature | Dwell Time | Pressure |
|---|---|---|---|
| Standard heat-seal embroidered | around 300°F | 10–15 seconds | Medium-firm |
| Woven heat-seal | around 300°F | around 10 seconds | Medium |
| PVC / heat-seal | approximately 300°F | approximately 12 seconds | Firm |
| UV-printed leatherette | approximately 300°F | approximately 12 seconds | Firm |
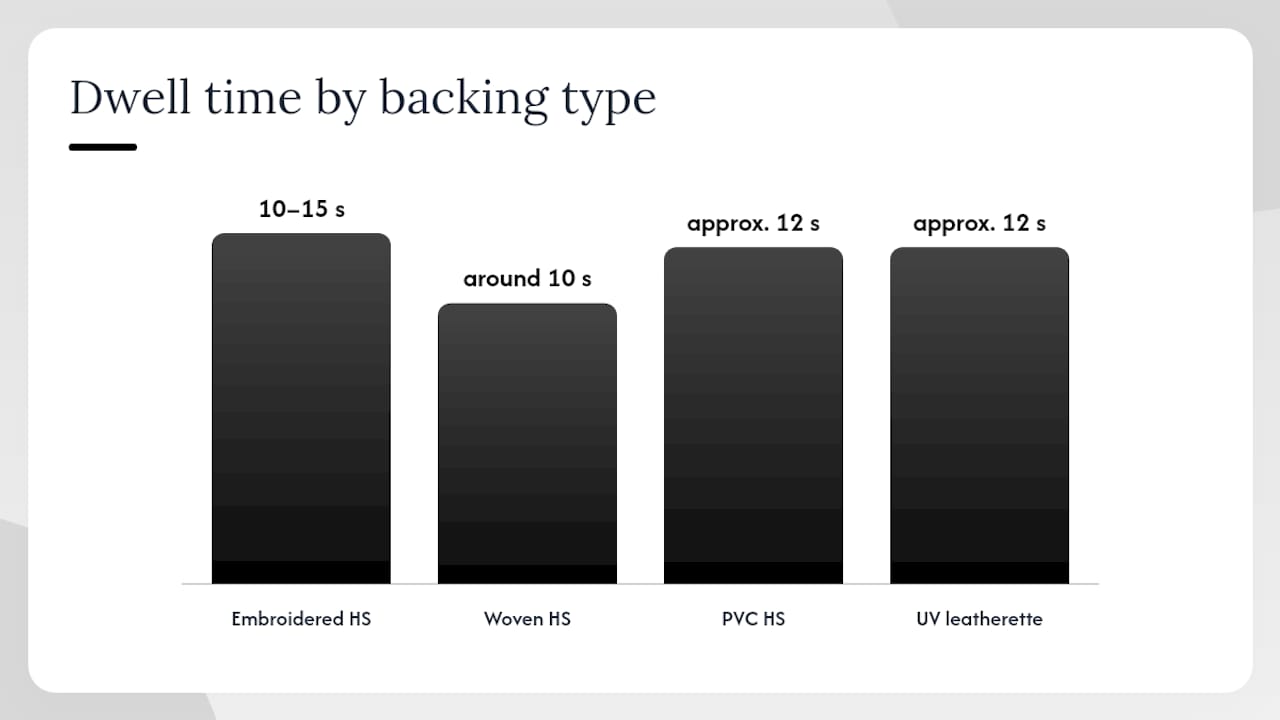
Always follow the patch manufacturer’s temperature spec over these ranges. Vendor product pages are often the most reliable source for exact figures.
Step-by-step application
- Preheat the heat press to the manufacturer’s recommended temperature and let it stabilize for at least two minutes.
- Prepare the hat. Place a cap clamp or curved cap platen on the lower platen to support the hat’s crown and keep the surface flat under pressure.
- Pre-press the hat. Close the press on the hat for three to five seconds with no patch to remove moisture and pre-shrink the fabric.
- Position the patch. Place it adhesive-side down in the desired location. Use heat-resistant tape to hold it if needed.
- Cover with a pressing cloth (thin cotton or silicone sheet) to protect the patch face.
- Press for the manufacturer’s specified dwell time at the correct temperature and pressure. Do not shift the press during the dwell.
- Release and cool. Lift the press, remove the hat, and let it cool on a flat surface for at least 30 seconds before touching the patch.
- Inspect. Press the edges firmly with your fingertip. If any edge lifts, re-press for an additional five seconds with firm pressure.
Pro Tip: If you’re pressing multiple hats, check your platen temperature with an infrared thermometer between runs. Heat press platens can drift by 10–15°F after several consecutive presses, which is enough to cause inconsistent adhesion.
How do you apply an iron-on patch to a hat with a household iron?
A household iron can attach patches to hats reliably when you use the right technique. The key constraints are the curved surface and the iron’s uneven heat distribution. Work in small sections, use a stable support, and keep steam off entirely.
Temperature and time guidelines
| Iron Setting | Approximate Temp | Press Time per Section |
|---|---|---|
| Cotton / High | around 300°F | 15–20 seconds |
| Wool / Medium-High | around 300°F | around 20 seconds |
| Synthetic / Low-Medium | low to moderate heat | about 25 seconds |
For most cotton and canvas hats, the cotton setting works well. For polyester-blend hats, drop to the synthetic setting and extend the press time slightly.
Step-by-step application
- Set up a stable surface. Place a rolled towel or cap block inside the hat to support the crown and create a firm, flat pressing area. Per American Hat Makers, this curved support is what separates a clean bond from a wrinkled one.
- Heat the iron to the appropriate setting and turn steam completely off.
- Pre-press the hat. Iron the application area for five seconds to remove moisture.
- Position the patch adhesive-side down. Use a small piece of heat-resistant tape at the corners to hold it in place.
- Lay a thin cotton pressing cloth over the patch. Never press directly on the patch face.
- Press firmly in small sections, holding for 15–20 seconds per area. Apply steady downward pressure without sliding the iron.
- Back-iron. Carefully turn the hat inside out (or reach inside) and press the back of the fabric over the patch area for an additional 10 seconds. This drives the adhesive deeper into the fibers.
- Cool completely before testing. Wait at least 60 seconds, then tug the patch edges gently to check adhesion.
Pro Tip: A small travel iron or a hair straightener works better than a full-size iron on the curved front panel of a structured hat. The smaller plate gives you more control over pressure and coverage on a curved surface.
Alternatives: when should you sew, glue, or use adhesive-backed patches?
Iron-on isn’t always the right call. Wool hats, mesh-back truckers, high-heat laundering environments, and patches that need to be swapped out all call for a different approach. Here’s how the main alternatives compare:
- Sew-on patches: The most durable option. Thread locks the patch mechanically to the fabric, so washing temperature and adhesive degradation are non-issues. Sellers like Katydid Wholesale recommend sew-on for uniformed or frequently laundered garments where regulation or durability demand it. The trade-off is time and a basic sewing skill requirement.
- Fabric glue: Accessible and fast, but bond strength varies significantly by brand and fabric. Not recommended for hats that get regular wear or washing. Best for temporary fixes or low-stress placement.
- Adhesive-backed patches: Pressure-sensitive adhesive makes these fast to apply and, in some versions, repositionable. Permanent adhesive-backed types hold better than repositionable ones, but neither matches heat-activated bond strength on a hat that sees daily use.
- Velcro attachment: Ideal when you want to swap patches between hats. Sew or iron the hook side to the hat, and the loop side to the patch. Clean, professional, and fully reversible.
- Iron-on plus corner stitches: The hybrid approach most suppliers recommend. Iron the patch first for positioning and initial adhesion, then stitch the four corners by hand. This adds mechanical security without the full time investment of a complete sew-on application. For hats that get heavy wear, this is the method we recommend most often.
For a visual sense of how embroidered patches look on finished hats before you commit to a method, the 3x3 embroidered patch at Brass & Bunker Co. is a useful reference point.
Troubleshooting common problems and caring for patched hats
Most iron-on failures trace back to one of three causes: wrong temperature, insufficient dwell time, or an incompatible fabric. Here’s how to fix the most common issues and keep the bond intact long-term.
Common problems and fixes
- Edges lifting after cooling: Re-press with a pressing cloth for an additional 10 seconds at the same temperature. If edges lift again after a second press, add corner stitches or a small amount of fabric glue along the edge.
- Bubbling under the patch: Usually caused by trapped moisture. Pre-press the hat area before applying the patch to drive out moisture, then re-apply.
- Partial adhesion (one side bonds, the other doesn’t): The hat surface wasn’t flat during pressing. Use a cap block or towel to level the surface and re-press the unbonded area.
- Patch peeling after washing: Iron-on adhesive degrades with repeated high-heat washing and drying. If the patch is peeling after laundering, re-press and add corner stitches, or switch to a sew-on method for that hat.
Washing and drying advice
Cold water, gentle cycle, and air drying are the three rules that extend patch life the most. High-heat dryer cycles are the fastest way to degrade heat-activated adhesive. Never iron directly over a patch after it’s applied; if the hat needs pressing, use a pressing cloth and low heat.
Post-application verification checklist
- Wait at least 60 seconds after pressing before handling the patch.
- Press each edge firmly with your fingertip. No lifting should occur.
- Flex the hat brim gently. The patch should move with the fabric, not resist it.
- Check the patch face for any scorching or discoloration from the pressing cloth.
Pro Tip: For hats you know will get heavy use or frequent washing, it is often recommended to add corner stitches within the first 24 hours of application, while the adhesive is still fully cured and the patch is positioned exactly where you want it.
What tools and supplies do you need to apply iron-on patches to hats?
Getting the right supplies together before you start saves a second trip and prevents improvised fixes that compromise the bond. Here’s the complete list:
- Hat-ready iron-on patches with a specified heat-seal or thermally activated adhesive backing (confirm backing type on the product page before ordering).
- Heat press or household iron. A heat press gives more consistent results; a travel iron or hair straightener handles curved hat panels better than a full-size iron.
- Pressing cloth. Thin cotton muslin or a dedicated silicone pressing sheet. Never press directly on the patch face.
- Cap clamp or cap block. Keeps the hat’s curved crown stable under the platen. A tightly rolled towel works as a substitute.
- Heat-resistant tape. Holds the patch in position during pressing so it doesn’t shift when you apply pressure.
- Infrared thermometer (optional but useful). Confirms actual platen or iron surface temperature, which often differs from the dial setting.
- Basic sewing kit. Needle and thread for corner stitches on high-wear hats. A few stitches at each corner add significant durability.
When buying patches, prefer listings that specify backing type, adhesive activation temperature, and recommended substrates. A listing that says only “iron-on” without those details is a flag to ask the seller or order a single test patch first. For structured snapback and trucker-style hats, the Fire Things Snapback Hat at Brass & Bunker Co. shows the typical panel construction you’ll be working with.
What we’ve learned from supplying hat-ready patches
We’ve shipped thousands of patches to hat makers, brands, and individual creators, and the single most consistent finding is this: the adhesive backing matters more than the patch style. A beautifully printed UV leatherette patch with a weak or mismatched adhesive will fail on a hat within weeks. A well-bonded embroidered patch with a quality heat-seal backing will outlast the hat itself.
For hobbyists just getting started, we recommend UV-printed or heat-seal embroidered patches with a clearly specified thermally activated polymer backing. These give you the most predictable results with a household iron, and the bond strength on cotton and canvas hats is reliable when you follow the temperature and dwell time specs. The Troutscape UV Printed Patch is a good example of what a hat-ready backing looks like in practice — full-color detail, durable face, and a backing spec that’s listed clearly on the product page.
One thing we tell every first-time buyer: order a single patch and test it on a scrap of the same fabric before pressing it onto a finished hat. No minimum order requirements mean there’s no reason not to. That one test press will tell you everything about temperature, dwell time, and adhesion that a product description can’t.
Hatpatchsupply has the hat-ready patches you need
Hatpatchsupply is built specifically for hat makers and brands who need patches that actually bond to hat fabrics — not generic garment patches repurposed for hats. Every product is designed with hat application in mind: backing types are listed clearly, application specs are on the product page, and no-minimum ordering means you can test before you commit to a full run.
For full-color detail, the custom UV-printed hat patches deliver photo-quality results on cotton and canvas hats with a durable heat-seal backing. The Thin Red Line UV Printed Hat Patch and the Brotherhood Patch show the level of detail and color accuracy you can expect. For dimensional styling, the custom tri-layer acrylic patches add a structured, layered look that stands out on structured hats.
Order a single test patch at Hatpatchsupply and press it on a scrap of your hat fabric before your full run.
Sources
- Patch Attachment Methods: Iron-on, Sew-on, Velcro Compared
- How to Iron a Patch on a Hat: Quick and Easy Steps
- Wholesale Hat Patches | Designed in US | Katydid Wholesale
Always follow the specific instructions on your patch’s product page, and test on a scrap of the same fabric before pressing onto a finished hat.
Recommended
- Hat Patch Making Made Simple: 7 Powerful Tips to Create Custom Hats That Stand Out - Hat Patch Supply by Hat Foundry
- UV Printed Hat Patches: The Complete Guide for Custom Hat Makers - Hat Patch Supply by Hat Foundry
- Thin Red Line UV Printed Hat Patch - Quality and Durability – Hat Patch Supply
- Why Do Cheap Patches Fall Off Hats? – Hat Patch Supply
Ready to press your own?
Custom UV patches with no minimum, shipped in 72 hours — or grab a free-shipping sample pack first.