


Hat Patch University
Patch Backing Types for Hats, Uniforms, and Merch

The seven core patch backing types are sew-on, iron-on/heat-seal, hook-and-loop (Velcro), peel-and-stick/self-adhesive, plastic backing for PVC patches, magnetic, and unbacked/pin. For most small-brand buyers, the right choice comes down to how permanent the attachment needs to be and what surface the patch is going on.
Here is the short version by use-case:
- Uniforms and workwear → sew-on; maximum wash resistance, no adhesive failure risk
- Retail hats and casual merch → sew-on or iron-on/heat-seal, depending on fabric weight and curve
- Short-term promos, displays, or mockups → peel-and-stick/self-adhesive
- Interchangeable ID or tactical gear → hook-and-loop (Velcro), with the loop base sewn to the garment
- Rigid or shaped patches (PVC, acrylic) → plastic or stiff backing to hold edge definition
Key takeaways
The backing you choose before production determines how long your patch lasts, how it installs, and whether it survives laundering. Sew-on remains the most durable option across all use cases that involve regular washing.
| Point | Details |
|---|---|
| Sew-on for washed garments | Sew-on backing outlasts all adhesive options on uniforms and workwear washed regularly. |
| Iron-on requires edge stitching | Heat-seal alone lifts at edges over time; adding corner stitches after pressing extends life significantly. |
| Self-adhesive is not permanent | Pressure-sensitive adhesive fails with washing; use it for displays, mockups, or smooth non-laundered surfaces only. |
| Hook-and-loop needs a sewn loop base | Adhesive-only loop panels fail under repeated attachment; always sew the loop base to the garment. |
| Hat Patch Supply for small runs | No-minimum ordering and sample availability let buyers test backing choices on real garments before committing to production. |
Table of Contents
- What are patch backing types and why do they matter?
- Sew-on backing: the durable default for heavy-use items
- Iron-on / heat-seal backing: practical for low-volume branding
- How does hook-and-loop (Velcro) backing work?
- Peel-and-stick / self-adhesive backing: what it actually does
- Why plastic backing matters for PVC and rigid patches
- Magnetic and pin/clutch options: when and why
- How to choose the right backing for your project
- Installation and care: step-by-step application for each backing type
- Common failure modes and how to fix them
- Hat Patch Supply: custom patches with the backing your project needs
- Sources
What are patch backing types and why do they matter?
Patch backing is the material or treatment applied to the underside of a finished patch. It is distinct from the patch face (the embroidered, printed, or molded front) and from the stabilizer used during production. Backing is what determines how the patch attaches to a garment or surface, and that single decision cascades into permanence, wash performance, flexibility on curved surfaces like hat brims, and how much labor a buyer needs at the application stage.
Industry guides organize backings into four practical categories: permanent, semi-permanent, removable, and production-only. Choosing the wrong category is the most common reason patches fail after production, not poor embroidery or weak thread. Hat Patch Supply, which produces UV printed patches, laser engraved leatherette, and adhesive-backed options, structures its product line around these distinctions so buyers can match backing to application before they place an order.
Wash performance is where backing decisions show up most clearly. A sew-on patch on a cotton uniform can survive numerous wash cycles without degradation. An iron-on patch on a stretch-blend shirt may begin lifting at the edges after a handful of washes. Self-adhesive backing was never designed for laundering at all. Understanding these differences before ordering saves money and prevents the frustration of patches that look great on arrival and fail within weeks.
Sew-on backing: the durable default for heavy-use items
Sew-on patches carry no adhesive layer. The patch is stitched directly through its edge (or across its face) into the base garment using a sewing machine or by hand. That mechanical bond is what makes sew-on the highest-durability option across all backing types, particularly for items that go through repeated industrial or commercial laundering.
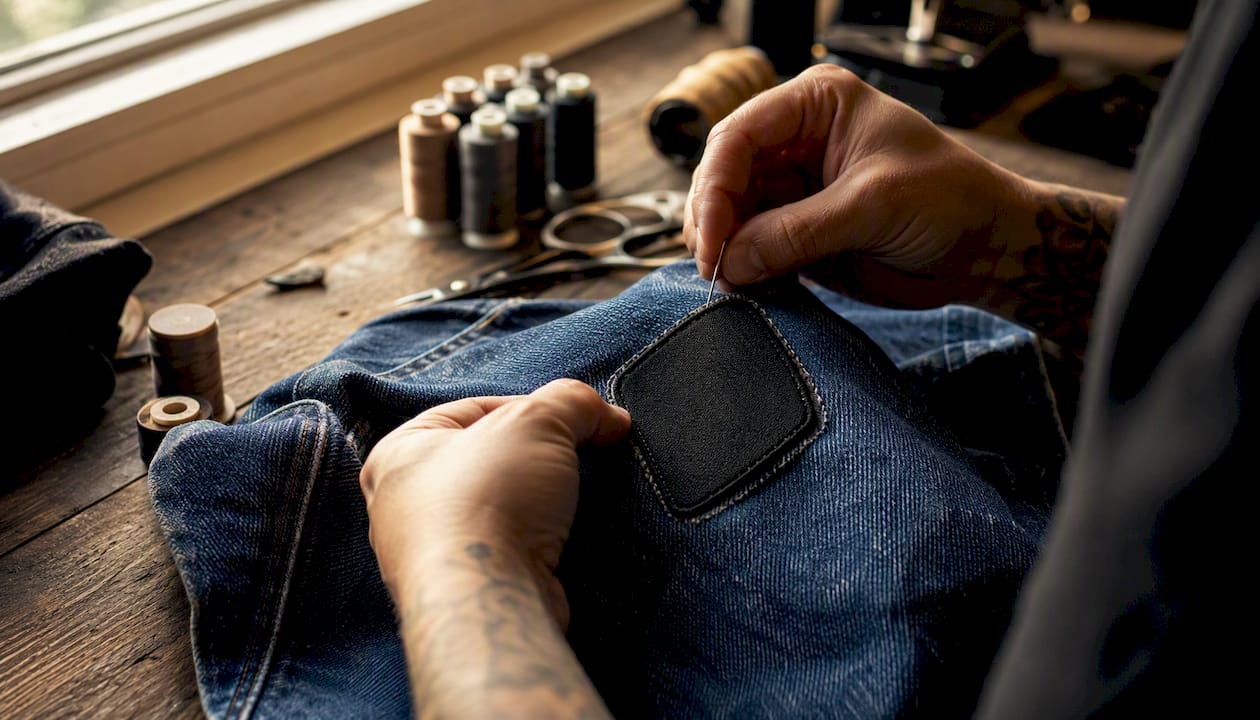
The structural logic is straightforward: thread locks the patch to the fabric at multiple points around the perimeter, so there is no adhesive layer to soften, peel, or delaminate. Uniforms, tactical vests, work jackets, and any garment washed frequently should default to sew-on for this reason.
The trade-offs are real. Sew-on requires either a sewing machine with the right presser foot or skilled hand-stitching, and the stitching is visible on the inside of the garment. Removing a sewn patch leaves needle holes. For small brands applying patches themselves, machine sewing is faster and more consistent; a standard zigzag stitch around the patch border works well on most woven fabrics. Ask your vendor whether the patch edge is finished (merrowed or hot-cut) before ordering, since a clean edge holds stitching better and reduces fraying over time.
Pro Tip: Request a physical sample before committing to a full sew-on run. Stitch it to a scrap of your actual garment fabric, run it through five wash cycles, and check the edge. That test costs almost nothing and eliminates guesswork about thread tension and edge behavior on your specific material.
Iron-on / heat-seal backing: practical for low-volume branding
Iron-on backing is a thermally activated adhesive film bonded to the underside of the patch during production. Heat and pressure melt the film, which then bonds to the garment fibers as it cools. The result is a semi-permanent attachment that works well on stable, heat-tolerant fabrics.
The most common applications for iron-on are promotional shirts, casual cotton or denim apparel, canvas bags, and any item where the buyer wants a clean finish without visible stitching. It is not the right choice for:
- Stretch or synthetic blends (nylon, polyester, spandex), where heat can damage the fabric and adhesion is weaker
- Items washed frequently at high temperatures, where the bond softens and edges begin to lift
- Curved surfaces like structured hat crowns, where even pressure is difficult to achieve with a household iron
- Waterproof or coated fabrics, which resist adhesive bonding
A household iron set to the fabric-appropriate temperature (typically cotton or linen setting, no steam) works for small runs, but a heat press gives more consistent pressure and dwell time. Most iron-on patches perform best with 10–15 seconds of firm, even pressure. The edges are the first failure point: if you see lifting within the first few washes, press the edges again immediately rather than waiting for the patch to detach fully. Adding a few anchor stitches at the corners after heat application significantly extends the patch’s life on garments that will be washed regularly.
How does hook-and-loop (Velcro) backing work?
Hook-and-loop is a two-piece system. The patch carries the hook side (the stiff, scratchy layer), and a loop panel is sewn or bonded to the garment. The two surfaces grip each other when pressed together and release cleanly when pulled apart. That interchangeability is the entire point.
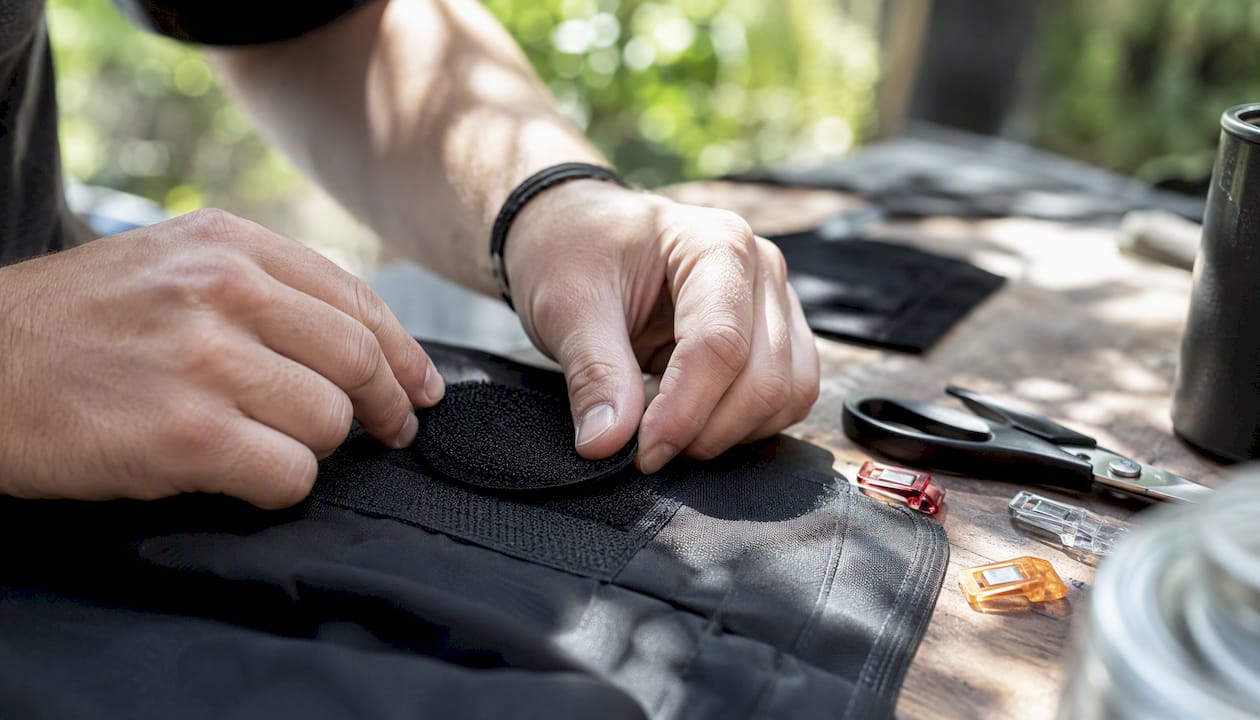
Military and tactical contexts rely on hook-and-loop more than any other backing type, precisely because patches need to change frequently. Unit identifiers, rank insignia, and mission-specific patches swap in and out without damaging the uniform. The same logic applies to ID patches on event staff vests, team jerseys where player names rotate, and any branded gear that needs to display different patches at different times.
The practical trade-offs are worth knowing before you order. Hook-and-loop adds measurable thickness to both the patch and the garment panel, which can feel bulky on lightweight fabrics. In dirty or dusty environments, the hook side accumulates lint and debris that reduces grip over time; a stiff brush clears most of it. The loop panel on the garment also wears down after many attachment cycles, eventually requiring replacement. For buyers ordering patches for hats, the added thickness at the crown can affect how the hat sits, so test fit before committing to a full run.
Peel-and-stick / self-adhesive backing: what it actually does
Self-adhesive backing uses a pressure-sensitive adhesive covered by a release liner. Peel the liner, press the patch onto a surface, and it holds. The key word is “holds,” not “bonds permanently.” This backing type is designed for short-term positioning, display use, mockups, and surfaces that will not be laundered.
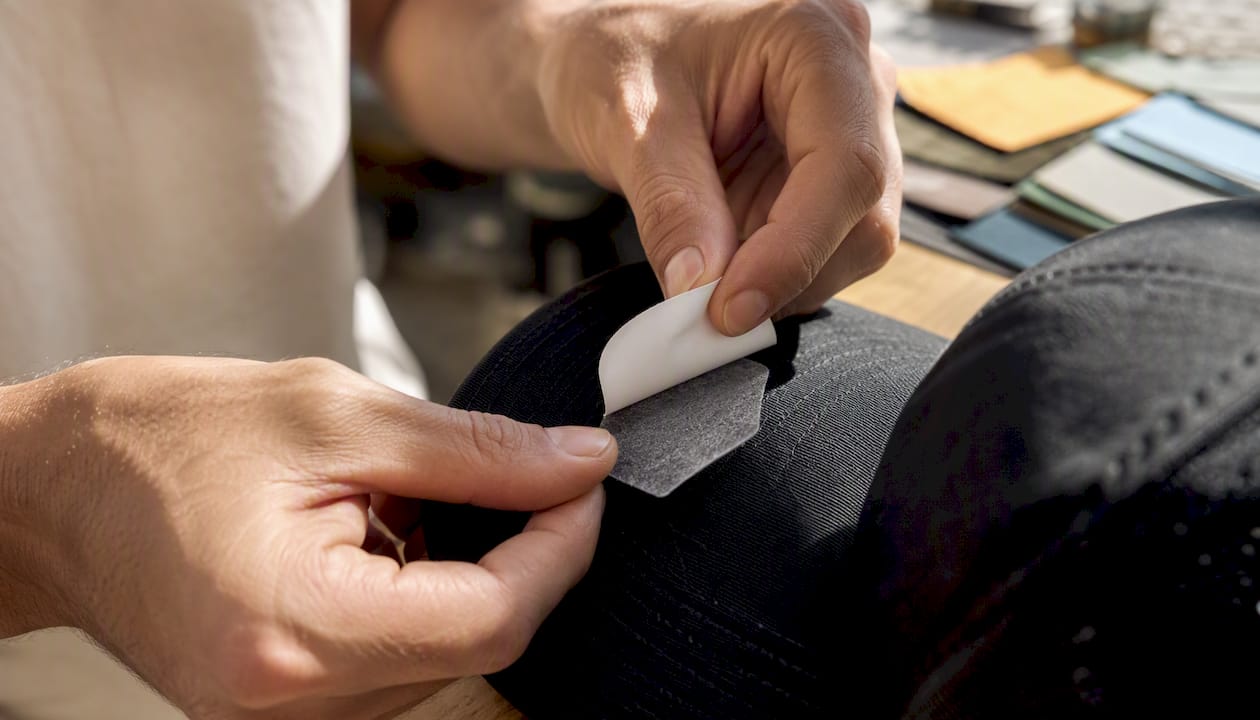
Buyers regularly order self-adhesive patches expecting them to survive washing. They will not. The adhesive weakens with moisture, heat, and repeated flex, and a patch that looks secure on day one will be loose or missing after the first wash cycle. That is not a product defect; it is the intended performance range of a pressure-sensitive adhesive.
Where self-adhesive genuinely excels:
- Trade show displays and point-of-sale product mockups
- Temporary placement on bags, hats, or jackets for photography before permanent attachment
- Smooth, non-porous surfaces like notebooks, phone cases, or helmets where laundering is not a factor
- Positioning a patch precisely before sewing it down permanently
| Use case | Self-adhesive appropriate? | Notes |
|---|---|---|
| Uniform or workwear | No | Will fail with washing; use sew-on |
| Promotional display | Yes | Short-term hold on smooth surfaces |
| Hat mockup / photography | Yes | Position before sewing or heat-sealing |
| Casual bag or notebook | Yes | No laundering; adhesion holds well |
| Retail garment (washed) | No | Edges lift; use iron-on or sew-on |
Hat Patch Supply’s pre-cut leatherette patches with adhesive backing are a practical example of this format used correctly: they work well for positioning, display, and smooth-surface applications where the buyer understands the use case.
Pro Tip: Use self-adhesive as a positioning tool, then sew or heat-seal for permanence. The two-step approach gives you precise placement without the risk of adhesive failure on a finished garment.
Why plastic backing matters for PVC and rigid patches
Plastic backing adds a thin, stiff layer to the underside of a patch, giving it body and edge definition that the patch material alone cannot provide. For PVC patches, thin woven patches, and UV-printed designs on flexible substrates, plastic backing is what makes the patch feel finished and hold its shape on a curved surface.
Vendors add plastic backing primarily to solve two problems: a patch that flops or curls when held up, and a patch that loses its edge definition when pressed against a curved hat crown. A stiff backing layer keeps the patch flat and makes the printed or molded face look sharper.
For buyers ordering custom acrylic or tri-layer patches, the stiff backing is part of the construction, not an add-on. Ask your vendor whether the backing is sewable or adhesive-only, since some plastic-backed patches are designed for heat application rather than stitching. On structured hats, a rigid patch with a slight pre-curve at the backing layer sits flush against the crown without the gap that flat patches sometimes show.
Magnetic and pin/clutch options: when and why
Magnetic patches use a magnet embedded in or bonded to the patch back, paired with a ferrous metal plate or a second magnet on the inside of the garment. The patch holds in place without any penetration of the fabric, which makes it appealing for delicate materials or situations where the wearer changes patches frequently.
The practical limits are significant. Magnetic patches work best on structured surfaces, stiff hat brims, or display boards where movement is minimal. They are not suitable for soft garments worn during physical activity, and the magnet’s weight can cause heavier patches to sag or shift. For buyers who need a no-damage, no-tool attachment for occasional display or collector use, magnetic options are a reasonable choice. For anything worn regularly, they are a supplement to, not a replacement for, a permanent backing.
Pin and clutch attachments convert a patch into a wearable pin. A metal pin is passed through the patch and the garment, secured on the inside with a clutch back. This leaves small holes in the fabric and is best suited to decorative patches on lapels, bags, or hats where the wearer accepts that trade-off. Safety-pin conversions are simpler but less secure. Neither option is appropriate for patches that need to stay in a fixed position under physical stress.
How to choose the right backing for your project
Work through these criteria in order, and the right backing usually becomes clear before you reach the vendor conversation.
| Decision criterion | What to ask yourself | Recommended backing |
|---|---|---|
| Permanence needed | Will this patch ever need to come off? | No → sew-on or heat-seal; Yes → hook-and-loop or magnetic |
| Wash/dry cycles | More than 10 washes expected? | Yes → sew-on; Occasional → iron-on; None → self-adhesive |
| Garment material | Stretch, synthetic, or coated fabric? | Avoid iron-on; use sew-on |
| Surface curvature | Structured hat crown or curved panel? | Sew-on or pre-curved plastic-backed patch |
| Interchangeability | Patches need to swap frequently? | Hook-and-loop with sewn loop base |
| Budget and labor | Applying patches yourself, small run? | Iron-on for speed; sew-on for longevity |
Vendor questions to ask on every order: Does the patch come with a sample or proof? What is the recommended iron or press temperature and dwell time? Is the loop base sewn or adhesive-only? What is the minimum order quantity, and what is the lead time? Has the backing been wash-tested, and for how many cycles?
Red flags to watch for: Any vendor who claims self-adhesive backing is permanent on washed garments. No sample or proof policy on custom orders. No guidance on fabric compatibility or heat settings. Vague answers about whether hook-and-loop loop panels are sewn or glued.
Hat Patch Supply’s site offers sample availability and small-run ordering, which lets buyers test backing choices on their actual garments before committing to a production run.
Installation and care: step-by-step application for each backing type
Sew-on
- Position the patch on the garment and pin or tape it in place.
- Set your sewing machine to a short straight stitch or narrow zigzag.
- Stitch around the perimeter, keeping the needle 1–2mm inside the patch edge.
- Backstitch at the start and end to lock the thread.
- Trim threads and press flat with an iron if needed.
For care: machine wash cold, tumble dry low. No special handling required beyond what the garment itself needs.
Iron-on / heat-seal
- Pre-heat the garment area with a dry iron for 5 seconds to remove moisture.
- Position the patch face-up on the garment.
- Press firmly with a dry iron (cotton/linen setting, no steam) for 10–15 seconds without sliding.
- Flip the garment inside out and press from the back for another 10 seconds.
- Allow to cool completely before handling.
For care: wash inside-out on a gentle cycle, cold water. Avoid high-heat drying. If an edge begins to lift, re-press immediately with a cloth between the iron and the patch face. Adding corner stitches after heat application extends durability significantly.
Hook-and-loop
- Sew the loop panel to the garment at the desired location using a straight stitch around the perimeter.
- Press the hook-backed patch onto the loop panel.
- Test the grip by pulling at the corners before use.
For care: wash the garment with the patch removed when possible to reduce loop wear. Clear lint from the hook side with a stiff brush after each use in dirty environments.
Self-adhesive / peel-and-stick
- Clean the target surface and allow it to dry completely.
- Peel the release liner from the patch back.
- Press firmly for 10–15 seconds, applying even pressure across the full patch face.
- Do not launder.
For removal: peel slowly at a low angle. Residue on smooth surfaces clears with isopropyl alcohol.
Common failure modes and how to fix them
Most patch failures trace back to three predictable problems, and each has a straightforward fix.
Iron-on edge lifting is the most frequent complaint. It happens when the adhesive film did not fully activate, usually because pressure was uneven or dwell time was too short. The fix: place a pressing cloth over the patch, apply firm pressure with a hot iron for 15 seconds, and hold without sliding. If the edge lifts again after washing, sew the perimeter with a short straight stitch. That combination of heat-seal plus edge stitching is more durable than either method alone.
Hook-and-loop grip loss in dirty environments is a lint problem, not a product defect. The hook fibers fill with debris and can no longer engage the loop. A stiff-bristled brush run across the hook surface restores most of the grip. If the loop panel on the garment has worn flat after many attachment cycles, replacing the loop panel is faster and cheaper than replacing the patch.
Self-adhesive failure after washing is not fixable because the adhesive was not designed for that use. The correct response is to re-back the patch with iron-on film or sew it down. Vendors who sell adhesive-backed patches for garment use should be asked directly whether the adhesive is wash-rated; most pressure-sensitive adhesives are not.
Pro Tip: Before a full production run of iron-on patches, press one sample patch onto a scrap of your actual garment fabric, wash it three times on a normal cycle, and inspect the edges. Three washes reveals edge behavior faster than any spec sheet. If the edges hold, your production run will too.
For makers working through hat-specific application questions, the hat patch making guide from Hat Patch Supply covers backing choice relative to hat shapes and curved panel installation in practical detail.
Hat Patch Supply: custom patches with the backing your project needs
Choosing the right backing is only half the equation. The other half is finding a supplier who builds that backing into the patch correctly from the start, offers samples before you commit, and does not require a large minimum order to test a new design.
Hat Patch Supply produces UV printed hat patches with adhesive backing options, laser engraved leatherette patches, and custom tri-layer acrylic patches for buyers who need rigidity and edge definition on structured hats. No-minimum ordering means you can test one backing type on your actual garment before scaling. The team can advise on which backing suits your fabric and application method, and sample patches are available so you can run your own wash test before production. Browse the Brotherhood Patch as an example of a finished UV-printed custom patch, or start a quote directly at Hatpatchsupply.
A note from David
We work with hat makers and small brands every week who arrive at the backing question after they have already placed an order. Getting it right before production is always faster and cheaper. If you are unsure which backing fits your garment and wash requirements, reach out before you order. We can walk through the options with you, and a sample is almost always the right first step for any new project.
Sources
The following sources informed the backing guidance throughout this article:
- Embroidered Patch Backing Comparison: A Beginner’s Practical Guide
- Ultimate Guide to Patch Backing
- Types of Military Patch Backing
Recommended
- Custom Tri-Layer Acrylic Patches Wholesale - Premium Quality – Hat Patch Supply
- Thin Blue Line UV Hat Patch - Stylish and Durable Design – Hat Patch Supply
- Thin Red Line UV Printed Hat Patch - Quality and Durability – Hat Patch Supply
- Elk Mountain Backdrop Acrylic Hat Patch - Gold Black White – Hat Patch Supply
Ready to press your own?
Custom UV patches with no minimum, shipped in 72 hours — or grab a free-shipping sample pack first.