


Hat Patch University
Patch Storage Conditions for Hat Makers: Quick Guide

Proper patch storage conditions come down to two key parameters and three immediate actions: keep ambient temperature in a cool, stable range, hold relative humidity moderate, and never let adhesive-backed patches sit without their liners. Get those right and you protect both the visual quality and the bond strength of your entire inventory.
Three quick actions when a shipment arrives:
- Inspect each lot for moisture, creasing, or liner damage before shelving anything.
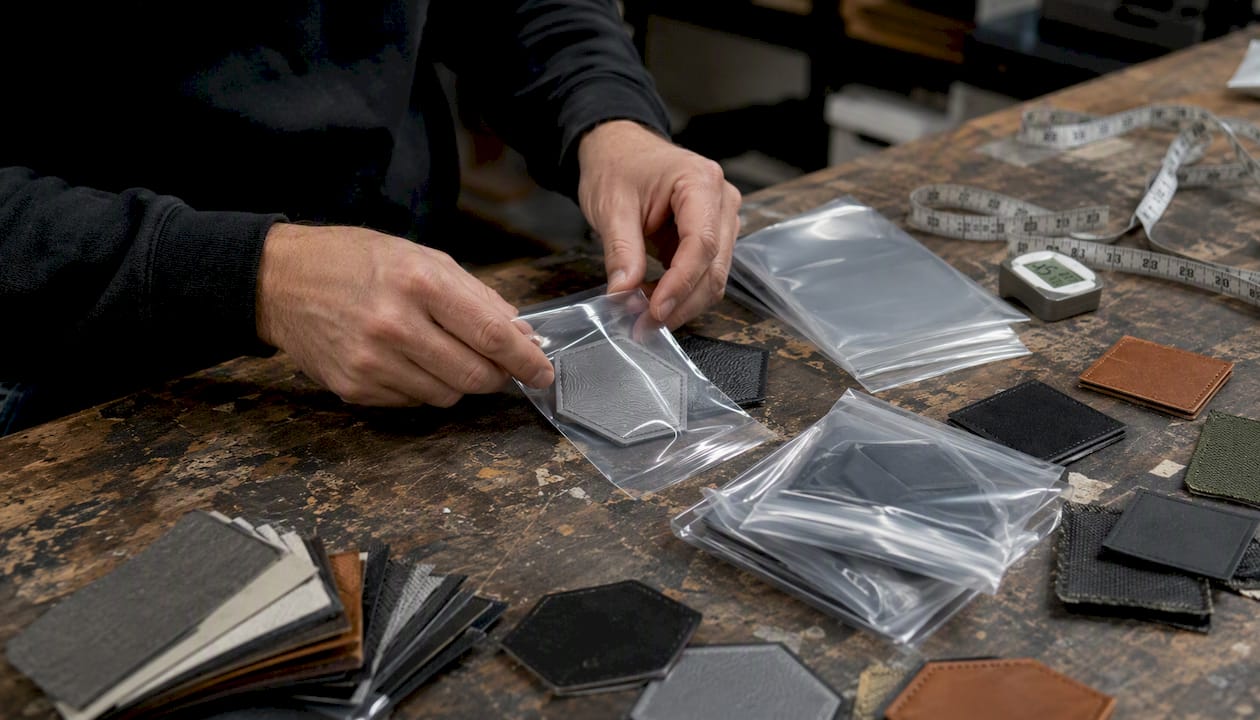
- Separate adhesive-backed patches from non-adhesive stock immediately and store them flat in sealed poly bags.
- Label every lot with a date code and batch number before it goes on the shelf.
Must-have supplies checklist:
- Digital hygrometer (one per storage zone)
- Silica gel desiccant pouches (rechargeable or indicating type)
- Acid-free tissue or lignin-free interleaving sheets
- PVC-free archival poly bags or clear sleeves
- Humidity indicator cards for sealed boxes
Pro Tip: Before you unpack a full shipment of adhesive-backed patches, peel the liner on a single sample and press it against a scrap of hat fabric with your thumb for five seconds. If it holds cleanly and releases without tearing the fabric, the batch is good. If tack feels weak or the liner pulls adhesive with it, isolate the lot and run a heat-activation test before committing to the full inventory.
Key Takeaways
Correct patch storage conditions protect both adhesive performance and visual quality: keep temperature in the recommended cool range, relative humidity moderate, and liners intact on all adhesive-backed stock.
| Point | Details |
|---|---|
| Temperature and humidity targets | Store at 60°F–70°F and 40%–50% RH; deviations above 80°F or 60% RH degrade adhesives and thread-based materials. |
| Liners protect adhesive tack | Keep release liners intact until application; exposed adhesive degrades within hours from dust, oils, and moisture. |
| Adhesive cure time matters | Allow 24–48 hours cure time after application before washing; cold, gentle washing without fabric softener extends bond life. |
| FIFO and lot labeling | Label every lot with material type, date, and lot number; rotate oldest stock first to prevent adhesive shelf-life failures. |
| Hat Patch Supply | Offers UV-printed, acrylic, and leatherette patches with stable adhesive formulations and sample kits for storage validation. |
Table of Contents
- What are the right patch storage conditions by material?
- What packaging and supplies protect patch inventory best?
- How do you store adhesive-backed patches to preserve tack?
- How do you monitor and control your storage environment?
- Short-term vs. long-term storage: how long can patches sit?
- What QA checks should you run before shipping patches?
- What do you do when adhesive or materials fail before shipping?
- Red flags that predict storage failures
- What we’ve learned about storage at Hat Patch Supply
- Storage-ready patches from Hat Patch Supply
- Sources
What are the right patch storage conditions by material?
Storage needs vary more by material than most sellers expect. A single shelf policy works against you when UV-printed patches and embroidered patches have meaningfully different sensitivities.
Kaishen recommends storing woven and embroidered patches at roughly 60°F–70°F with relative humidity near 40%–50%, away from prolonged light exposure and never folded. Folding an embroidered patch stresses the thread structure at the fold line, and repeated flexing causes fraying that no amount of careful handling later will reverse.
UV-printed patches carry a different risk: the ink layer sits on the surface and is vulnerable to UV degradation and abrasion. Keep them in opaque or UV-blocking sleeves and avoid stacking heavy items on top, which can cause micro-cracking in the print layer over time. Hat Patch Supply’s UV-printed patch guidance notes that protecting color integrity during storage is as important as the print quality itself.
Leatherette patches are sensitive to solvents and prolonged heat. Even a warm car trunk or a storage room near HVAC equipment can cause the surface to stiffen or warp. PVC patches off-gas plasticizers over time, which can transfer to adjacent materials, so store them in separate sealed bags away from embroidered or leatherette stock. Acrylic patches are rigid and relatively stable, but sharp temperature swings can cause edge micro-cracking, particularly at corners.
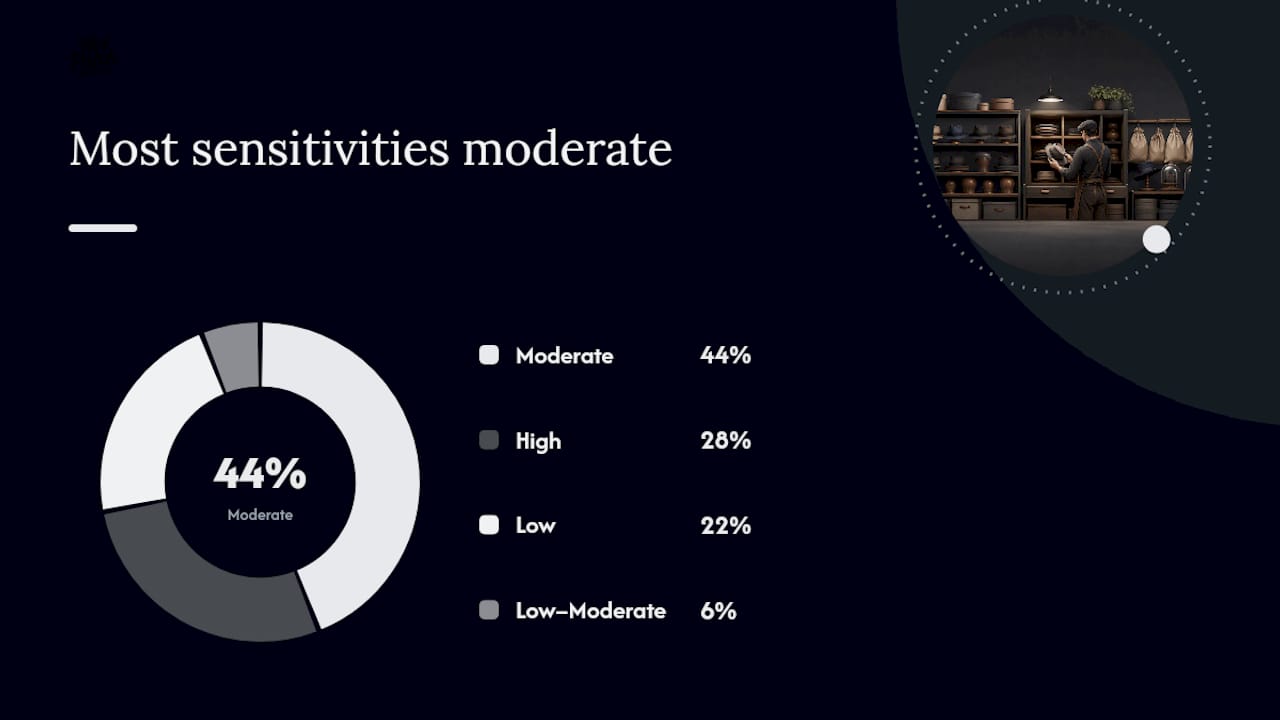
| Material | Temperature sensitivity | Humidity sensitivity | Light sensitivity |
|---|---|---|---|
| Embroidered | Moderate | High (thread absorbs moisture) | Moderate |
| UV-printed | Moderate | Low–Moderate | High (ink fade) |
| Leatherette | High (warps above 80°F) | Moderate | Moderate |
| PVC | Moderate | Low | Low (off-gassing risk) |
| Acrylic | High (edge cracking with swings) | Low | Low |
| Woven | Moderate | High | Moderate |
What packaging and supplies protect patch inventory best?
Archival, PVC-free materials are the standard for long-term preservation: acid-free sleeves, lignin-free boards, and UV-protective covers prevent both color fade and material degradation. These aren’t just collector practices; they apply directly to commercial inventory held for more than a few weeks.
For packaging, use:
- Archival poly bags (4-mil minimum, heat-sealable) for individual lots or small batches
- Acid-free tissue interleaving between stacked patches to prevent surface transfer
- Rigid acid-free boxes for long-term storage, sized so patches lie flat without compression
- Silica gel pouches inside every sealed container, replaced or recharged when the indicator changes color
- Humidity indicator cards inside opaque boxes where you can’t see a hygrometer directly
For adhesive-backed patches specifically, keep the release liner intact until the moment of application. Stack them liner-side down in a single layer or use interleaving sheets between layers. Never bundle them with rubber bands, which compress the adhesive unevenly.
Pro Tip: Photograph each lot before sealing the box: one shot of the patches, one of the label showing lot code, date, and adhesive batch number. Store the photos in a shared folder organized by lot. When a customer reports an adhesion issue three months later, you’ll have a timestamped record of the condition at intake, which is worth more than any written log.
How do you store adhesive-backed patches to preserve tack?
Adhesive-backed patches are the most storage-sensitive item in your inventory. The thermally activated polymer or pressure-sensitive adhesive on the back degrades faster than the patch itself when storage conditions slip.
Follow these steps for every adhesive-backed lot:
- Leave liners intact. Never remove the release liner until application. Exposed adhesive picks up dust, oils, and ambient moisture within hours.
- Store cool and flat. Temperatures above 80°F begin to soften many thermally activated adhesives, reducing bond strength before the patch ever reaches a hat.
- Avoid compression. Stacking heavy boxes on top of adhesive-backed patches deforms the adhesive layer and can cause it to bond to the liner permanently.
- Keep away from solvents. Cleaning products, paint fumes, and even strong adhesive sprays nearby can migrate into packaging and degrade tack.
- Allow cure time before use. MaggieFrameStore notes that adhesive-backed patches benefit from a 24–48 hour cure period after application before the first wash, and that cold, gentle washing without fabric softener extends bond life significantly.
Adhesive-backed patches need both environmental control and procedural controls, leaving liners on and avoiding compression, to maintain tack. These procedures are inexpensive to implement but prevent most failures before they start.
For pressure-activated adhesives, like those used on Hat Patch Supply’s FoundryTags, the liner protects a bond that activates under firm hand pressure. These are especially sensitive to partial compression during storage, which can pre-activate the adhesive unevenly.
Pro Tip: Pull one patch from a lot that’s been in storage for 60 days or more and run a thumb-press test on a fabric scrap. If tack has dropped noticeably, test three more from different positions in the box. Uneven tack across a lot usually points to a humidity or compression problem, not a product defect.
How do you monitor and control your storage environment?
Daily temperature swings of more than 10°F stress adhesives and cause dimensional changes in embroidered and woven patches.
Set up monitoring with these steps:
- Place a digital hygrometer at shelf height in each storage zone, not near doors or HVAC vents where readings spike artificially.
- Check readings twice daily during the first two weeks in a new space to establish your baseline swing range.
- Log any reading outside the 40%–60% RH band or outside 55°F–75°F temperature range as a deviation event.
- Use rechargeable silica gel pouches inside sealed containers; replace or recharge when the indicator beads turn pink.
- For storage rooms holding more than 500 units, a low-cost USB data logger (under $30 at most office supply retailers) gives you a continuous record without manual checks.
For light control, keep patches in opaque boxes or UV-blocking sleeves. A single south-facing window in a storage room can fade UV-printed ink in weeks during summer. Fluorescent lighting also emits UV; LED lighting is a straightforward swap that reduces cumulative exposure.
- Keep storage areas clean and sealed against insects and rodents, which damage thread-based patches.
- Avoid cardboard boxes directly on concrete floors, where moisture wicks upward.
- Never store patches near paint, solvents, or cleaning supplies.
Pro Tip: A $12 indicating silica canister on each shelf gives you a passive visual check every time you walk past. When the beads turn pink, you know the RH in that zone has crept up before your hygrometer log catches it.
Short-term vs. long-term storage: how long can patches sit?
Storage requirements tighten as inventory ages. Short-term stock (0–90 days) needs basic environmental control and sealed packaging. Medium-term inventory (3–12 months) requires desiccant management, periodic inspection, and FIFO rotation. Long-term storage (12+ months) demands archival-grade packaging, logged environmental data, and a formal re-inspection policy.
For adhesive-backed patches, plan a practical shelf life of 12–18 months under proper conditions before adhesive performance becomes unreliable. Non-adhesive patches (embroidered, woven, PVC) can hold quality for several years with correct storage. These are working guidelines, not guarantees; actual performance depends on your specific adhesive formulation and storage environment.
Implement FIFO (first in, first out) with lot codes on every box: format as [Material]-[YYYYMMDD]-[Lot#]. Example: UV-20250315-004. Pull the oldest lot first for every order.
| Storage phase | Duration | Key requirements | Inspection cadence |
|---|---|---|---|
| Short-term | 0–90 days | Sealed bags, hygrometer, desiccant | At intake and before shipping |
| Medium-term | 3–12 months | Archival packaging, logged RH/temp, FIFO | Monthly visual check |
| Long-term | 12+ months | Acid-free boxes, data logger, formal re-inspection policy | Every 90 days with adhesion test |
- Log the date, RH reading, temperature, and any visual anomalies at each inspection.
- Flag any lot showing edge lift, color shift, or liner adhesion for immediate QA testing.
- Retire adhesive-backed lots that fail two consecutive adhesion tests rather than attempting repeated rework.
What QA checks should you run before shipping patches?
A two-minute check before shipping prevents returns that take two hours to resolve. Run this sequence on every outgoing lot:
- Visual scan: Check for color fade, fraying at edges, cracking in PVC or acrylic, and any edge lift on adhesive-backed patches.
- Liner integrity check: Confirm the release liner is fully attached and peels cleanly without pulling adhesive.
- Thumb-press adhesion test: On a fabric sample, press one patch for five seconds with firm thumb pressure. It should hold without sliding and release cleanly from your thumb.
- Heat-activation spot check (adhesive-backed): For thermally activated patches, use a heat press at the manufacturer’s recommended temperature and dwell time on a scrap piece of hat fabric. A properly stored patch bonds firmly with no lifting at the edges after cooling.
Log these fields for each lot tested:
- Lot code and date
- Ambient RH and temperature at time of test
- Number of patches sampled vs. total lot size
- Pass/fail result and any observed defects
Pro Tip: If two or more patches in a sample fail the adhesion test, stop the lot from shipping. Partial failures in a sample almost always mean the full lot has degraded unevenly. Document the failure, isolate the box, and run the troubleshooting flow before making a customer-service decision.
What do you do when adhesive or materials fail before shipping?
Work through this sequence before deciding to rework or reject:
- Identify the symptom: Weak tack, liner bonding to adhesive, color shift, edge warping, or cracking.
- Run a controlled test: Test three patches from different positions in the lot to confirm the failure is lot-wide, not isolated.
- Attempt safe remediation: For thermally activated adhesives with reduced tack, a controlled heat-reactivation pass using a heat press at the correct temperature and pressure can restore bond strength. Hat Patch Supply’s heat press application guide covers safe reactivation parameters.
- Retest: After remediation, run the full QA sequence on the reworked patches before releasing the lot.
Do not attempt:
- Solvent cleaning of adhesive surfaces (degrades tack permanently)
- Aggressive heat above the adhesive’s rated temperature (causes adhesive migration or burn-through)
- Re-adhering a liner that has already bonded to the adhesive (the bond is compromised; replace the patch)
Hat Patch Supply’s adhesive failure analysis identifies contamination, heat and humidity exposure, and poor initial adhesive quality as the three primary failure modes. If rework fails a second test, the lot should be rejected and documented for supplier follow-up, not shipped.
Pro Tip: Keep a small rework log: lot code, failure symptom, remediation attempted, retest result. After six months, patterns in that log tell you whether a failure is a storage problem on your end or a recurring quality issue with a specific product or supplier.
Red flags that predict storage failures
Catching these early prevents large-scale losses:
- Relative humidity above 60% in any storage zone: isolate all open lots immediately, add desiccant, and recheck within 24 hours.
- Heat exposure above 80°F: adhesive-backed lots exposed to high heat should be quarantined and tested before any orders ship.
- Stacked or creased patches: compression damage to embroidered or woven patches is permanent; folded adhesive-backed patches often show uneven tack.
- Missing or damaged liners: any adhesive-backed patch with a compromised liner should be tested before shipping, not assumed good.
- PVC patches stored with other materials: off-gassing plasticizers can migrate to adjacent embroidered or leatherette patches over weeks.
- Dirty or open storage: dust and airborne oils contaminate adhesive surfaces even through loosely sealed bags.
The most common storage mistake we see isn’t a dramatic failure — it’s a box of adhesive-backed patches left on a shelf near a heat vent for two months, with no liner check and no desiccant. By the time an order ships, tack has dropped enough to generate returns, but not enough to fail a casual visual inspection.
Shipping-related failures often mimic storage failures: patches compressed in transit, exposed to temperature extremes in a delivery truck, or packed against solvent-containing materials. Log the shipping method and packaging for any lot that generates a return, so you can separate transit damage from pre-ship storage issues.
What we’ve learned about storage at Hat Patch Supply
We’ve written step-by-step application and troubleshooting posts because the questions we hear most often aren’t about design — they’re about why a patch that looked perfect in the bag failed on the hat. In almost every case, the root cause traces back to storage: a liner left off, a box stored near a heat source, or a lot shipped without a quick adhesion check.
Our UV vs. laser vs. embroidered comparison guide goes deeper on material-specific handling, and our adhesive troubleshooting posts cover the most common bond failures we see in the field. If you’re working through a specific storage or adhesion issue, reach out directly. We’d rather help you test a small sample now than troubleshoot a return later.
Storage-ready patches from Hat Patch Supply
Every patch Hat Patch Supply ships arrives with its release liner intact and is packaged to survive transit without adhesive degradation. Our custom UV-printed hat patches and custom acrylic patches are built for inventory that sits on a shelf before it ships, with adhesive formulations selected for stability under the temperature and humidity ranges covered in this guide.

If you’re building out a patch inventory and want to confirm the right storage approach for a specific product, contact our team for a sample kit. We’ll send you a small lot to test your storage setup before you commit to a larger order.
Sources
- What is the best way to store woven patches? - Blog - Kaishen
- Adhesive Backing for Patches: How to Choose, Apply, and Maximize Durab – MaggieFrameStore
Recommended
- Trouble Maker Hat Patch - Unique and Trendy Accessories – Hat Patch Supply
- Hat Patch Making Made Simple: 7 Powerful Tips to Create Custom Hats That Stand Out - Hat Patch Supply by Hat Foundry
- Why Do Cheap Patches Fall Off Hats? – Hat Patch Supply
- Thin Red Line UV Printed Hat Patch - Quality and Durability – Hat Patch Supply
Ready to press your own?
Custom UV patches with no minimum, shipped in 72 hours — or grab a free-shipping sample pack first.