


Hat Patch University
Custom PVC Hat Patches: Your Complete Buying Guide

For most hat branding needs, 3D soft-rubber PVC hat patches are the right call. They’re waterproof, flexible, and hold color better than embroidered alternatives under UV exposure and repeated washing. Here’s what to do next:
- Choose your backing: Heat-applied adhesive for a permanent professional bond, sew-on when curved placement or high-stress wear is a concern, or hook-and-loop for interchangeable branding.
- Order a proof first: Request a low-quantity sample from Hat Patch Supply before committing to a full production run. Confirm your artwork file specs (vector preferred, 300 DPI minimum for raster) at the same time.
- Confirm your size: For standard hat front panels, most patches land between 2"–3.5" wide and 1"–2.5" high.
Pro Tip: If you’re applying patches to structured trucker hats or snapbacks, a dual-platen heat press gives you the most consistent adhesive penetration. A top-only press can leave cold spots under the brim.
Key Takeaways
Custom 3D PVC hat patches deliver the most durable, weatherproof, and visually bold branding result for hats when sized correctly, backed appropriately, and applied with a dual-platen heat press.
| Point | Details |
|---|---|
| Best patch type for hats | 3D soft-rubber PVC patches offer waterproof, flexible, high-color-saturation branding for most hat styles. |
| Sizing guideline | Target 2"–3.5" wide by 1"–2.5" high for trucker hats and snapbacks; max front panel is about 2" H x 4" W. |
| Strongest attachment method | Dual-platen heat press delivers the most even adhesive penetration and prevents edge lifting. |
| Design limit to follow | Keep stacked detail to three layers above the base to preserve flexibility and prevent pull-away. |
| Recommended supplier | Hat Patch Supply offers no-minimum UV-printed and adhesive-backed hat patches with fast production turnaround. |
Table of Contents
- What are PVC hat patches and why do they work for branding?
- Design and customization choices that affect your final patch
- What size patch fits your hat style?
- How to attach PVC patches to hats: methods and step-by-step guidance
- What to expect for pricing, minimums, and production timelines
- How to evaluate a PVC patch supplier before you order
- What most buyers get wrong about PVC patches
- Hatpatchsupply makes ordering custom hat patches straightforward
- Sources
What are PVC hat patches and why do they work for branding?
PVC stands for polyvinyl chloride, the soft, flexible rubber-like material used to mold these patches into precise shapes with crisp edges and layered depth. Unlike woven or embroidered patches, PVC patches are cast from molds, which means logos, text, and graphic elements can be rendered in true 3D relief rather than stitched approximations.
The practical benefits are significant. PVC patches are waterproof, soft, and flexible, making them well-suited for hats, outerwear, and heavy apparel that sees regular wear and washing. Color saturation stays sharp because the pigment is embedded in the material itself, not printed on top of a fabric surface. The matte rubber finish reads as premium on both structured and unstructured caps.
Key benefits at a glance:
- Waterproof and weather-resistant: No fraying, no color bleed from rain or sweat.
- Flexible: Conforms to curved hat panels without cracking or peeling.
- High color saturation: Pigment is molded in, not applied on top.
- UV-resistant: Holds color through sun exposure better than most fabric patches.
- Durable against abrasion: The PVC surface resists scuffing from daily handling.
Typical production thickness for hat patches runs 3–5 mm. Thicker patches produce a more pronounced 3D effect, but anything above 5 mm can feel stiff on a soft-front dad cap. For most hat styles, 3–4 mm hits the right balance between visual pop and wearability.
Common use cases include promotional merchandise, uniform insignia, streetwear branding, and tactical or morale patches. The format works equally well for a 12-piece run of custom caps for a small business and a 500-piece production order for a retail brand.
Pro Tip: Request a physical sample in your chosen thickness before approving a full run. The difference between 3 mm and 5 mm is subtle on screen but noticeable on a hat.
Design and customization choices that affect your final patch
Color, texture, and file format decisions made early in the design process determine both how the finished patch looks and how smoothly production goes.
Color and texture options
PVC patches use spot color by default, meaning each color is a separate molded layer. Most suppliers support up to 4–6 spot colors within standard pricing. UV full-color printing, available from suppliers like Hatpatchsupply, removes that color limit entirely and allows photographic-quality gradients and fine detail. For bold logo work on hat fabric, high-contrast spot color tends to read more clearly at a distance. UV printing is the better choice for complex artwork, photography-based designs, or anything with more than six distinct tones.
The 2D vs. 3D distinction matters practically. A 2D patch has a flat face with color differentiation but no raised relief. A 3D patch uses layered mold construction to create physical depth, which catches light and makes logos read more boldly on a hat. Industry guidance recommends limiting stacked detail to no more than three layers above the base to avoid excessive thickness and potential pull-away over time.
Edge and border choices
- Heat-cut edge: Clean, precise border; works well for geometric shapes.
- Recessed sew channel: An outer groove molded into the patch perimeter so stitching sits flush. This is the right choice for curved hat placements where sewing directly to the edge would cause puckering.
- Merrowed border: A wrapped thread edge, more common on embroidered patches but occasionally used on hybrid designs.
Artwork file specs
- Vector files (AI, EPS, SVG): Always preferred. Vectors scale without quality loss and give production teams clean paths to work from.
- Raster files (PNG, JPG): Acceptable at 300 DPI minimum at final patch size. Lower resolution creates soft edges in the mold.
- Color profile: Submit in CMYK for print-based processes; confirm with your supplier whether they require Pantone color callouts for spot-color PVC.
- Clear space and outlines: Expand all text to outlines before submitting. Maintain at least 1.5 mm of clear space between fine details to prevent them from merging in the mold.
Request a digital proof before production and a physical sample proof before a large run. Digital proofs catch color and proportion issues; physical samples confirm thickness, texture, and how the patch sits on an actual hat panel.
What size patch fits your hat style?
Getting the size right is the single most common place buyers lose time on revisions. A patch that looks proportional in a mockup can overwhelm a low-profile dad cap or disappear on a wide-front trucker.
Recommended sizing for trucker hats and snapbacks typically falls in the 2"–3.5" width by 1"–2.5" height range, with 2.25" circles a common choice. For reference, standard hat front panels generally top out at about 2" high by 4" wide as a practical ceiling before the patch begins to distort the cap’s structure. Consult the Hatpatchsupply hat patch size guide for visual examples by hat style.
Long, narrow patches (e.g., 3.5" wide by 1" tall) tend to read well on flat-front truckers but can look awkward on curved panels where the ends lift slightly. Square and circular patches distribute stress more evenly across curved surfaces and are generally the safer choice for unstructured caps.
For side placement above the brim, keep patches under 1.5" in either dimension. Front-center placement at mid-panel is the most forgiving position for both heat application and visual balance.
Pro Tip: Print your design at actual size on paper and hold it against the hat before ordering. It takes 30 seconds and prevents the most common sizing mistake.
How to attach PVC patches to hats: methods and step-by-step guidance
There are three primary attachment methods for PVC patches on hats: heat-applied adhesive, hook-and-loop (Velcro), and sew-on, with heat application generally delivering the most permanent professional bond.
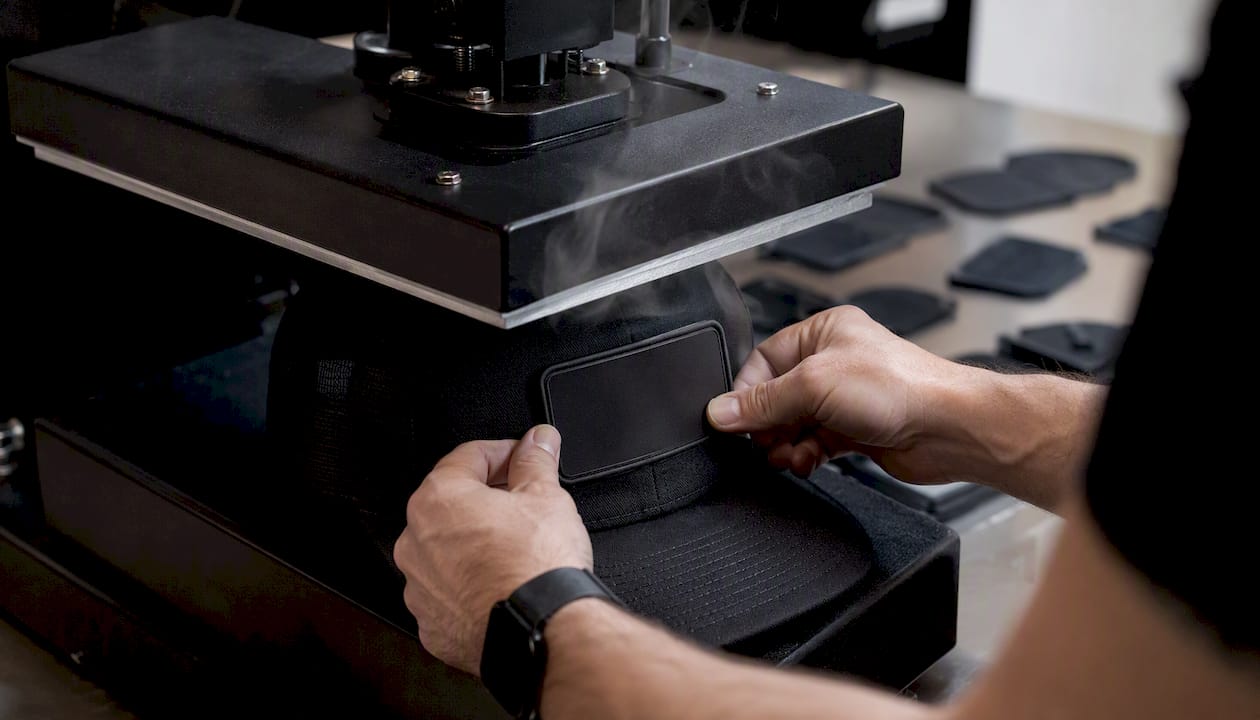
Heat-applied adhesive
This is the method we recommend for most production runs. The patch arrives with a thermally activated polymer backing that bonds to fabric under heat and pressure.
Step-by-step:
- Pre-press the hat panel for 3–5 seconds to remove moisture and wrinkles.
- Position the patch on the hat front panel, centered and level.
- Cover with a silicone pressing sheet or parchment paper to protect the PVC surface.
- Press at the temperature and time specified by your adhesive supplier (typically 300–320°F for 10–15 seconds).
- Allow to cool completely before handling. Do not peel back the patch while warm.
- Test bond strength by applying light lateral pressure. Re-press if any edge lifts.
For the strongest bond, use a heat press that applies heat from both the top and bottom so the adhesive penetrates fabric evenly and prevents lifting. A top-only press can leave cold spots, particularly under the brim or inside the crown. See Hatpatchsupply’s guide on applying heat-pressed patches for press-specific settings.
Pros: Fastest application, clean professional finish, no visible stitching. Cons: Requires a heat press; not ideal for very curved or heavily structured panels without a hat-specific platen.
Sew-on
Best for curved placements, high-stress wear, or any application where the patch must outlast the hat itself. A recessed sew channel molded into the patch perimeter keeps stitching flush and prevents puckering on curved panels.
Best practices: Use a polyester thread that matches or complements the patch border. A straight stitch around the perimeter works for most applications; a zigzag stitch adds holding strength on stretch fabrics. Keep stitch tension consistent to avoid drawing the hat fabric inward.
Pros: Maximum long-term durability; no equipment beyond a sewing machine; works on any hat style. Cons: Slower per unit; visible stitching (though often a design feature); requires a sew channel for clean results on curved panels.
Hook-and-loop (Velcro)
Useful for tactical gear, event merchandise, or any application where the patch needs to be swapped between hats. Attach the loop side to the hat and the hook side to the patch backing.
Pros: Fully interchangeable; no tools required for the end user. Cons: Lower holding strength than heat or sew; hook side can snag hat fabric if not properly aligned; not suitable for washed garments without reinforcement.
What to expect for pricing, minimums, and production timelines
Pricing for custom PVC patches follows a straightforward volume curve: unit cost drops as quantity increases, and 3D molded designs carry a modest premium over flat 2D patches because of the tooling involved.
- Low minimums and sample options: Some suppliers offer small-quantity proof orders (often as few as 5 units) so you can confirm fit and bonding before committing to a full run. Hatpatchsupply’s no-minimum policy means you can order a single proof without a large upfront commitment.
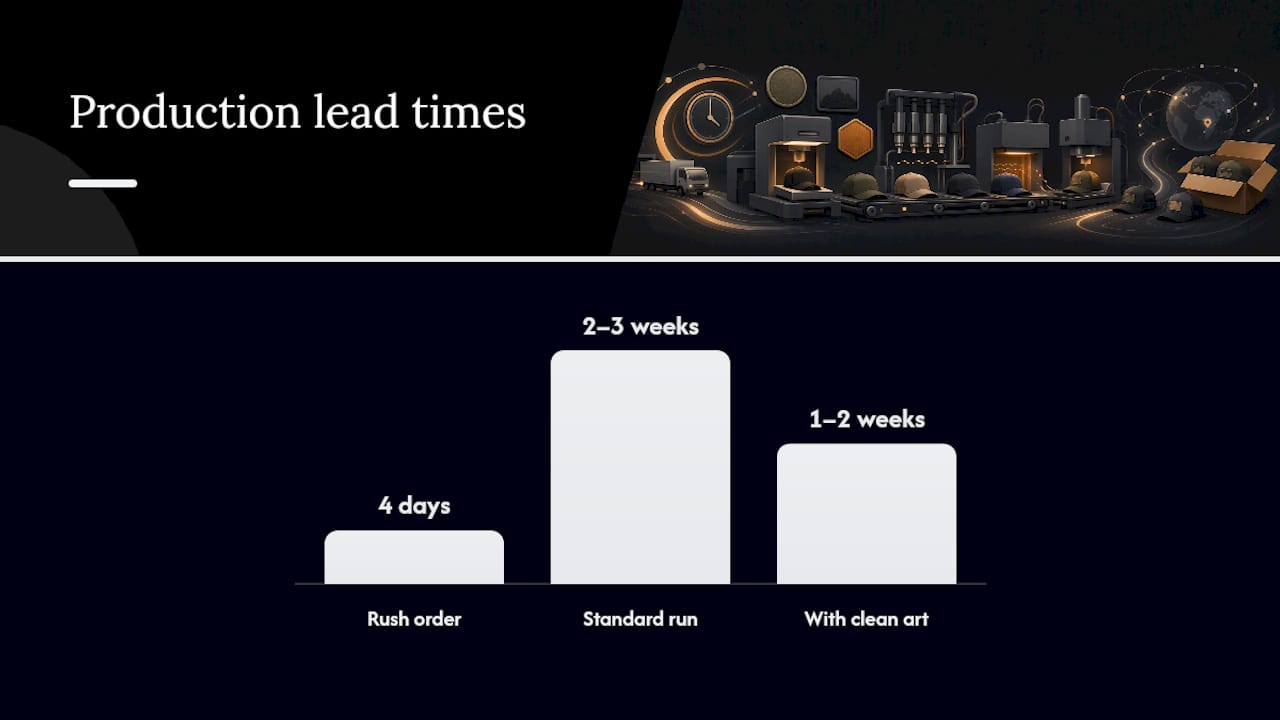
- Typical turnaround: Standard custom runs commonly take 2–3 weeks from art approval to shipping. Some providers advertise turnaround as fast as 4 days for rush orders, though rush options add cost.
- Variables that affect price: Additional spot colors, special border treatments (recessed sew channel, merrowed edge), expedited shipping, and mold/tooling fees for first-time custom shapes.
- Art approval: The fastest path to production is submitting a clean vector file with outlined text and confirmed Pantone or CMYK color callouts. Revisions to artwork after proof approval restart the production clock.
- Wash care: Heat-applied PVC patches hold through multiple wash cycles when applied correctly. Machine wash cold is the standard recommendation for longevity.
Pro Tip: Build art approval time into your project schedule. A clean file submitted on day one can cut a full week off your total lead time.
How to evaluate a PVC patch supplier before you order
Not every supplier who advertises custom PVC patches delivers the same quality or transparency. Here’s what to look for and what to avoid.
Must-have capabilities:
- Clear artwork specifications published on the product page (file types, DPI, color profiles)
- Digital proof included before production, with physical sample option available
- Low-minimum or no-minimum order options for first-time buyers
- Multiple backing options: heat-applied adhesive, sew-on, and hook-and-loop at minimum
- Sew channel available as a standard option for curved hat placements
Production transparency signals:
- Quoted lead times stated per product, not buried in fine print
- Visible sample images showing actual finished patches (not just renders)
- Clear policy on revisions, refunds, and sample costs
- Stated PVC thickness and UV/wash resistance specs
Red flags:
- Pricing significantly below market with no proof sample offered
- Vague or missing artwork requirements
- No sew-channel option for hat-specific orders
- No accessible customer support channel before purchase
- Production brokered through an unnamed third party with no quality accountability
A supplier who publishes specific material specs, shows real sample photography, and offers a low-quantity proof order is signaling confidence in their output. That combination is worth more than the lowest per-unit price.
What most buyers get wrong about PVC patches
The detail vs. thickness tradeoff is where we see the most preventable production problems. Buyers often push for maximum 3D detail, adding four or five raised layers to a small patch, then are surprised when the finished piece feels stiff or starts to separate at the edges after a few months of wear.
The practical rule: keep stacked detail to three layers above the base. That limit preserves flexibility, keeps the patch weight low enough to avoid deforming unstructured caps, and gives the adhesive backing a flat enough surface to bond evenly. A well-designed two-layer patch with strong color contrast will outperform a five-layer patch with marginal detail differences every time.
The other consistent mistake is skipping the physical proof. A digital mockup on a flat screen doesn’t tell you how a 4 mm patch sits on a curved dad cap front. Order the sample. Confirm the bond. Then run production.
Hatpatchsupply makes ordering custom hat patches straightforward
Custom hat patches shouldn’t require a large minimum order, a long production wait, or a back-and-forth over artwork specs. Hatpatchsupply offers full-color UV-printed hat patches with no minimum order requirement, adhesive backing as standard, and fast production turnaround built for hat makers and brands who need results quickly.
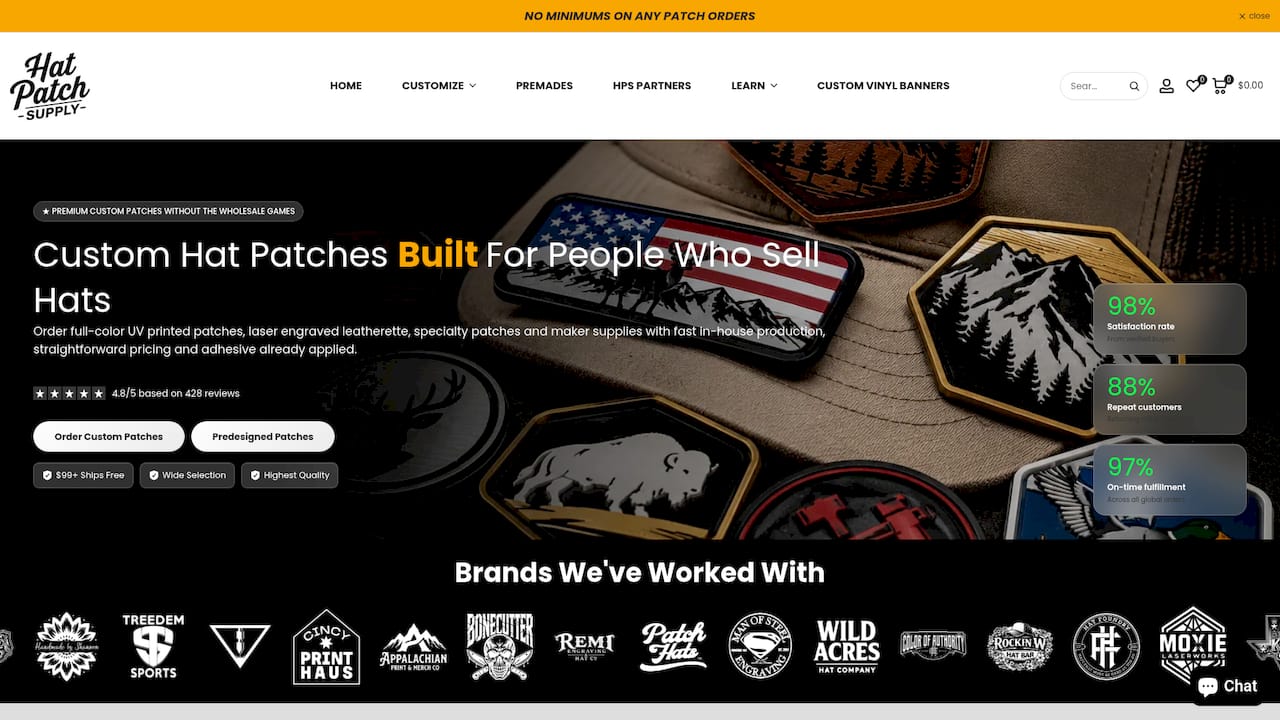
The product range covers UV-printed patches for vibrant full-color designs, laser engraved leatherette patches for a premium textured finish, and pre-designed options like the Brotherhood firefighter patch if you want to see production quality before ordering custom. Every product page lists backing options, turnaround times, and sample images of finished patches on actual hats. To get started, visit Hatpatchsupply, confirm your artwork specs, choose your backing and border, and request a proof. Production moves once art is approved.
Sources
The following sources were used for technical guidance on attachment methods, sizing, and material specifications:
Recommended
- UV Printed Hat Patches: The Complete Guide for Custom Hat Makers - Hat Patch Supply by Hat Foundry
- UV Printed vs. Laser Engraved vs. Embroidered Hat Patches: Which Shoul – Hat Patch Supply
- Hat Patch Making Made Simple: 7 Powerful Tips to Create Custom Hats That Stand Out - Hat Patch Supply by Hat Foundry
- What Are Custom UV Hat Patches? The Future of Full-Color Hat Branding – Hat Patch Supply
Ready to press your own?
Custom UV patches with no minimum, shipped in 72 hours — or grab a free-shipping sample pack first.