


Hat Patch University
How to Sew PVC Patches for a Durable, Lasting Finish

Yes, you can sew PVC patches, and doing so gives you the strongest, longest-lasting attachment available for a rigid or semi-rigid patch. Sewing beats adhesive alone whenever the patch will face regular wear, washing, or abrasion. The catch is that PVC does not behave like woven fabric under a needle, so the technique matters more than it does with an embroidered patch.
Here is the quick decision guide we give customers before they pick up a needle:
- Sew it for jackets, bags, uniforms, and anything that gets washed or handled roughly. This is the most durable long-term method.
- Glue it with a flexible adhesive like E6000 when the fabric is heat-sensitive or you need a fast, temporary fix.
- Hook and loop it when the patch needs to come off and go back on regularly, such as tactical gear or seasonal displays.
- Combine methods (adhesive plus a perimeter of stitches) when you want maximum hold on a high-wear item.
Hat Patch Supply produces both sewable and adhesive-backed patches, including PVC and UV-printed options, so the method you choose can match the product you order rather than forcing a workaround. A well-placed backstitch, the right needle, and a few minutes of prep will get you a patch that survives the dryer, not just the first wash.
Key Takeaways
Sewing gives PVC patches their strongest, most durable hold, but success depends on matching your needle, thread, and stitch choice to the patch and fabric in front of you.
| Point | Details |
|---|---|
| Gather the right tools first | Use a leather or ballpoint needle, polyester thread, and a thimble before starting any patch. |
| Test fabric and backing | Check the care tag for heat sensitivity and thin the iron-on layer before sewing thick patches. |
| Choose your stitch by use case | Backstitch for heavy wear, whip stitch for beginners, invisible stitch for hidden repairs. |
| Combine adhesive and stitching for longevity | Use E6000 to hold the patch flat, then sew the perimeter for maximum durability. |
| Practice on scraps and buy sewable patches | Test technique on scrap fabric first, then order sewable or adhesive-backed patches from Hat Patch Supply to match your method. |
Table of Contents
- Sew PVC Patches: What You Need Before You Start
- How Do You Prep the Garment Before Sewing?
- Hand-Sewing PVC Patches: Stitch Choices and Technique
- Machine-Sewing PVC Patches: Settings and Safe Technique
- Alternatives to Sewing: When Glue or Hook and Loop Makes More Sense
- Fixing Common Problems and Caring for Sewn Patches
- How to Remove a PVC Patch Without Damaging the Fabric
- Stitch Cheat Sheet: Time, Cost, and Advanced Techniques
- Safety Precautions When Combining Adhesives With Stitching
- Why Testing on Scraps Beats Testing on the Garment
- Ready-Made Sewable and Adhesive-Backed Patches From Hat Patch Supply
- Frequently Asked Questions
- Sources
Sew PVC Patches: What You Need Before You Start
Rushing into a rigid patch with whatever needle happens to be in your kit is the fastest way to snap it, bend it, or leave a crooked hole in the patch face. PVC does not flex or give the way canvas or denim does, so your tools need to work with that rigidity instead of fighting it.
Needles. For hand sewing, reach for a heavy-duty needle designed for leather or a ballpoint needle if the patch backing has any give. A leather needle’s cutting point punches through vinyl cleanly instead of dragging fibers or splitting the material. For machine work, a size 90/14 to 100/16 denim or leather needle handles most patch thicknesses; anything finer tends to deflect off the PVC surface and bend.
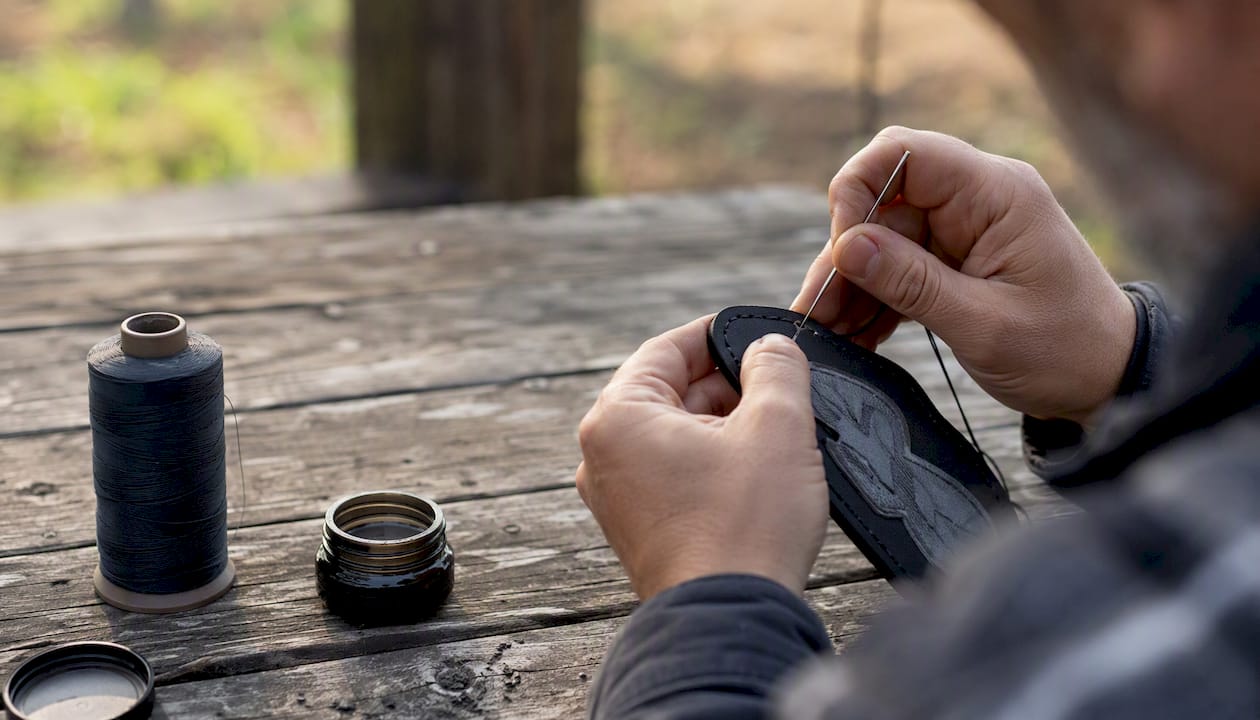
Thread. Polyester thread is the standard choice because it resists the flexing and micro-abrasion that a sewn patch endures. A topstitch or jeans-weight thread (roughly Tex 40 to Tex 70) gives visible stitches more presence and strength for exposed areas like jacket sleeves. Match thread color to the patch border for a nearly invisible finish, or pick a contrasting color if you want the stitching to read as a design detail.
Adhesives and temporary holds. E6000 is the adhesive we point people toward most often because it stays flexible after curing and bonds well to both PVC and most garment fabrics. Fabri-Tac and Tear Mender work for lighter, faster fixes but tend to be less forgiving with movement over time. For holding the patch in place while you sew, temporary spray adhesive or low-tack painter’s tape works better than pins on rigid PVC.
Support tools. A thimble or a jar-gripper saves your fingers when pushing a needle through thick vinyl. An awl or a small hole punch lets you pre-punch pilot holes on very thick or multi-layer patches. Sewing clips, tailor’s chalk, and a small pair of embroidery scissors round out the kit.
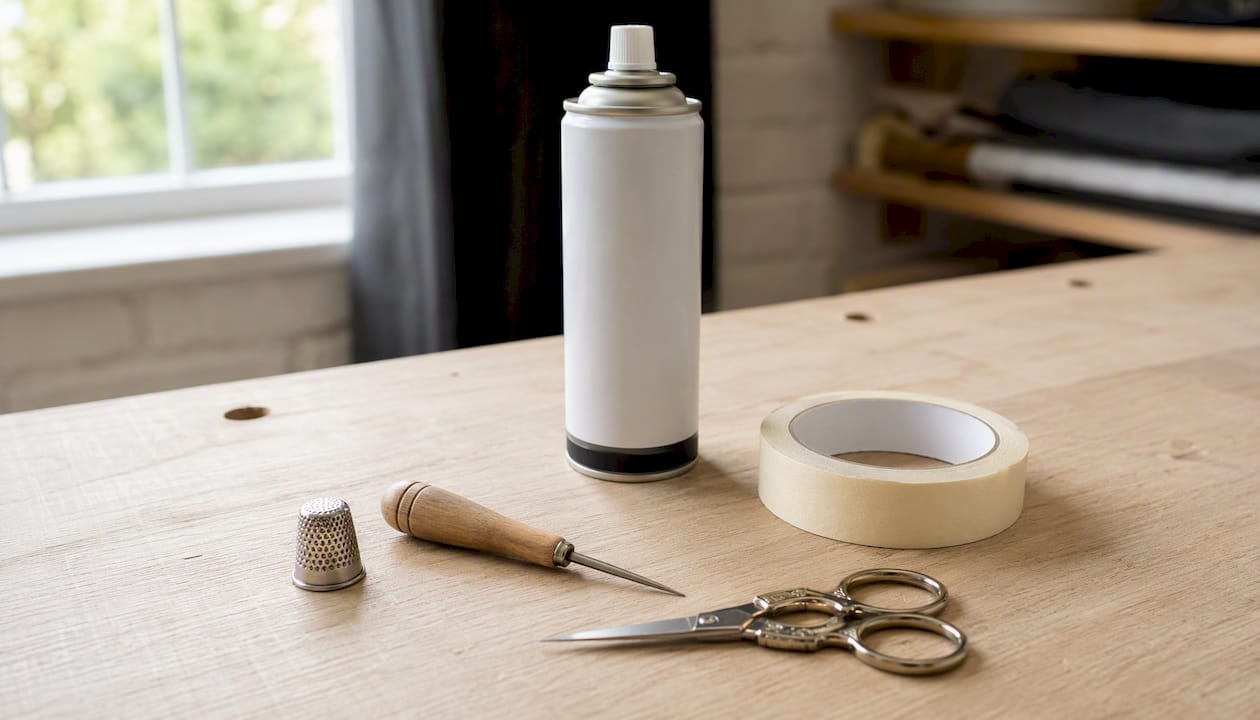
Pro Tip: Skip the pins on rigid PVC. A pin forced through vinyl backing leaves a permanent puncture mark and can crack the edge of a thick patch. Use temporary adhesive spray or tape to hold it in place while you stitch instead.
How Do You Prep the Garment Before Sewing?
Good prep prevents most of the failures people blame on “bad stitching.” Start by checking the garment’s care tag. If it lists any heat sensitivity, avoid ironing directly over the patch area unless you are using a low-heat pressing cloth as a buffer.
Many PVC patches ship with a thin iron-on layer on the back, meant as a temporary hold before permanent attachment. That shiny layer adds resistance when you push a needle through it, which is one of the leading causes of needle wear and breakage on thick patches. Test a corner first. If the backing feels stiff or glossy, peel or thin it before sewing rather than fighting through it stitch by stitch, as detailed in this guide on repairing peeling faux leather.
If you are patching over a hole, worn spot, or frayed seam, reinforce the area first. A scrap of iron-on interfacing or a fabric underpatch behind the hole gives your stitches something solid to anchor into instead of pulling against weakened fibers.
Positioning matters as much as reinforcement:
- Lay the garment flat and try the patch in a few spots before committing.
- Avoid seams, zippers, and high-stretch areas like elbows or knees, since PVC will not flex with the fabric underneath.
- Mark the final placement with tailor’s chalk on all four sides.
- Apply a light coat of temporary spray adhesive or a strip of low-tack tape to hold the patch flat.
- Double-check alignment from a few feet away before threading your needle.
Quick prep checklist to run through before the first stitch:
- Garment care tag reviewed for heat sensitivity
- Iron-on backing removed or thinned if present
- Weak fabric reinforced with interfacing or underpatch
- Placement marked and patch temporarily secured
- Needle and thread matched to patch thickness
Hand-Sewing PVC Patches: Stitch Choices and Technique
Hand sewing gives you the most control, which makes it the better choice for small patches, curved edges, or any spot where a machine’s presser foot cannot reach comfortably. For maximum strength, use a backstitch. For a first attempt, a whip stitch is more forgiving and keeps the patch oriented correctly while you work, a point stitch guides for hand-sewn patches consistently back up.
Here is the process from start to finish:
- Thread your needle with a doubled length of polyester thread, roughly 24 to 30 inches before doubling, and knot the end.
- Start from the underside of the fabric, bringing the needle up through a pre-marked point about 1/8 inch from the patch edge.
- Push the needle down through the patch itself, angling slightly to reduce stress on the vinyl.
- For a backstitch, bring the needle back up ahead of your last stitch, then down through the point where the previous stitch ended, building an overlapping line.
- Keep stitch spacing tight and even, with small, consistent intervals, tighter on corners and curves.
- When working around a curved edge, take smaller, more frequent stitches to hug the shape without puckering the fabric underneath.
- Finish by weaving the thread tail through two or three existing stitches on the underside before trimming, rather than relying on a single knot.
| Stitch | Best For | Pros | Cons |
|---|---|---|---|
| Backstitch | Heavy-wear areas, jackets, bags | Strongest hold, resists pulling | Slower, more visible on the front |
| Whip stitch | Beginners, lightweight fabric | Easy to learn, keeps patch flat | Less durable under heavy stress |
| Blanket stitch | Decorative edges, visible borders | Neat finish, doubles as trim | Takes longer, needs even spacing |
| Invisible stitch | Hidden repairs, delicate fabric | Nearly undetectable from the front | Weaker on thick or rigid PVC |
Pro Tip: On a patch thicker than a standard credit card, pre-punch pilot holes with a small awl before sewing. A thimble or jar-gripper also saves your fingertips when pushing through multiple layers of vinyl and fabric at once.
For any patch that will see real abuse, a second row of stitches just inside the first adds insurance without much extra time. Backtrack over your last two stitches before cutting the thread. That small habit stops the whole seam from unraveling if one stitch eventually snaps.
Machine-Sewing PVC Patches: Settings and Safe Technique
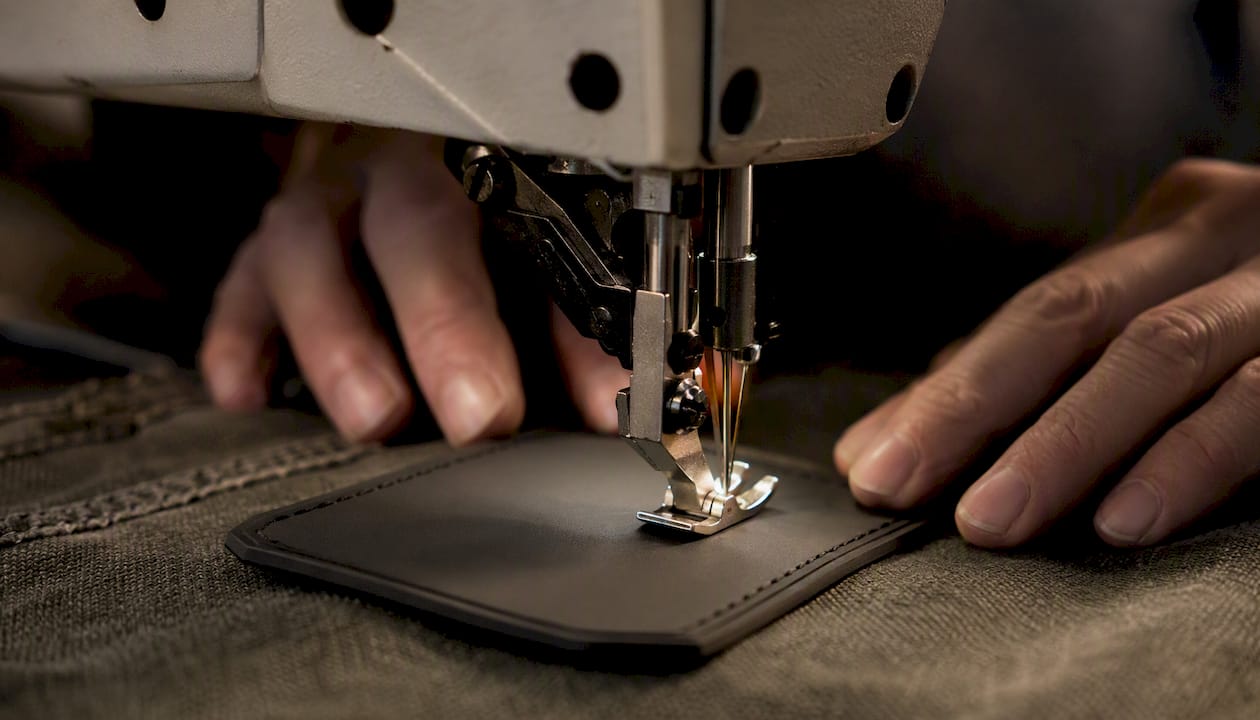
A sewing machine is the better call when you are attaching several patches, want a perfectly uniform stitch line, or need to move fast. The tradeoffs are real, though: rigid PVC can deflect a needle mid-stitch, and any leftover adhesive on the patch back can gum up your needle and plate over time.
Machine settings that work well for most PVC patches:
- Needle: size 90/14 to 100/16, denim or leather point
- Presser foot: a walking foot or non-stick (Teflon-coated) foot to move smoothly over the vinyl surface
- Stitch length: 2.5 to 3mm, longer than you would use on standard fabric
- Tension: slightly reduced from your default setting to prevent puckering around the rigid patch edge
- Thread: polyester top and bobbin thread in matching weights
The stepwise process:
- Anchor the patch with a few short reverse stitches at your starting point.
- Sew slowly along one edge, letting the feed dogs pull the fabric rather than pushing the patch yourself.
- At corners, stop with the needle down, lift the presser foot, and pivot before continuing.
- On thick merrow-edged or raised-texture patches, switch to hand-finishing for the tightest corners if the machine starts skipping stitches.
- Finish with another short reverse stitch to lock the seam.
A common sticking point with machine sewing is adhesive residue transferring onto the needle and throat plate, which causes skipped stitches and thread snags. Wipe the needle with a bit of rubbing alcohol every few patches if you notice buildup. If a needle breaks mid-stitch, stop immediately, check for any fragment lodged in the fabric, and swap in a fresh needle before continuing.
For patches on slippery synthetics like polyester shells, some sewers report that a rigid PVC or rubber patch needs pilot holes or a heavier needle to avoid the patch sliding or the needle deflecting off the surface. If your machine struggles through the thickest section of a patch, finish that spot by hand rather than forcing it and risking a broken needle or a skipped, weak stitch.
Alternatives to Sewing: When Glue or Hook and Loop Makes More Sense
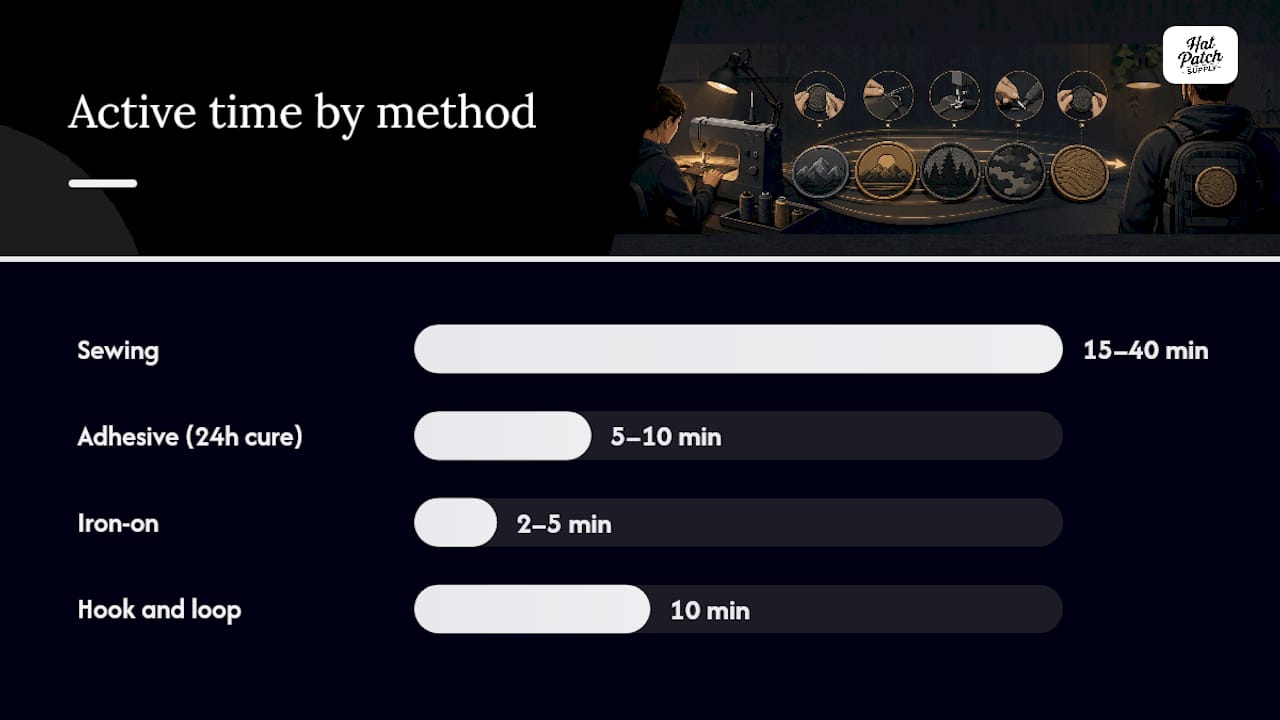
Sewing is not always the right answer, and pretending otherwise does readers a disservice. Sometimes the fabric cannot take a needle without visible damage, or the patch needs to be temporary. Here is how the main alternatives stack up.
| Method | Best For Durability | Best For Heat-Sensitive Fabrics | Tools Needed | Time Required | Pros/Cons |
|---|---|---|---|---|---|
| Sewing | Highest durability, withstands washing | Not applicable, no heat used | Needle, thread, thimble | 15 to 40 minutes per patch | Strongest hold; visible stitching, more effort |
| Adhesive (E6000) | Good, especially combined with stitching | Yes, no heat required | Adhesive, applicator, ventilation | 5 to 10 minutes plus 24 hour cure | Fast and flexible; can degrade faster under heavy abrasion |
| Iron-on | Moderate, depends on fabric | No, heat can warp PVC or synthetics | Iron, pressing cloth | 2 to 5 minutes | Quick; risky on heat-sensitive material |
| Hook and loop | Moderate, best for removable use | Yes, no heat required | Sew-in loop backing, hook pad | 10 minutes to attach backing | Fully removable; less secure under stress |
E6000 remains the adhesive we recommend most for bonding PVC because it cures flexible rather than brittle, which matters on a patch that will bend with the garment. Fabri-Tac and Tear Mender are reasonable substitutes for lighter applications. Whatever you choose, clean the bonding surface first and work in a ventilated space, since most of these adhesives carry strong fumes while curing.
Iron-on attachment has a real limit with PVC: too much heat can warp the patch or melt synthetic garment fibers underneath it. If your fabric care tag warns against high heat, skip the iron entirely and use one of the alternatives above, or check a comparison of heat-activated adhesive options before committing.
Hook and loop is the right call for anything you want to swap out seasonally or by event. Sew the loop side onto the garment (loop attaches more securely to fabric than hook does) and let the patch’s hook backing do the rest.
The strongest combination we see in practice is temporary adhesive to hold the patch flat, followed by a full perimeter of stitches. That gets you the speed of glue during setup and the long-term strength of stitching once you are done.
Fixing Common Problems and Caring for Sewn Patches
Even a careful job runs into small snags. Here is how to solve the ones we hear about most:
- Skipped stitches on the machine: usually adhesive residue on the needle. Clean it with rubbing alcohol and switch to a fresh needle if skipping continues.
- Puckering around the patch edge: loosen your tension slightly and slow your sewing speed near the patch border.
- Thread breaking mid-seam: switch to a heavier polyester thread and check that your needle size matches the patch thickness.
- Adhesive bleeding through the fabric: apply less adhesive next time and use a barrier like painter’s tape around the patch edge during application.
- Loose corners after a few washes: go back in with a few extra backstitches at the corner points, which take the most stress during wear.
Wash care depends on how the patch is attached. For sewn patches, machine wash cold and skip the dryer’s high-heat setting, air drying or using low heat instead. For adhesive-backed or combo patches, spot clean when possible and avoid soaking, since prolonged water exposure can eventually soften some adhesives. Cheap adhesive backing is a common reason patches fail early, a pattern we break down in more detail in our piece on why patches fall off hats.
Reinforce edges that see the most friction, like the bottom corner of a backpack patch, with a double row of stitching from the start. If you notice fraying threads or lifting corners after several wears, re-sew that section promptly rather than waiting for the whole patch to detach.
Pro Tip: If a patch starts lifting at one corner, do not just re-glue the loose spot. Pull a few stitches, clean out any old adhesive residue, and re-sew that section fresh. Gluing over old residue rarely holds as well as starting clean.
How to Remove a PVC Patch Without Damaging the Fabric
Removal is straightforward for sewn patches and a bit more delicate for glued ones, but rushing either process is how garments get damaged. Rigid PVC will not tear away cleanly, so plan to work slowly no matter which attachment method you are undoing.
For a sewn patch:
- Use a seam ripper to snip the stitches from the underside of the fabric, working a few stitches at a time.
- Pull the loosened thread out gently with tweezers rather than yanking the patch itself.
- Once all stitches are cut, lift the patch away and trim any leftover thread fragments from the fabric.
For a glued patch:
- Test a small amount of a plastic-safe solvent, such as the kinds covered in Loctite’s plastic bonding guidance, on a hidden area of the garment first to check for discoloration or damage.
- Apply the solvent sparingly along the patch edge and let it sit for the recommended time before attempting to lift a corner.
- Use a plastic scraper, not metal, to gently work the patch free once the adhesive softens.
- Wipe away residue with a clean cloth and let the fabric air dry before deciding whether to reapply a new patch.
Always work in a ventilated area when using solvents, and never force a scrape on delicate or coated fabrics. A little patience here saves you from replacing the whole garment.
Pro Tip: If a patch will not budge after one solvent application, stop and let it sit longer rather than scraping harder. Aggressive scraping is what actually tears fabric, not the solvent itself.
Stitch Cheat Sheet: Time, Cost, and Advanced Techniques
Once you have sewn a few patches, the choices become second nature. Until then, this quick reference covers what to expect.
Realistic expectations for a single patch: hand sewing a mid-size PVC patch takes roughly 15 to 30 minutes depending on stitch choice and patch size, while machine sewing typically finishes in 5 to 10 minutes once you are set up. Materials run cheap, usually just a few dollars for thread and needles per patch, plus the cost of adhesive if you are combining methods.
Two techniques separate a rushed job from a lasting one. First, pilot holes on very thick or multi-layer patches keep your needle from bending or snapping, especially on anything thicker than roughly 1/8 inch. Second, running a bead of flexible adhesive around the patch perimeter before stitching gives you a backup bond if any single stitch ever fails, which matters most on patches that flex constantly, like the ones on a duffel bag or a jacket sleeve.
Safety Precautions When Combining Adhesives With Stitching
Mixing glue and stitching gives you the best of both methods, but it comes with a few precautions worth taking seriously. Most PVC-safe adhesives, including E6000, release strong fumes while curing, so work in a well-ventilated room and avoid leaning directly over the patch while it sets.
Skin contact matters too. These adhesives bond skin nearly as well as fabric, so keep a damp cloth nearby and wash off any contact quickly before it sets. If you have sensitive skin or a latex-type sensitivity, wear thin nitrile gloves during application. Never apply adhesive near the eyes or mouth, and keep the work area away from children and pets while it cures.
Fabric damage is the other risk to watch for. Too much adhesive spreads beyond the patch edge and can stiffen or discolor the surrounding fabric, especially on lighter-colored garments. Apply a thin, even layer rather than a thick pool, and use painter’s tape as a barrier around the patch edge if you are worried about bleed-through. Let the adhesive cure fully, typically 24 hours, before washing or flexing the garment, since a half-cured bond is weaker and more likely to shift under the needle if you are stitching over it.
Why Testing on Scraps Beats Testing on the Garment
The single habit that separates a clean patch job from a frustrating one is thinning or removing the iron-on backing before you ever pick up a needle. Skip that step and every stitch fights against a stiff, glossy layer that resists the needle, dulls the point faster, and often ends in a snapped needle halfway through the job.
That lesson usually gets learned the hard way, on a garment that actually matters, which is exactly why it is worth learning on something that does not. A denim scrap or an old t-shirt sleeve shows you within a few stitches whether your needle size, thread weight, and stitch spacing are working together or fighting each other. If the needle drags or the patch puckers on a test scrap, you adjust before committing to the jacket you actually care about.
Sewing PVC rewards patience more than skill. The people who get frustrated are almost always the ones who skipped the prep step and blamed the needle. Slow down, thin the backing, test the stitch on scrap fabric first, and the actual sewing becomes the easy part.
Ready-Made Sewable and Adhesive-Backed Patches From Hat Patch Supply
Every step in this guide gets easier when you start with a patch built for the attachment method you actually plan to use. Hat Patch Supply produces sewable PVC and UV-printed patches alongside adhesive-backed leatherette options, so you are not stuck reworking a patch designed for a different job before you can even thread a needle.

If durability is the priority, our Brotherhood custom UV printed emblem and Troutscape UV printed patch are both built to hold vibrant detail through stitching without cracking at the edges. For projects where you want structure without the bulk of full PVC, our tri-layer acrylic patches sew cleanly and keep their shape. And if you would rather skip the needle entirely on a lower-wear item, our pre-cut leatherette patches with adhesive backing go on in minutes.
No minimum order requirements mean you can order a single test patch before committing to a full run for your brand or team. Browse the full Hat Patch Supply catalog to find a patch that matches the attachment method you have already decided on.
Frequently Asked Questions
Can you sew PVC patches onto any fabric? Most woven fabrics like denim, canvas, and cotton twill take a sewn PVC patch well. Slippery or heat-sensitive synthetics can be trickier and sometimes need pilot holes or a heavier needle to avoid deflection.
What is the best thread for sewing PVC patches? Polyester thread in a topstitch or jeans weight holds up best against the flexing and abrasion a sewn PVC patch endures over time.
Do I need to remove the iron-on backing before sewing? If your patch has a shiny iron-on layer, thinning or removing it first makes the needle penetrate more easily and reduces the chance of needle breakage.
Is gluing PVC patches instead of sewing durable enough? A flexible adhesive like E6000 holds well on its own for lighter-use items, but sewing plus adhesive gives the longest-lasting result on anything that gets washed or handled roughly.
How do I remove a sewn PVC patch without damaging my garment? Snip the stitches from the underside with a seam ripper and pull the loosened thread free with tweezers, rather than tugging on the patch itself.
Sources
- Best Stitch for Patches by Hand: A Complete Practical Guide - Fabrellia
- Sewing on a Patch by Hand or Sewing Machine • Stitch Clinic
- How to Sew a Patch On (2 Ways) - MindyMakes
- E6000
Recommended
- UV-Printed Pattern Patches - Pre-Cut Leatherette Stickers – Hat Patch Supply
- Custom Pimpin UV Printed Patch - Durable and Vibrant Design – Hat Patch Supply
- In The Dirt UV Printed Patch - Durable and Stylish Design – Hat Patch Supply
- 5 Best Heat-Activated Adhesives for Hat Patches, Ranked – Hat Patch Supply
Ready to press your own?
Custom UV patches with no minimum, shipped in 72 hours — or grab a free-shipping sample pack first.