


Hat Patch University
How to Ship Hats with Patches: A Practical Guide

Shipping hats with patches correctly comes down to one method: place the hat in a small corrugated box, insert a cardboard stiffener behind the patch face, add light padding around the crown, and attach tracking before it leaves your hands. Get those four steps right and you will avoid the most common damage claims sellers face.
Here is what you can do in under five minutes before your next shipment:
- Pick your box size. A 12x9x6-inch corrugated box fits one to two structured caps with room for padding; a 14x10x6-inch box handles three to four.
- Protect the patch face. Lay a thin cardboard stiffener or plastic sheet directly over the patch surface before adding any fill material.
- Stabilize the crown. Crumple a sheet of kraft paper or use a hat shaper insert to hold the crown’s shape and prevent the hat from shifting.
- Label, insure, and track. USPS Priority Mail and UPS Ground both include tracking; add declared value insurance for orders above $50. Hat Patch Supply patches are built to last, but transit handling is unpredictable enough to justify the extra step.
Key Takeaways
Shipping hats with patches reliably requires matching your packaging method to the specific patch material, using a stiffener behind every patch face, and photographing the sealed box before it leaves your hands.
| Point | Details |
|---|---|
| Box over mailer for structured caps | Use a 12x9x6-inch corrugated box for any hat with a raised or rigid patch. |
| Stiffener behind every patch | Cut chipboard slightly larger than the patch and place it between the fabric and the patch backing. |
| Patch type determines risk | Acrylic chips at edges, leatherette scuffs, adhesive-backed patches can delaminate from heat or moisture. |
| Track and insure above $50 | USPS Priority Mail includes $100 base coverage; add declared value for higher-value orders. |
| Hatpatchsupply for test orders | No-minimum ordering lets you sample UV-printed, acrylic, or leatherette patches before a full production run. |
Table of Contents
- How should you ship hats with patches: box or poly mailer?
- How do you protect patches during packing?
- Packing multiple hats without damaging patches
- Which U.S. carrier and service level should you use?
- Labels, tracking, insurance, and returns
- Packing checklist for every patched hat shipment
- International shipping: customs and patch restrictions
- How to handle damaged shipments and patch complaints
- Branding and merchandising when shipping custom patch hats
- What most sellers get wrong about packing patched hats
- Hatpatchsupply patches are built for sellers who ship
- Sources
How should you ship hats with patches: box or poly mailer?
The choice between a small corrugated box and a poly mailer is not purely about cost. It is about what your patch can survive.
Structured caps with raised or rigid patches, including tri-layer acrylic patches that have dimensional edges, need a box. Poly mailers flex and compress during automated sorting, and that compression is exactly what chips acrylic edges or creases a stiff UV-printed surface. A box holds its shape regardless of what gets stacked on top of it in a carrier facility.
Poly mailers are acceptable for soft, flexible beanies carrying a thin, flat, sewn-on patch with no raised elements. They cost less per unit and weigh less, which matters when you are shipping a high volume of low-value items. A lightly padded poly mailer with a bubble interior adds a small buffer without adding much weight.
| Scenario | Recommended packaging | Why |
|---|---|---|
| Structured cap, acrylic or UV-printed patch | Small corrugated box (12x9x6 in.) | Prevents compression and edge chipping |
| Trucker hat, large embroidered patch | Corrugated box with crown insert | Mesh back collapses in mailers |
| Soft beanie, thin flat sewn patch | Padded poly mailer | Flexible hat tolerates light pressure |
| High-value merch or gift order | Rigid box with tissue wrap | Perceived value matches product quality |
| Fundraiser hat patches, bulk run | Double-wall corrugated box | Stacking weight requires extra wall strength |
For eco-conscious sellers, recycled corrugated boxes and paper fill are widely available from ULINE, Packlane, and most office supply retailers. Avoiding foam peanuts in favor of kraft paper or recycled tissue reduces waste without sacrificing protection.
How do you protect patches during packing?
Patch type drives the highest-risk damage mode. Rigid acrylic patches chip on edges when compressed. Leatherette can scuff against rough interior surfaces. Adhesive-backed patches can delaminate if exposed to moisture or heat during transit. Knowing your patch material before you pack is the single most useful thing you can do.
The embroidery finishing method also shapes your risk profile. Heat-applied patches are sensitive to high temperatures in transit, which can reactivate the adhesive and cause the patch to shift or bond to packaging material. Sewn-on patches are more forgiving of pressure but can snag on rough interior surfaces. Adhesive-backed patches need a clean, dry environment and should never be packed against absorbent fill that could wick moisture.
Follow this sequence every time:
- Shape the crown. Stuff the hat crown with crumpled kraft paper or a rigid hat shaper so it holds its form and does not collapse inward against the patch.
- Place a stiffener behind the patch. Cut a piece of chipboard or thin corrugated cardboard to slightly larger than the patch and slide it between the hat fabric and the patch backing. This distributes pressure across the stiffener rather than concentrating it on the patch face.
- Cover the patch face. Lay a sheet of glassine paper, thin foam sheet, or plastic sleeve directly over the print surface. For UV-printed patches, light padding over the print face prevents pressure impressions from forming during long transit times.
- Fill voids. Pack kraft paper or bubble wrap around the hat so it cannot shift inside the box. Movement during transit is what causes scuffing.
- Seal with pressure-sensitive tape. Run tape along all seams, not just the center flap.
Pro Tip: Automated conveyor belts in carrier sorting facilities apply lateral pressure from multiple directions. Pack as if a 10-pound box will rest on top of yours for 24 hours, because statistically, something will.
Packing multiple hats without damaging patches
For bulk shipments, including fundraiser hat orders and merch runs, the core rule is simple: never let two patch faces touch each other directly.
- 2–5 hats: Stack crowns nested inside each other with a sheet of chipboard or foam between each hat. Place the stack in a 14x10x6-inch box with fill on all sides.
- 6–12 hats: Use a double-wall corrugated box (16x12x8 inches or larger) and create compartments with pre-cut cardboard dividers. One hat per compartment keeps patches from pressing against each other during transit.
- Bulk pallets: For large fundraiser orders, wrap stacked boxes in stretch film and use corner protectors. Consider freight shipping through a carrier like FedEx Freight or UPS Freight when the shipment exceeds 150 pounds, since standard parcel handling is not designed for that weight class.
Pre-cutting your stiffeners and dividers in batches before a fulfillment run saves significant time. Cut 20 stiffeners at once, stack them near your packing station, and you eliminate the step that most sellers skip when they are rushing.
Which U.S. carrier and service level should you use?
For most small businesses shipping one to four patched hats domestically, USPS Priority Mail and UPS Ground are the practical defaults. Both include tracking, both offer reasonable transit times (2–5 business days for most domestic routes), and both have rate structures that work for small corrugated boxes.
- USPS Priority Mail: Flat-rate boxes (medium flat-rate box: approximately $17–$20 depending on destination) work well for one to two hats. Use the USPS online calculator at usps.com for exact pricing by weight and zone.
- UPS Ground: Generally competitive for heavier multi-hat boxes. Use the UPS rate estimator at ups.com. UPS Ground tends to be cost-effective for boxes over 2 pounds shipping more than 500 miles.
- FedEx Ground: Similar pricing to UPS Ground; useful if you already have a FedEx account with negotiated rates.
- Expedited services: USPS Priority Mail Express and UPS Next Day Air add cost but reduce transit time to 1–2 days. Reserve these for high-value or time-sensitive orders.
For high-value custom patch hats, add declared value coverage. USPS Priority Mail includes $100 of coverage by default; anything above that requires an additional fee. UPS and FedEx charge incrementally for declared value above their base liability limits.
Pro Tip: Automated sorting machines at carrier hubs apply mechanical pressure that standard parcel handling does not. If your patch is raised more than 3mm above the hat surface, a box is non-negotiable regardless of carrier.
Labels, tracking, insurance, and returns
Always photograph the packed hat before sealing the box. This single step is your strongest defense against a damage claim, because it establishes the condition of the shipment at the moment it left your hands.
- Label placement: Apply the shipping label to the largest flat side of the box. Avoid placing it over a seam or flap edge, where it can peel during transit.
- “Fragile” markings: Adding “Fragile” or “Do Not Crush” labels has limited effect on automated carrier handling, but they can influence manual handlers at the final delivery stage. Use them for high-value orders.
- Insurance: Insure any order where the patch and hat combined value exceeds $50. Declared value coverage through USPS, UPS, or FedEx is inexpensive relative to the cost of replacing a custom order.
- Returns policy language: State clearly in your order confirmation that patch damage claims require a photo of the damaged item within 48 hours of delivery. This creates a consistent, documentable workflow and reduces disputes.
For adhesive-backed UV patches, note in your return policy that delamination caused by improper storage after delivery is not a shipping defect. This distinction matters when a customer contacts you weeks after receipt.
Packing checklist for every patched hat shipment
Follow this sequence before every order ships:
- Select the correct box size (12x9x6 for 1–2 structured caps; 14x10x6 for 3–4).
- Cut a chipboard stiffener slightly larger than the patch and place it behind the patch.
- Cover the patch face with glassine paper, thin foam, or a plastic sleeve.
- Stuff the crown with kraft paper or a hat shaper insert.
- Fill all voids with kraft paper or bubble wrap so the hat cannot shift.
- Seal all box seams with pressure-sensitive tape.
- Photograph the sealed box and the label together.
- Apply the shipping label to the largest flat face.
- Add declared value insurance for orders over $50.
- Confirm tracking number is recorded in your order management system.
Materials to keep at your packing station: corrugated boxes (12x9x6 and 14x10x6), chipboard sheets, glassine paper or thin foam rolls, kraft paper fill, pressure-sensitive tape, a label printer, and a smartphone for the pre-seal photo.
International shipping: customs and patch restrictions
Shipping custom patch hats internationally adds two layers of complexity: customs documentation and potential restrictions on patch imagery.
Every international shipment requires a completed customs form (CN22 for low-value items, CN23 for higher-value shipments via USPS; a commercial invoice for UPS and FedEx international). Declare the contents accurately as “textile hat with decorative patch” and state the fair market value. Avoid undervaluing to comply with customs regulations.
Patch imagery can trigger import restrictions in certain markets. Patches featuring flags, military insignia, or law enforcement symbols may be subject to review or restricted import in some countries. Check the destination country’s customs authority website before shipping. USPS, UPS, and FedEx each publish country-specific prohibited items lists on their websites.
Packaging requirements do not change significantly for international shipments, but add extra void fill to account for longer transit times and more handling touchpoints. Double-tape all seams.
How to handle damaged shipments and patch complaints
When a customer reports patch damage, your response in the first 24 hours determines whether the situation resolves cleanly or escalates.
Ask for a photo of the damage immediately. A clear image showing the patch condition and the packaging state tells you whether the damage occurred in transit (carrier liability) or after delivery (not your liability). If the packaging shows obvious external damage, that is a carrier claim. File it promptly through USPS, UPS, or FedEx using the tracking number and your pre-seal photo as evidence.
For damage that appears to be a packing failure on your end, replace the item without argument. The cost of a replacement patch and hat is almost always lower than the cost of a chargeback or a negative review. Document what went wrong in your packing process and adjust your checklist.
Acrylic patches with chipped edges are the most common damage type we see reported. The fix is consistent: a box, a stiffener, and no direct contact between patch faces. Leatherette scuffing usually traces back to rough interior surfaces in the box. Lining the interior with tissue or glassine paper before packing eliminates most of those cases.
Branding and merchandising when shipping custom patch hats
The unboxing experience is part of the product, especially for custom patch hats sold as gifts, merch, or fundraiser items. A few low-cost additions turn a functional shipment into a branded moment.
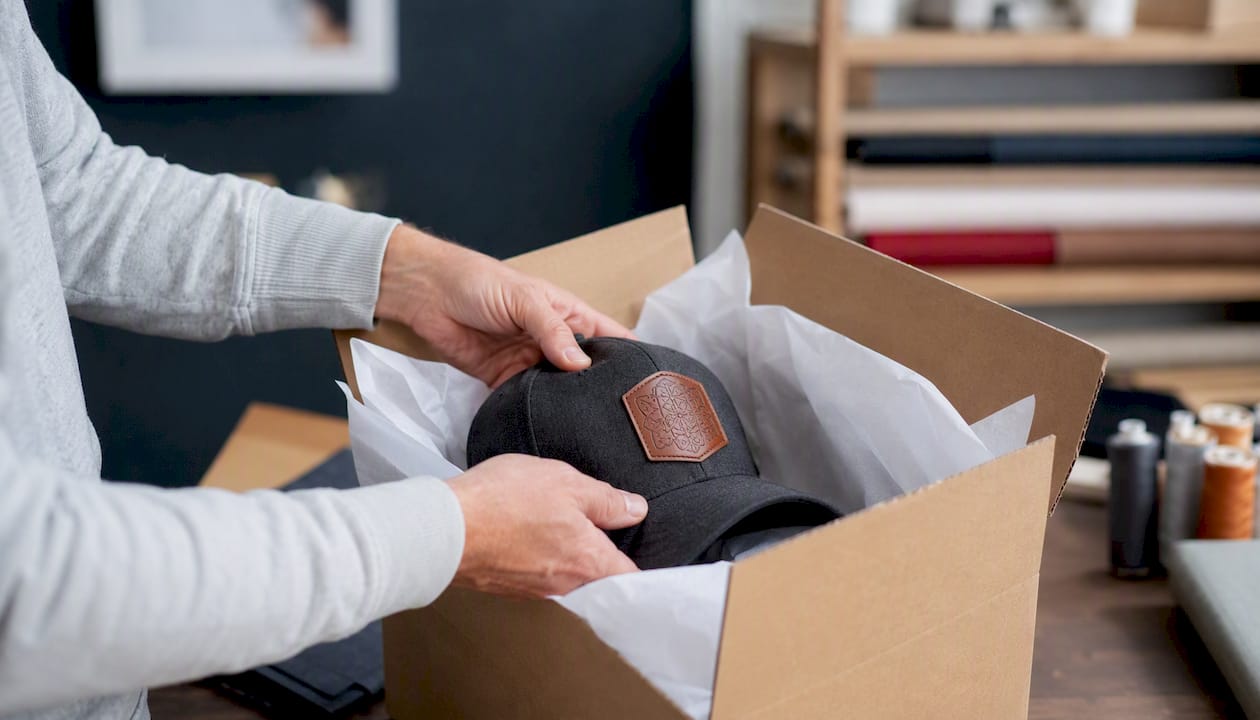
Wrap the hat in branded tissue paper before placing it in the box. Add a printed card with your logo, a short message, and care instructions for the patch. If you are shipping fundraiser hat patches as part of a campaign, include a small insert explaining the cause. These touches cost under $0.50 per order at volume and meaningfully increase the perceived value of what the customer receives.
For retail-ready shipments, consider a rigid gift box inside the corrugated shipping box. The inner box protects the hat during transit and doubles as the presentation layer when the customer opens it. This approach works particularly well for structured caps carrying dimensional patches, where the patch itself is a visual centerpiece.
Consistent branding across your packaging also reinforces trust when customers share unboxing content on social media. A hat with a well-presented, undamaged patch photographs well. A crushed hat in a torn mailer does not.
What most sellers get wrong about packing patched hats
The conventional advice on shipping custom hats focuses almost entirely on the hat structure: protect the brim, maintain the crown shape, use the right box size. That is all correct. What it misses is that the patch is often the most fragile element in the package, and it has different failure modes depending on the material.
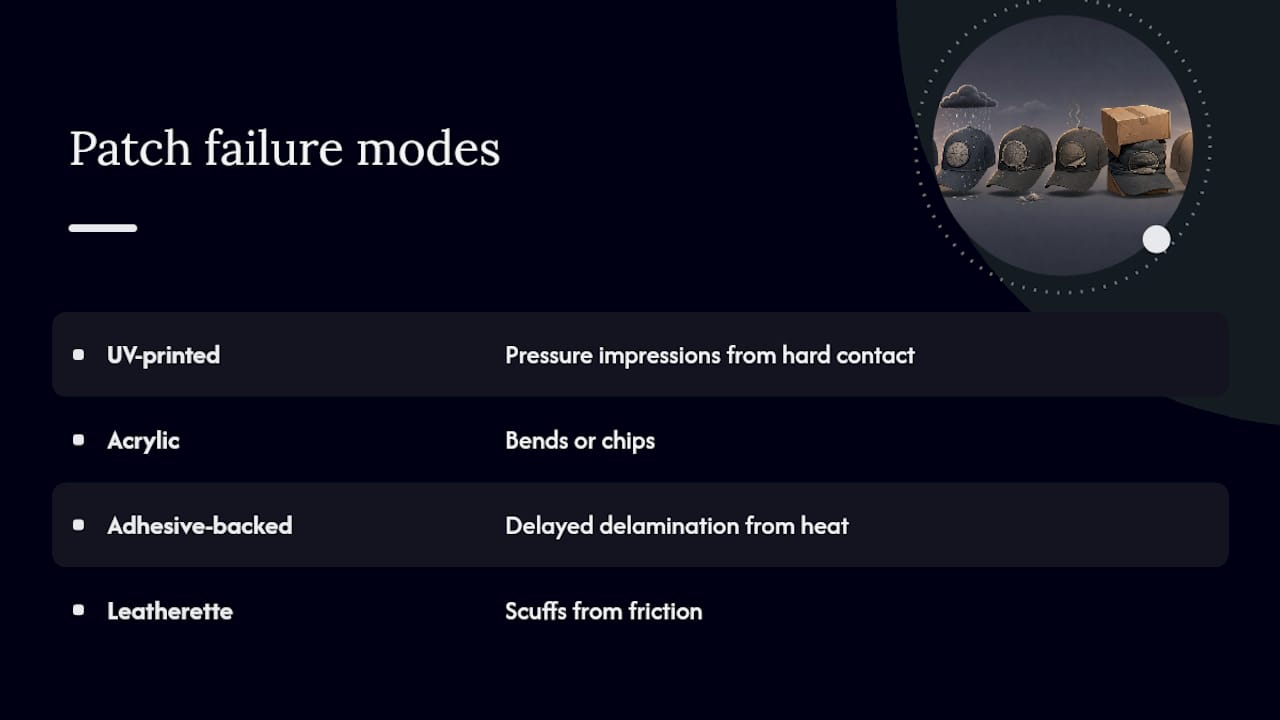
A UV-printed patch does not bend or chip the way an acrylic patch does, but it is vulnerable to pressure impressions from prolonged contact with a hard surface. An adhesive-backed patch can survive the transit just fine and then delaminate three days later because the customer stored the hat in a hot car. Leatherette scuffs from friction, not compression. Each of these failure modes requires a different protective response, and a single generic “add bubble wrap” instruction does not address any of them specifically.
We think the most underrated step in the entire packing process is the pre-seal photograph. Most sellers skip it because it feels like extra work. But it is the only piece of evidence that definitively places the damage after the package left your hands. Without it, every damage claim becomes a negotiation. With it, the resolution is usually straightforward.
Start with the patch type. Know what it is made of, how it is attached, and what its specific failure mode is. Then build your packing method around that. The box size and fill material are secondary decisions.
Hatpatchsupply patches are built for sellers who ship
If you are sourcing patches for hats you plan to sell and ship, the patch quality you start with directly affects how much protection you need in transit. Hatpatchsupply offers UV-printed hat patches, tri-layer acrylic patches, and laser engraved leatherette designs with adhesive backing, no minimum orders, and fast production. That no-minimum policy matters specifically for sellers who want to test-pack a sample order before committing to a full run.

Order a small batch, pack it using the checklist above, ship it to yourself or a test address, and inspect the result before you send customer orders. The Brotherhood Patch is a good starting point if you want a UV-printed example with dimensional detail to stress-test your packing method. Browse the full range at Hatpatchsupply and place a sample order before your next fulfillment run.
Sources
- Embroidery Finishing Methods: Your Complete How-To List — Flossom Blog
Recommended
- Hat Patch Making Made Simple: 7 Powerful Tips to Create Custom Hats That Stand Out - Hat Patch Supply by Hat Foundry
- UV Printed Hat Patches: The Complete Guide for Custom Hat Makers - Hat Patch Supply by Hat Foundry
- How to Start a Hat Bar: Equipment, Patches, and What Actually Sells – Hat Patch Supply
- Hat Patch Size Guide: Trucker Hat Patch Sizing – Hat Patch Supply
Ready to press your own?
Custom UV patches with no minimum, shipped in 72 hours — or grab a free-shipping sample pack first.