


Hat Patch University
Laser Engraved Leatherette: Buyer's Guide for Makers

Yes, properly formulated laserable leatherette engraves cleanly, produces a sharp two-tone contrast, and holds up well on finished products like hat patches, notebooks, and coasters. The key condition: the material must be PU-based (polyurethane), not PVC. PVC releases chlorine gas when lasered, which is hazardous to you and corrosive to your machine. Start with Hatpatchsupply’s laser engraved leatherette patches as your first reference point for what production-quality results look like before you invest in raw sheet stock.
Three things to do before your first production run:
- Test a scrap first. Run a small sample at your intended settings and check the contrast, edge quality, and any warping before committing to a full sheet.
- Confirm machine compatibility. CO2 lasers handle PU leatherette reliably; many diode lasers also work. Fiber lasers are generally not needed for this material.
- Secure ventilation and an MSDS. Request the Material Safety Data Sheet from your vendor before you engrave anything. Run extraction rated for organic fumes, or use a respirator rated for organics.
Key Takeaways
Laser engraved leatherette produces reliable, production-quality results when you verify PU composition, test settings against each material lot, and use proper fume extraction throughout.
| Point | Details |
|---|---|
| Verify material before engraving | Confirm PU composition and request an MSDS; PVC releases hazardous gases and must never be lasered. |
| Test settings per lot | Use vendor examples (e.g., 400 DPI, 100% speed, 50–70% power on CO2 machines) as brackets, then run a test grid on each new material lot. |
| Heat-press parameters matter | Vendor example for hat patches: 270°F for 15 seconds; always test on a sample hat before production. |
| Log every production run | Record material brand, color, lot, machine settings, and press parameters to eliminate rework on reorders. |
| Hatpatchsupply for ready-made patches | Pre-tested laser engraved leatherette patches with no minimums and adhesive-backed options remove material-sourcing risk for small businesses. |
Table of Contents
- What does “laserable leatherette” actually mean?
- Which lasers work on leatherette, and what are the safety rules?
- What settings should you start with for leatherette engraving?
- How to prepare leatherette and run common project workflows
- How to choose between sheet stock, pre-cut patches, and adhesive-backed options
- Fume management, waste handling, and MSDS guidance
- Case study: making a 3" laser engraved hat patch from artwork to hat
- Is leatherette a responsible material choice?
- Why we recommend verified laserable leatherette and Hatpatchsupply
- Hatpatchsupply makes it easy to order production-ready laser engraved patches
- Sources
What does “laserable leatherette” actually mean?
Laserable leatherette is a synthetic, leather-like sheet engineered so that the laser ablates the top coating and reveals a contrasting core underneath. The top layer is typically a colored PU coating; the core is often black or dark brown. When the laser removes the top, you get a crisp two-tone image without cutting all the way through the material.
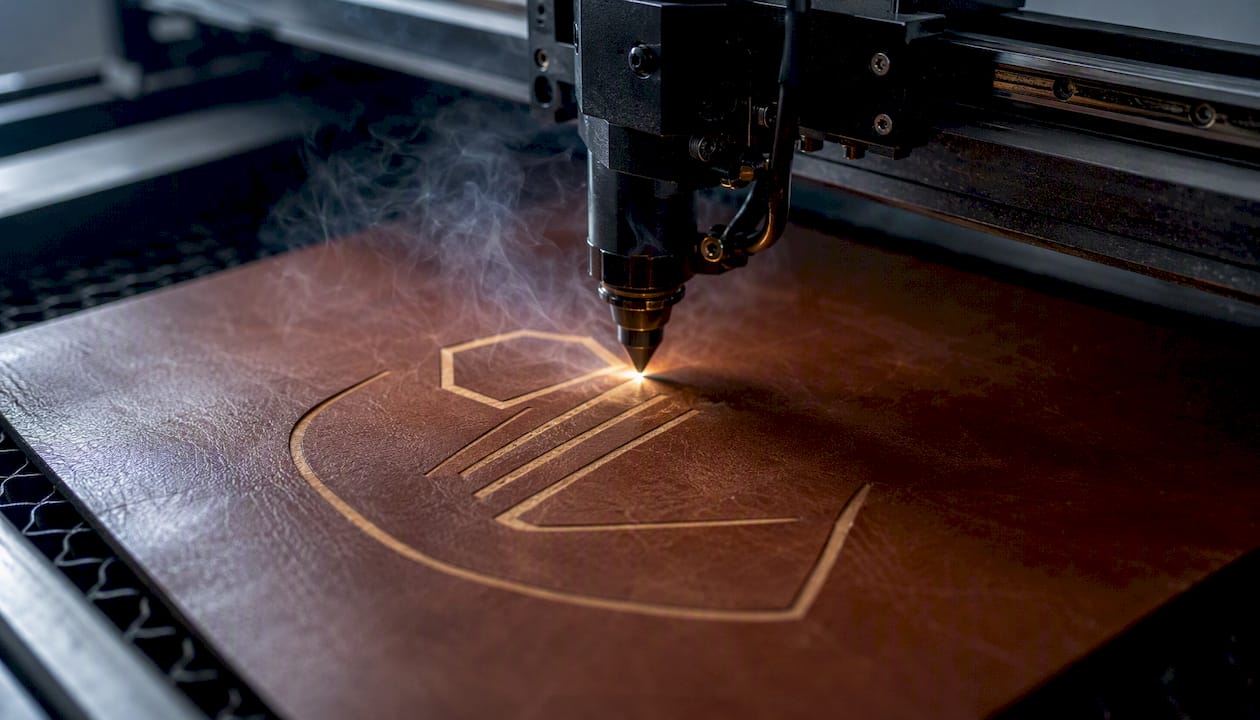
Buyers encounter this material in several formats. Full sheets are the most common, typically sized around 12" x 24" (approximately 305 x 610 mm). Innograv’s product listings describe PU leatherette sheets at 610 x 305 mm with a thickness of approximately 1.2 mm as a standard spec, and note water resistance as a typical trait. Pre-cut patches come in popular sizes like 3" round or 3.5" x 2.2", often with adhesive backing already applied. Notebook and journal covers are another common form, usually sold as single-sided laserable panels. Adhesive-backed label stock is a fourth format, useful for retail tags and product branding.
Thickness across these products generally runs 0.8–1.5 mm, with 1.2 mm being the most common production spec. Single-sided laserable means only the top face engraves with contrast; double-sided products allow engraving on both faces, which matters for items like keychains or coasters that are visible from either side.
Leatherette vs. real leather vs. PVC. Real leather engraves beautifully but costs significantly more, varies batch to batch, and raises ethical sourcing questions for some buyers. PU leatherette is consistent, affordable, and vegan. PVC looks similar on a product page but must never be lasered. Trotec’s material guidance confirms that PVC/vinyl releases hazardous gases during laser processing and should be avoided entirely, while PU and suede-like synthetics are suitable for high-quality engraving when properly tested.
Which lasers work on leatherette, and what are the safety rules?
Machine compatibility is straightforward for most makers. CO2 lasers in the 40–100W range are the most reliable choice for PU leatherette; the wavelength interacts efficiently with the coating and produces clean ablation. Many diode lasers (common in hobby setups like xTool, Sculpfun, or LaserPecker units) also achieve good results, though they may require slower speeds or multiple passes to reach the same contrast depth. Fiber lasers are generally not the right tool here; they are optimized for metals and hard plastics, not PU coatings.
Limitations to plan around:
- Some leatherette sold as “faux leather” or “vegan leather” is actually PVC or vinyl. Always verify composition before engraving.
- Thin materials (under 0.8 mm) can warp or curl under heat, especially on diode machines with longer dwell times.
- Without a colored top and contrasting core, you will not get the bold two-tone result. A uniform-color sheet produces a subtle texture change rather than a readable image.
- Adhesive-backed sheets can off-gas from the adhesive layer during cutting; keep power focused on engraving depth, not full cuts, when possible.
Safety checklist before every new material lot:
- Request the MSDS from your vendor and confirm the material is PU, not PVC.
- Run a vented test cut on a scrap piece before any production session.
- Use a fume extractor rated for organic vapors, or a respirator with organic vapor cartridges.
- Never run unvented in a shared or enclosed space.
- If the smell is sharp, chemical, or acidic (not the mild “warm leather” smell of PU), stop immediately and ventilate.
Pro Tip: Smell is your fastest safety sensor. PU leatherette produces a mild, slightly sweet odor when engraved. A sharp, acrid, or bleach-like smell almost always means PVC or a chlorinated binder. Stop the job, ventilate the space, and request the MSDS before continuing.
What settings should you start with for leatherette engraving?
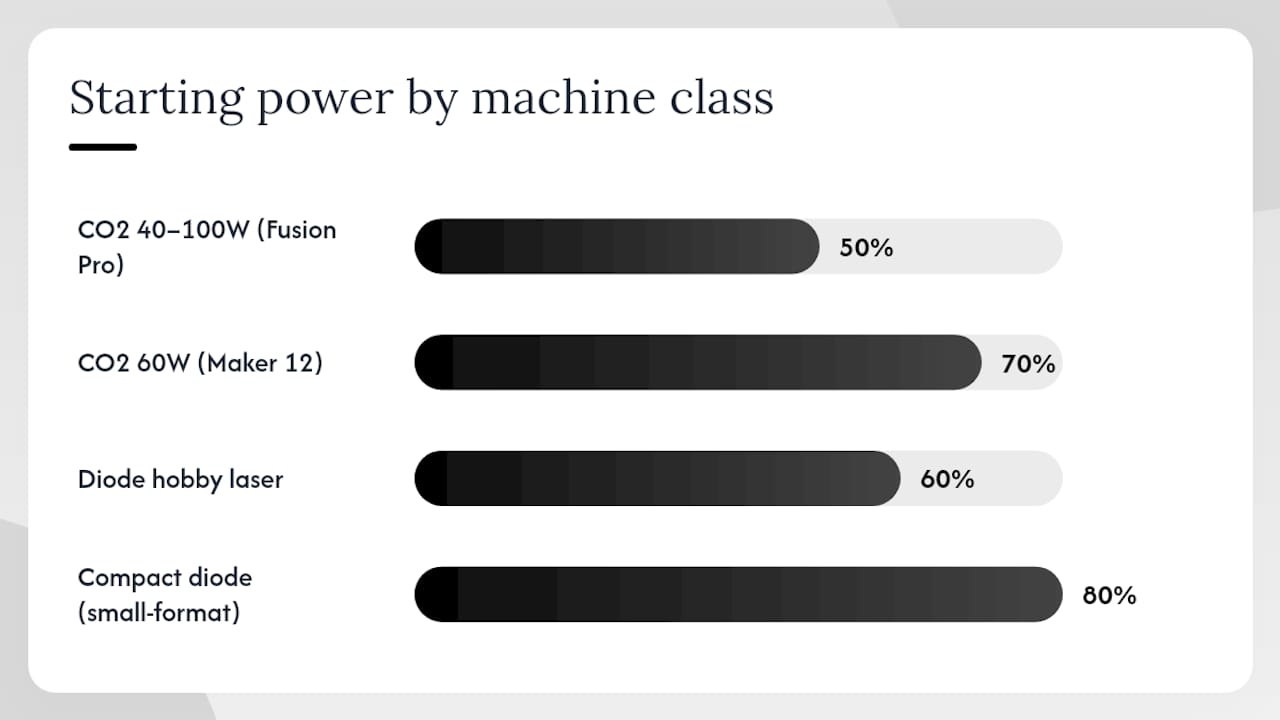
Settings vary by machine class, coating thickness, and the specific lot of material you are using. No table of numbers replaces a test grid, but vendor-published examples give you a reliable starting bracket. Epilog’s hat patch project used a 100-watt Fusion Pro 24 at 400 DPI, 100% speed, and 50% power as their example starting point. Their notebook tutorial lists a 60-watt Fusion Maker 12 at 400 DPI, 100% speed, and 70% power for similar material. These are vendor examples on their specific equipment; treat them as brackets, not absolutes.
| Machine Class | Example Power | Example Speed | DPI | Notes |
|---|---|---|---|---|
| CO2 40–100W (e.g., Epilog Fusion Pro 24) | 50% | 100% | 400 | Vendor example; test first |
| CO2 60W (e.g., Epilog Fusion Maker 12) | 70% | 100% | 400 | Vendor example; notebook project |
| Diode hobby laser | 60% | 60% | 300 | Start lower; multiple passes option |
| Compact/small-format diode | 80% | 40–60% | 300 | Slower speed compensates for lower power |
ComMarker’s settings roundup and LaserPecker’s step-by-step guide both stress that settings must be tuned by testing, not copied directly from another machine’s output. The test-grid method is the fastest path to production-ready settings: fix one variable (say, power) and step the other (speed) across a small grid of squares on scrap material. The square that shows clean contrast without excessive charring or warping is your starting point. Log the result against the material lot, color, and machine so you can reproduce it without re-testing.
How to prepare leatherette and run common project workflows
General prep. Wipe the sheet with a lint-free cloth to remove dust or oils. Flat material engraves more consistently, so if a sheet has a curl, weight it flat for a few hours before use. Low-tack masking tape applied to the top surface reduces smoke residue on the surrounding material and peels off cleanly after engraving. For pre-cut patches, a simple jig cut from scrap acrylic or MDF keeps each piece in the same position and eliminates realignment between batches.
Hat patch workflow
- Prepare your artwork as a vector file (AI, SVG, or EPS) for logos and text, or a high-contrast grayscale raster for photo-style engraving. Tutorial guidance from Hey, Let’s Make Stuff confirms that vector art produces the crispest results on pre-cut patches.
- Set up the patch in your laser software, use the framing/camera feature to confirm alignment, and run a test pass on a scrap patch at your logged settings.
- Engrave the production patch. Multiple passes can deepen the core reveal without repositioning; stopping short of the full core depth can produce a subtle metallic-toned effect if that is the look you want.
- Trim any flash or edge irregularities with scissors or a die cutter.
- Apply to the hat using a compact hat press. A vendor-example starting point is 270°F for 15 seconds with a heat application pad and heat-resistant tape to hold the patch in position during pressing. Test this on a sample hat before production.
Notebook cover workflow
- Position the cover flat on the laser bed and use camera framing to center the design on the panel.
- Engrave at your tested settings (the Epilog 60W example of 400 DPI, 100% speed, 70% power is a useful bracket for similar machines).
- Allow the piece to cool before handling to avoid smearing residue.
- Assemble or bind the cover per your notebook construction method.
Coaster workflow
- Engrave the sheet, then cut to final shape (round or square) in the same laser session.
- Seal the engraved surface with a thin coat of matte finish spray if the coaster will see heavy moisture exposure.
- Add a felt or cork backing with adhesive to protect surfaces.
Pro Tip: Keep a physical settings log, not just a digital file. Write the material brand, color, lot number, machine, power, speed, and DPI on a small card and tape it to a scrap of the engraved result. When you reorder material six months later, that card tells you exactly where to start.
How to choose between sheet stock, pre-cut patches, and adhesive-backed options
The right format depends on your production volume, finishing capability, and how the patch will be applied.
What to verify on any product page before buying:
- Material composition: confirm PU, not PVC or vinyl
- MSDS availability: if the vendor cannot provide one, look elsewhere
- Sheet size and thickness (aim for 1.2 mm as a reliable baseline)
- Core contrast information: colored top with dark core is required for bold two-tone results
- Single vs. double-sided laserability
- Color options and whether the backing color is specified
- Adhesive backing type and strength rating
- Minimum order quantity and lead time
Format decision guide. Full sheets make sense when you are cutting custom shapes, running high-volume production, or want maximum flexibility in patch size. Pre-cut patches are the faster path to finished product: no cutting step, consistent sizing, and often available with adhesive already applied. Adhesive-backed pre-cut patches are the best choice for pop-up retail, event merchandise, or any application where a heat press is not available.
For small businesses ordering samples, ask the vendor for a camera or framing photo of an engraved result on the specific color you plan to order from Brass & Bunker Co’s hat collection. Production tolerances on core depth and coating thickness vary between color lots, and a sample photo confirms the contrast before you commit to a larger order. Pricing typically follows a sample-to-bulk curve: single-sheet or small-pack pricing is higher per unit, but it is the right way to validate settings before scaling.
Fume management, waste handling, and MSDS guidance
Safe operation of a laser engraving setup for leatherette requires attention to three areas: fume extraction, waste disposal, and documentation.
Fume management:
- Use a fume extractor rated for organic vapors; a basic shop vacuum is not sufficient.
- Never run a laser engraver in an unvented room or shared workspace without local exhaust ventilation.
- Local exhaust (a duct pulling air directly from the laser enclosure to the outside) is preferable to recirculating filtration for production volumes.
- When testing a new material lot, wear a respirator with organic vapor cartridges until you have confirmed the material is PU and the extraction is handling the output.
Waste handling. Leatherette offcuts and trim scraps are synthetic material and should not be burned or disposed of in open-air settings. Collect scraps in a sealed bag and follow your local municipal guidelines for synthetic/plastic waste. If you are unsure of the correct disposal category, contact your vendor and ask for the MSDS disposal section; it will specify the waste classification for that product.
Before any production run, request the supplier’s MSDS and ask for sample engraving notes or photos. A vendor who cannot provide either is not a reliable source for production material.
Case study: making a 3" laser engraved hat patch from artwork to hat
This walkthrough covers a single 3" round patch from file prep through heat-press application, using vendor-published examples as reference points.
-
Prepare the artwork. Export your logo as a vector SVG or AI file with all text converted to outlines. If the design includes a photo element, convert it to a high-contrast grayscale bitmap at 300 DPI or higher. Avoid gradients near fine text; they tend to produce muddy edges on leatherette.
-
Set up the laser. Place the patch in your jig, set focal height per your machine’s specification, and use the framing feature to confirm the design sits centered on the patch face. Add registration marks outside the patch boundary if you are running a batch.
-
Run the engraving pass. Using your tested settings (the Epilog Fusion Pro 24 vendor example of 100W, 400 DPI, 100% speed, 50% power is a documented starting bracket), run the first pass and inspect the contrast. If the core is not fully revealed, run a second pass at the same settings rather than increasing power, which risks charring.
-
Trim and inspect. Remove the patch from the jig, peel any masking tape, and trim any edge irregularities. Check that the engraved area is clean and the surrounding surface is free of residue.
-
Heat-press application. Position the patch on the hat, hold it in place with heat-resistant tape, and press at the vendor-example starting point of 270°F for 15 seconds using a compact hat press with a heat application pad. This is a vendor-sourced example; test on a sample hat before running production, as hat fabrics vary in heat tolerance.
Statistic callout: Vendor example heat-press parameters for leatherette hat patches: 270°F / 15 seconds (source: Epilog Laser sample club project). Always test on a sample hat before production.
- Log the batch. Record the material brand, color, lot number, machine settings, and press parameters on a card with a scrap of the engraved result. This eliminates rework when you reorder the same material.
Pro Tip: Apply heat-resistant tape to the patch edges before pressing, not just the center. Edge lift during pressing is the most common cause of adhesion failure on curved hat brims.
Is leatherette a responsible material choice?
PU leatherette is widely marketed as a vegan alternative to animal leather, and that claim holds up in the most direct sense: no animal hides are used in production. For buyers who prioritize animal welfare, it is a straightforward upgrade over genuine leather.
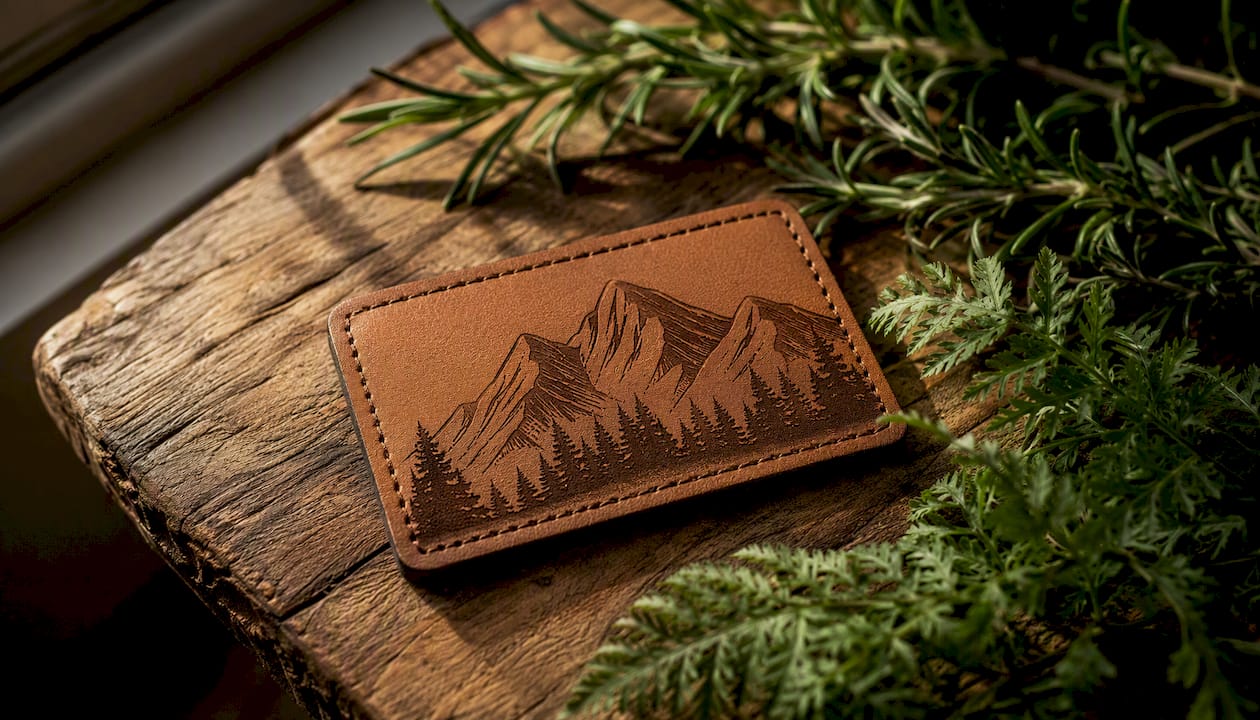
The environmental picture is more nuanced. PU leatherette is a petroleum-derived synthetic, and it does not biodegrade in the way natural materials do. Most PU leatherette is not currently recyclable through standard municipal streams in the United States; offcuts and end-of-life products typically go to landfill. Some manufacturers are developing bio-based PU alternatives using plant-derived polyols, but these are not yet widely available at the sheet-stock level for laser engraving applications.
From a production standpoint, PU leatherette generally has a lower water and land footprint than tanning genuine leather, which involves significant chemical processing. The comparison with PVC is clearer: PVC production involves chlorine chemistry and produces persistent pollutants, which is one more reason to avoid it beyond the immediate laser safety concern.
For small businesses making purchasing decisions, the practical guidance is to choose PU over PVC on both safety and environmental grounds, ask vendors about their sourcing and any bio-based options in their catalog, and minimize waste by planning cuts efficiently and collecting scraps for reuse where possible. Hatpatchsupply’s laser engraved leatherette patches use PU-based material, which aligns with both the safety requirements and the vegan positioning many hat brands now communicate to their customers. For buyers who want to see how laser engraving compares to other patch production methods on these dimensions, the UV printed vs. laser engraved vs. embroidered comparison covers the tradeoffs in detail.
Why we recommend verified laserable leatherette and Hatpatchsupply
The single biggest mistake we see small businesses make with leatherette is buying from a generic listing that does not specify PU vs. PVC. The price difference between a verified laserable PU sheet and an unlabeled “faux leather” sheet can be a few dollars per unit. The cost of a machine contaminated by chlorine gas, or a production run scrapped because the material warped or produced no contrast, is far higher.
Our recommendation is straightforward: buy from vendors who publish the MSDS, specify PU composition, and show engraved sample photos. Hatpatchsupply meets all three criteria and adds no-minimum ordering and adhesive-backed options, which matter for small businesses testing a new patch style before scaling. Order a sample, run it through the test-grid method described above, and log the results before committing to a production quantity. That workflow eliminates the guesswork that causes most leatherette engraving failures.
Hatpatchsupply makes it easy to order production-ready laser engraved patches
Sourcing verified laserable leatherette and producing consistent results takes time to set up. Hatpatchsupply removes the material-sourcing risk entirely by delivering wholesale laser engraved leatherette patches that are already production-tested, with sharp two-tone contrast and clean edges ready for hat application.
What sets Hatpatchsupply apart for small businesses and individual makers:
- No minimums. Order one patch or a hundred; pricing scales without a minimum commitment.
- Adhesive-backed options. Pre-applied adhesive means no separate bonding step for many applications.
- Fast turnaround. Production and fulfillment are built for brands that cannot wait weeks for samples.
- Design support. Upload your artwork or use existing templates; the team handles production-ready file prep.
For buyers who want to compare leatherette against full-color options, Hatpatchsupply also offers UV printed hat patches and top-grain laser engraved patches for premium applications. Browse the full catalog at Hatpatchsupply and upload your artwork to get started.
Sources
- Laser Engraving Leatherette Hat Patches - Quick & Easy Guide
- Leather Laser Engraving: A Step-by-Step Guide in 2024
- Laser engraving faux leather | Trotec Laser
- Laser Engrave Leatherette: Machines, Settings & Pro Tips for Perfect ResultsComMarker Blog | Laser Engraving Tutorials & Projects
- How to Laser Engrave Leather Patches - Hey, Let’s Make Stuff
- Leatherette | Innograv
Recommended
- Wholesale Laser Engraved Leatherette Patches - Custom Design – Hat Patch Supply
- UV Printed vs. Laser Engraved vs. Embroidered Hat Patches: Which Shoul – Hat Patch Supply
- The Software Behind the Machines: A Laser Engraving and UV Printing Wo – Hat Patch Supply
- Wholesale Top Grain Laser Engraved Patches for Customization – Hat Patch Supply
Ready to press your own?
Custom UV patches with no minimum, shipped in 72 hours — or grab a free-shipping sample pack first.